How to use the design editor (overview)
Add, position and edit text, shapes or media to customize your designsTable of Contents
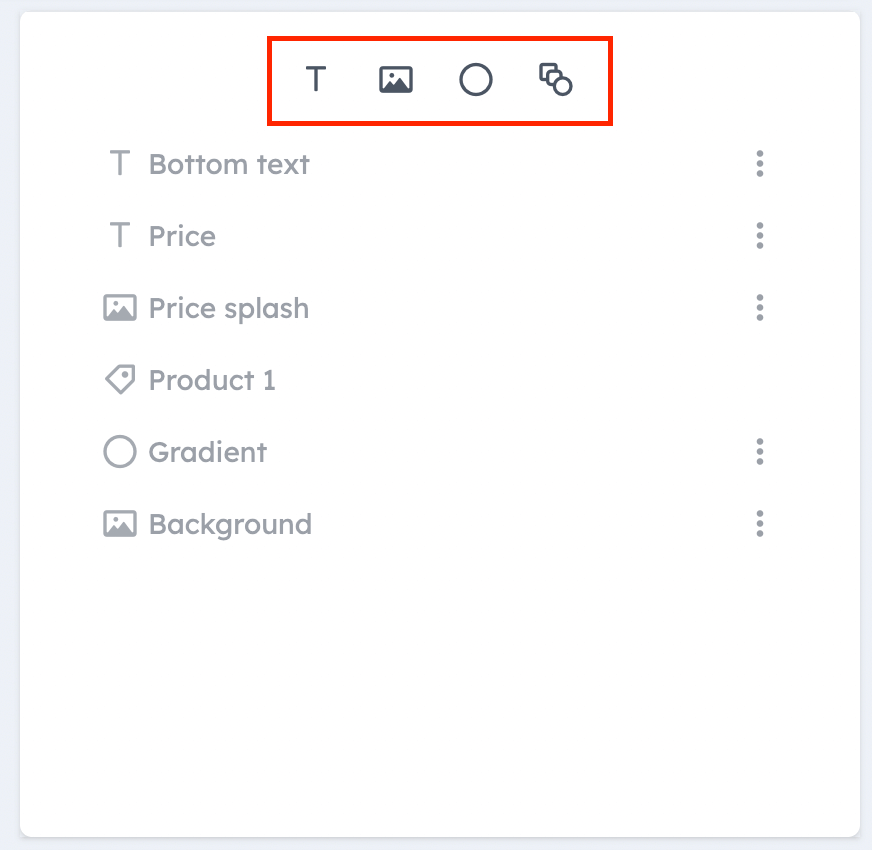
Layers and elements1. Text layers1.1. Aligning text layers2. Media layers3. Shape layers4. Asset layersEditing layers1. Adjust the size and position2. Select multiple layers3. Create groups4. Change the order of layers5. Align and match size on multiple layers6. Change the layer settingsLayers are the building blocks of your design inside Confect, similar to what you may know from Photoshop or Canva. In order to make sure the design matches your expectations, and you have full control over each aspect of your creative, it is necessary to understand how these layers work.
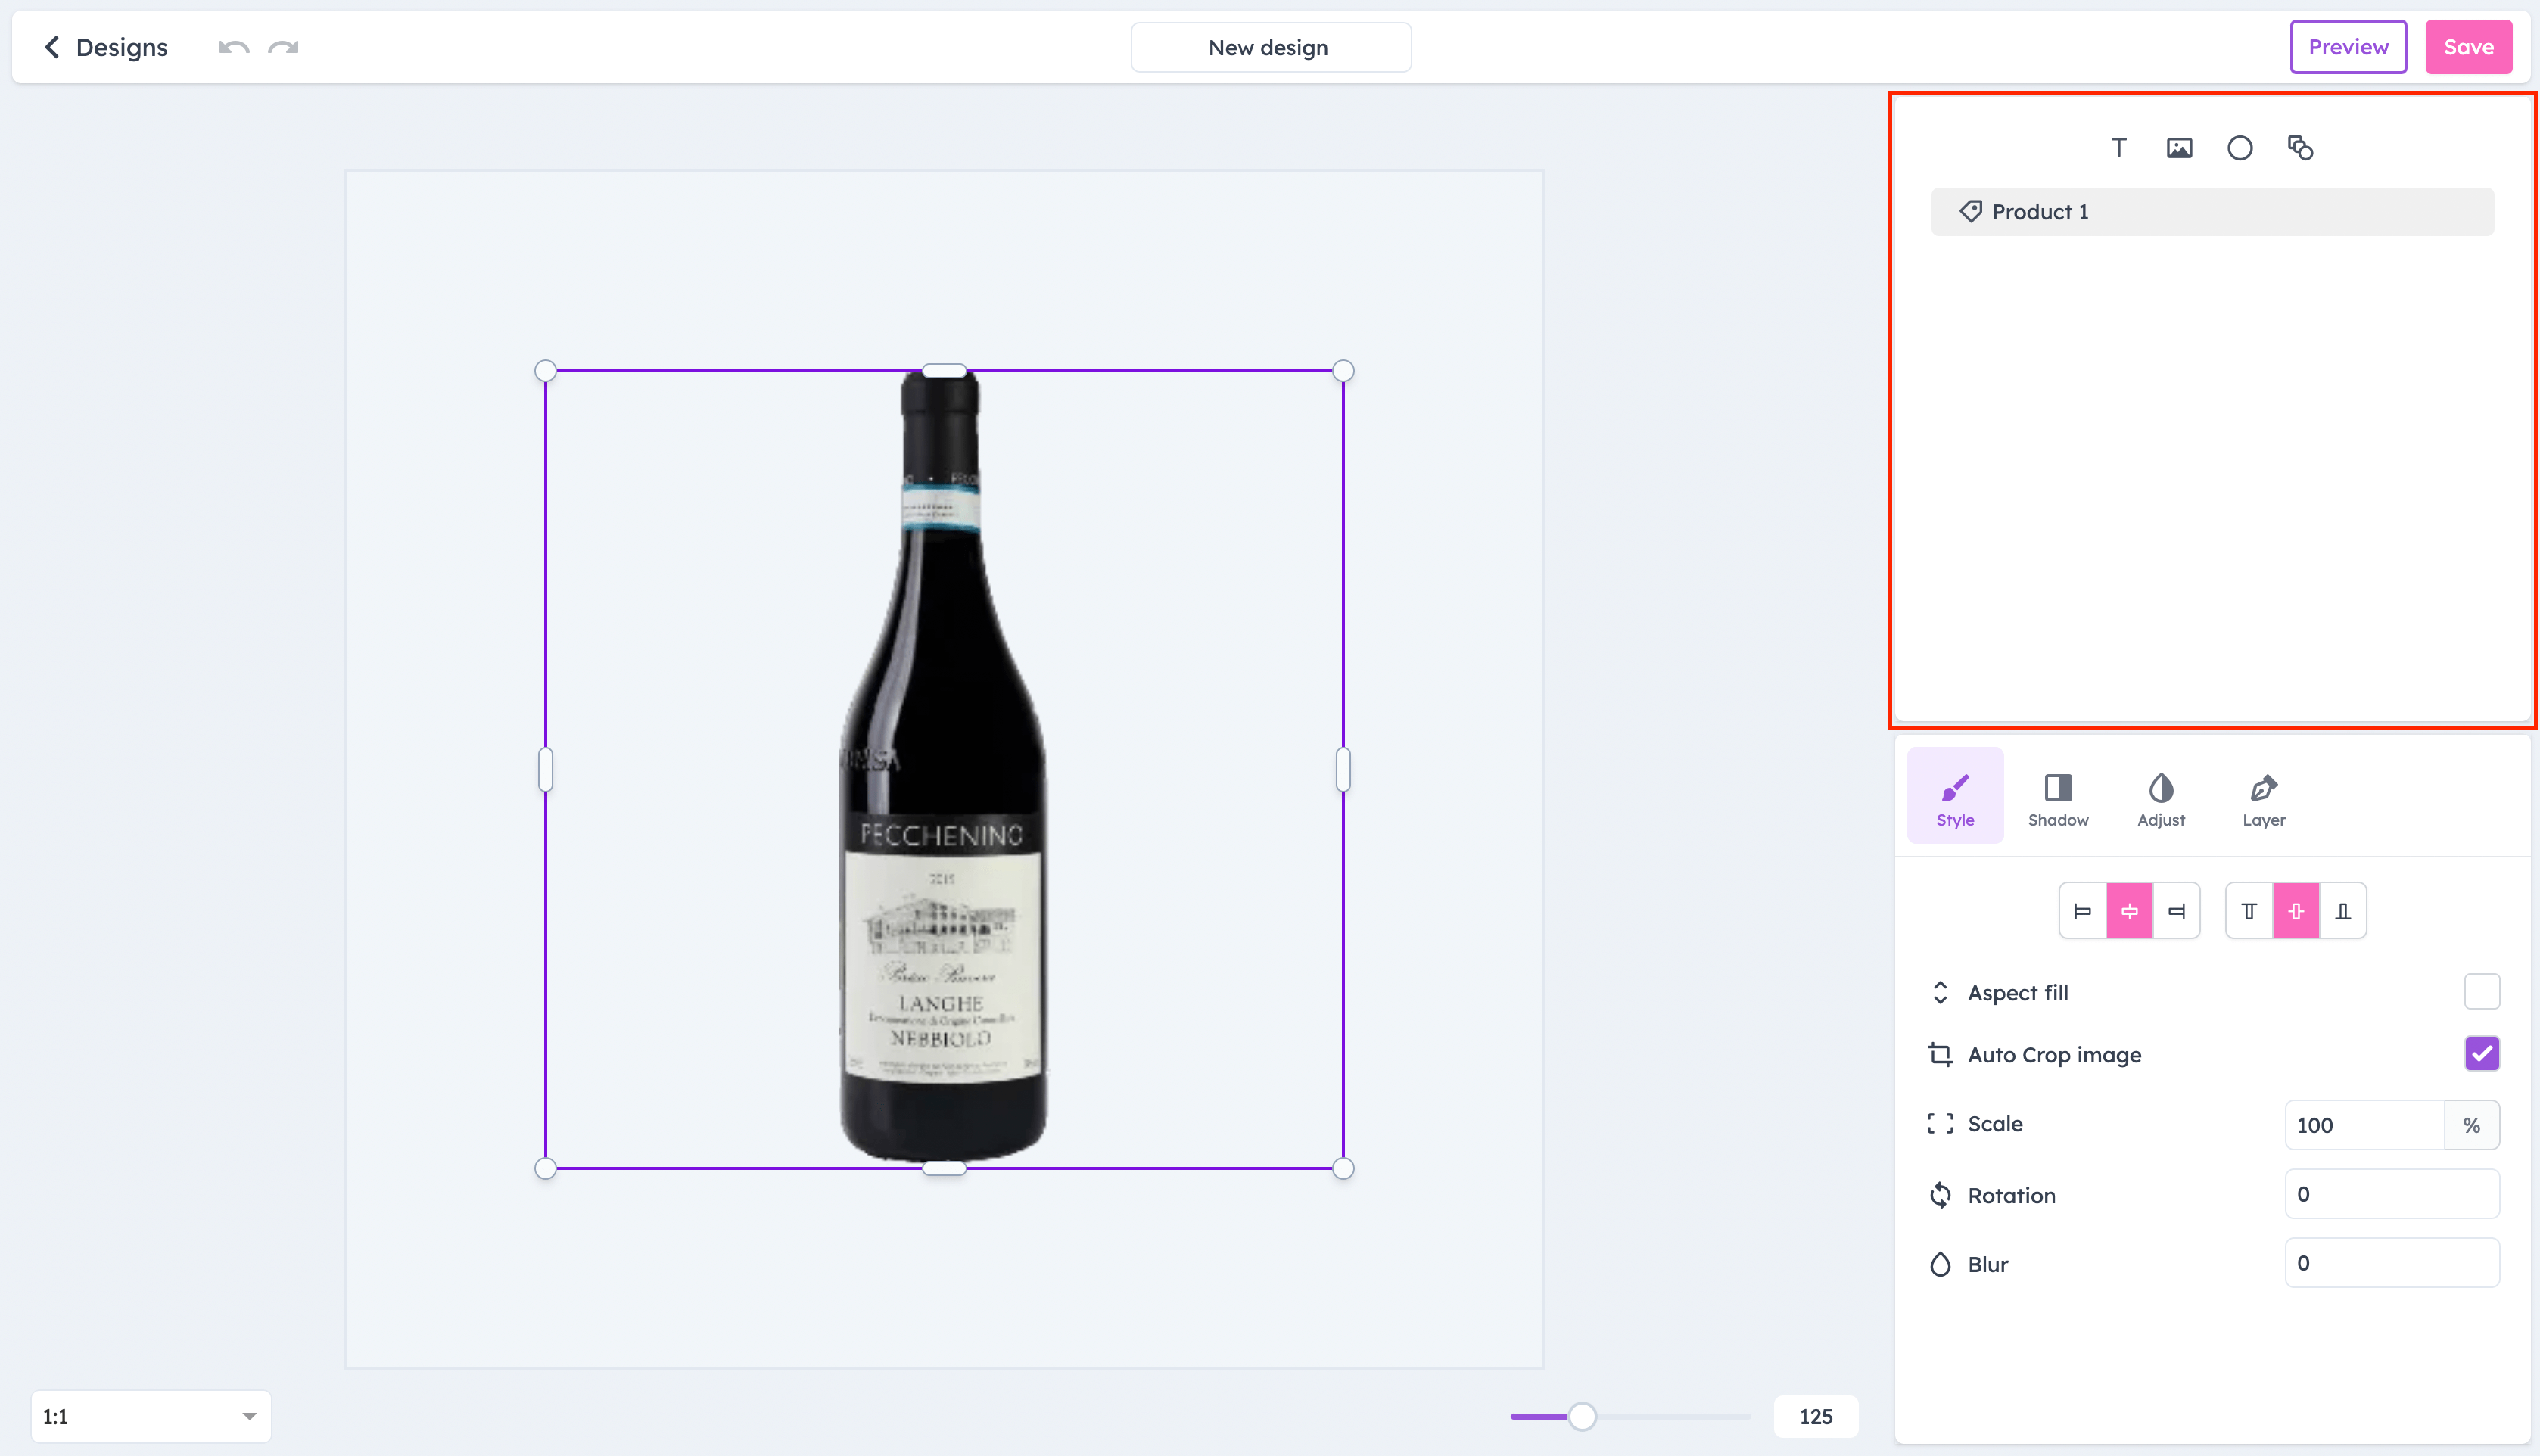
The layer tab in the upper right side of your screen is where you can get an overview of all the layers present in your design, in their hierarchical order.
Layers and elements
Wondering which design elements boost your performance? Run multiple designs at the same time (i.e., with different texts, backgrounds, or layouts) using design variants and see the impact for yourself.
Click here to see the guide
Layers represent the individual elements in your design (i.e. a product picture = product layer, a text block = text layer).
There are a number of different types of layers you could use in a Confect design, so let’s dive into what each of them is.
You can add a new layer by clicking on the icons at the top of the layers tab.
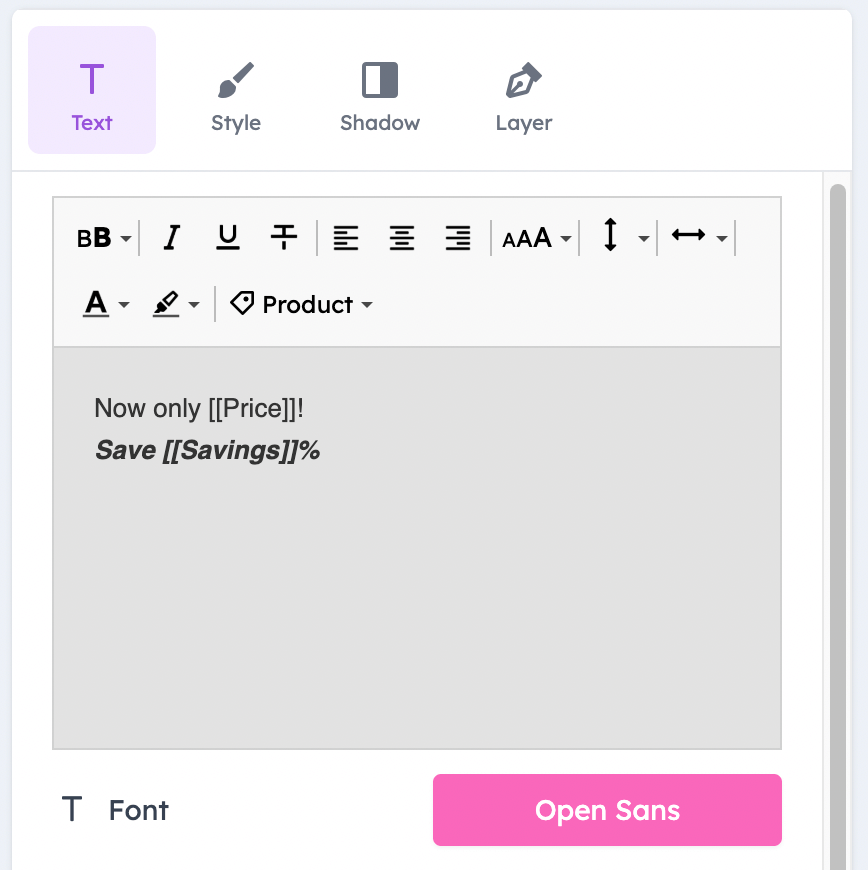
1. Text layers
A text is often crucial to get your offer across and provide more information.
Inside Confect, you can either add text manually (which will not change from product to product), or dynamically through "Product fields" (which will update based on the product).
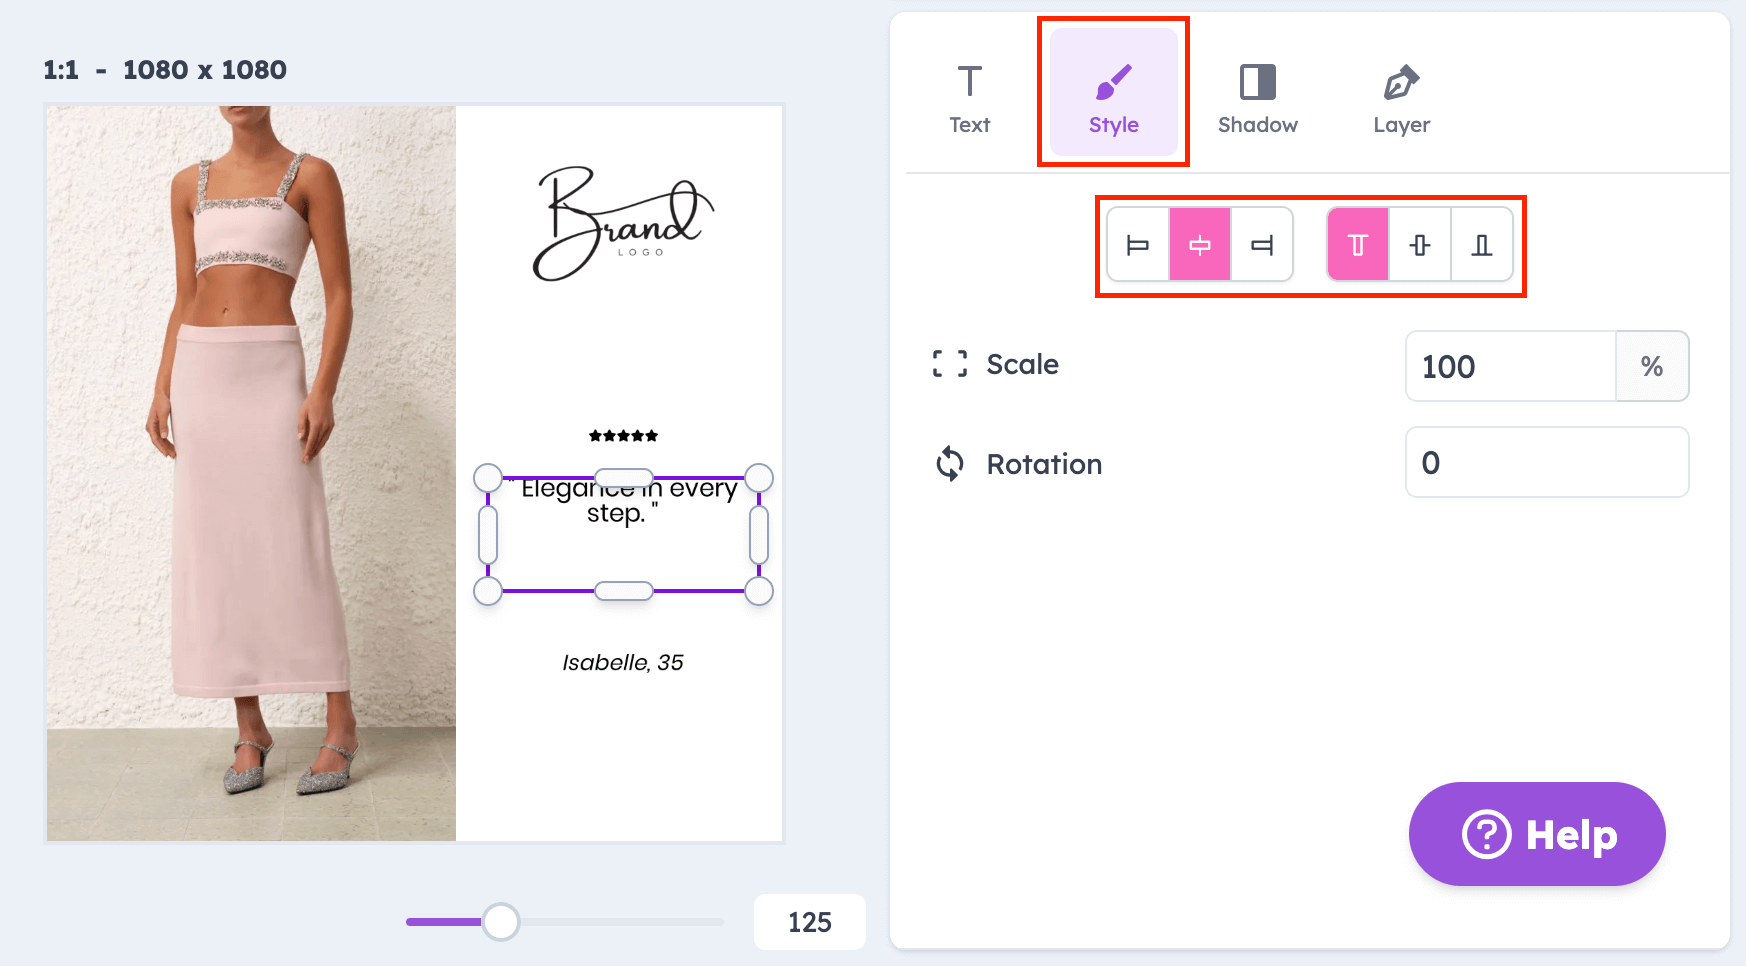
1.1. Aligning text layers
Inside the text editor, there are two ways to change how your text is aligned.
The first is line breaking - find this setting directly inside the text editor. When the text is longer than the layer, and goes multiple lines, this changes to which direction (left, center, right) the next line is aligned.
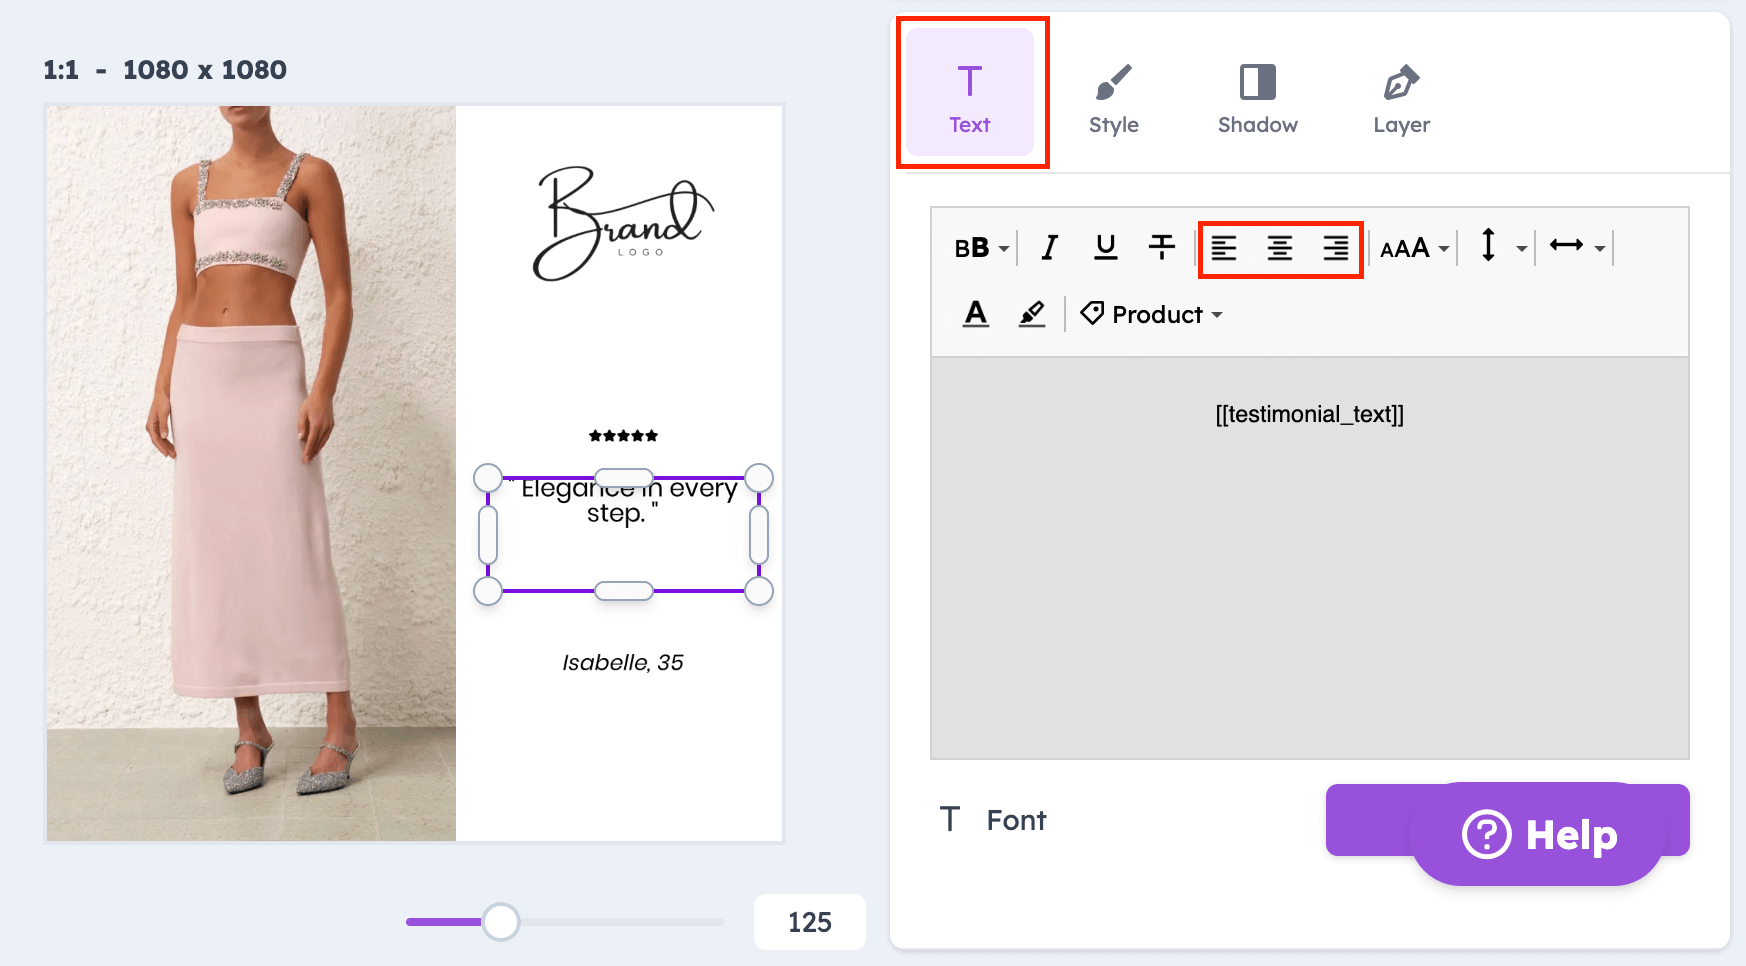
The second is edge alignment - find this setting inside the "Style" tab on text layers. You can move the entire text block to the edge of the layer vertically and horizontally (the default selection is center).
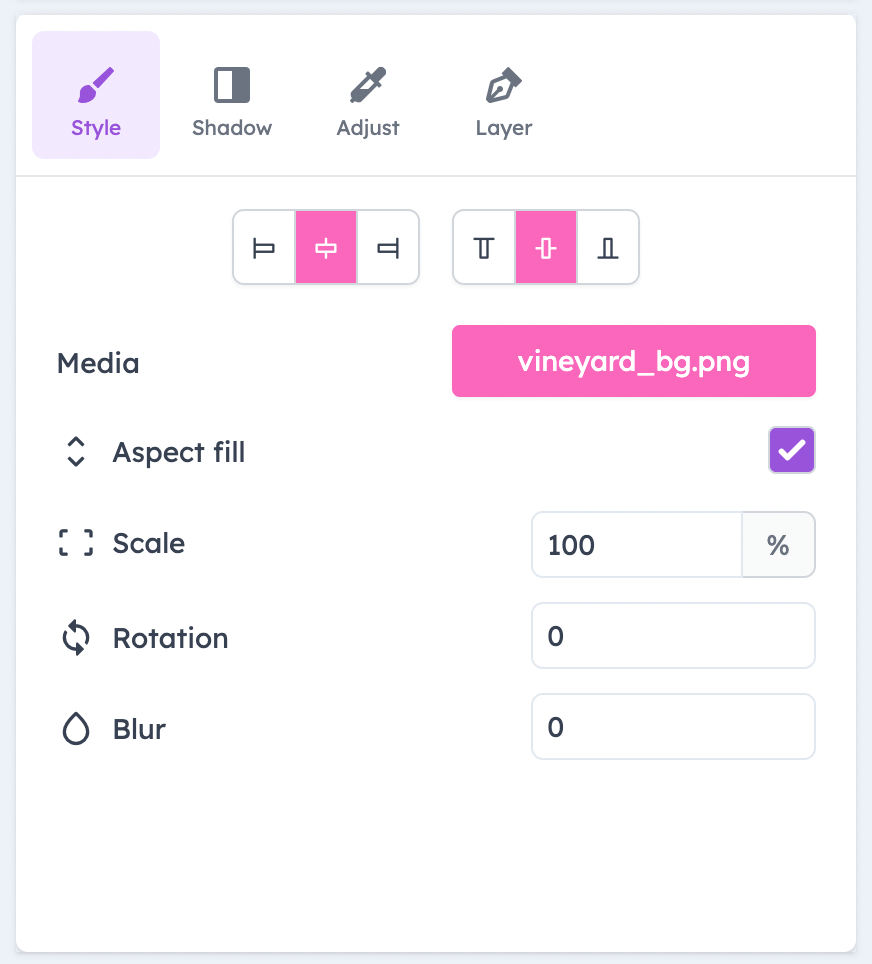
2. Media layers
You can add your own custom media to the design, be it either an image, or an element with a transparent background.
A common use case for the media layer is to upload a custom background. When doing this, make sure to toggle on the "Aspect fill" setting, so your image takes up the entire width and length of the design to be used as a background.
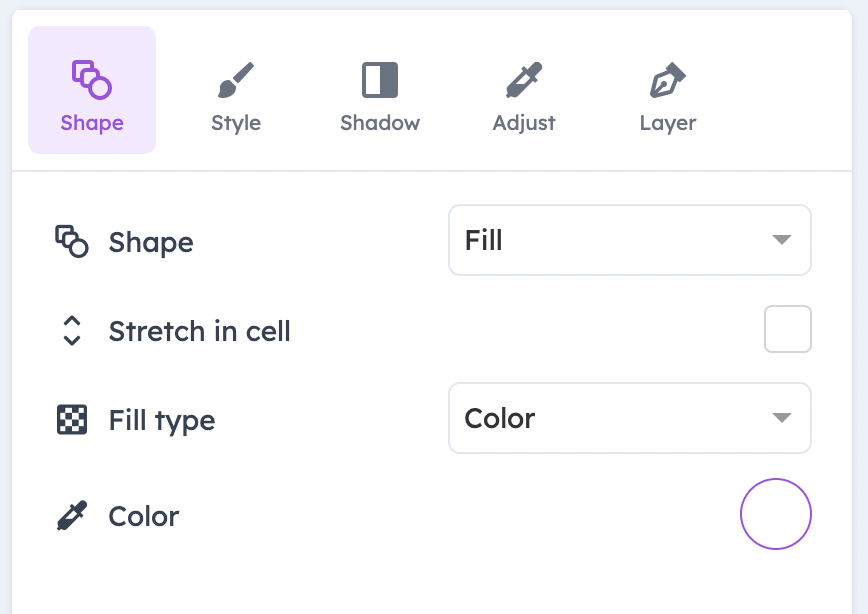
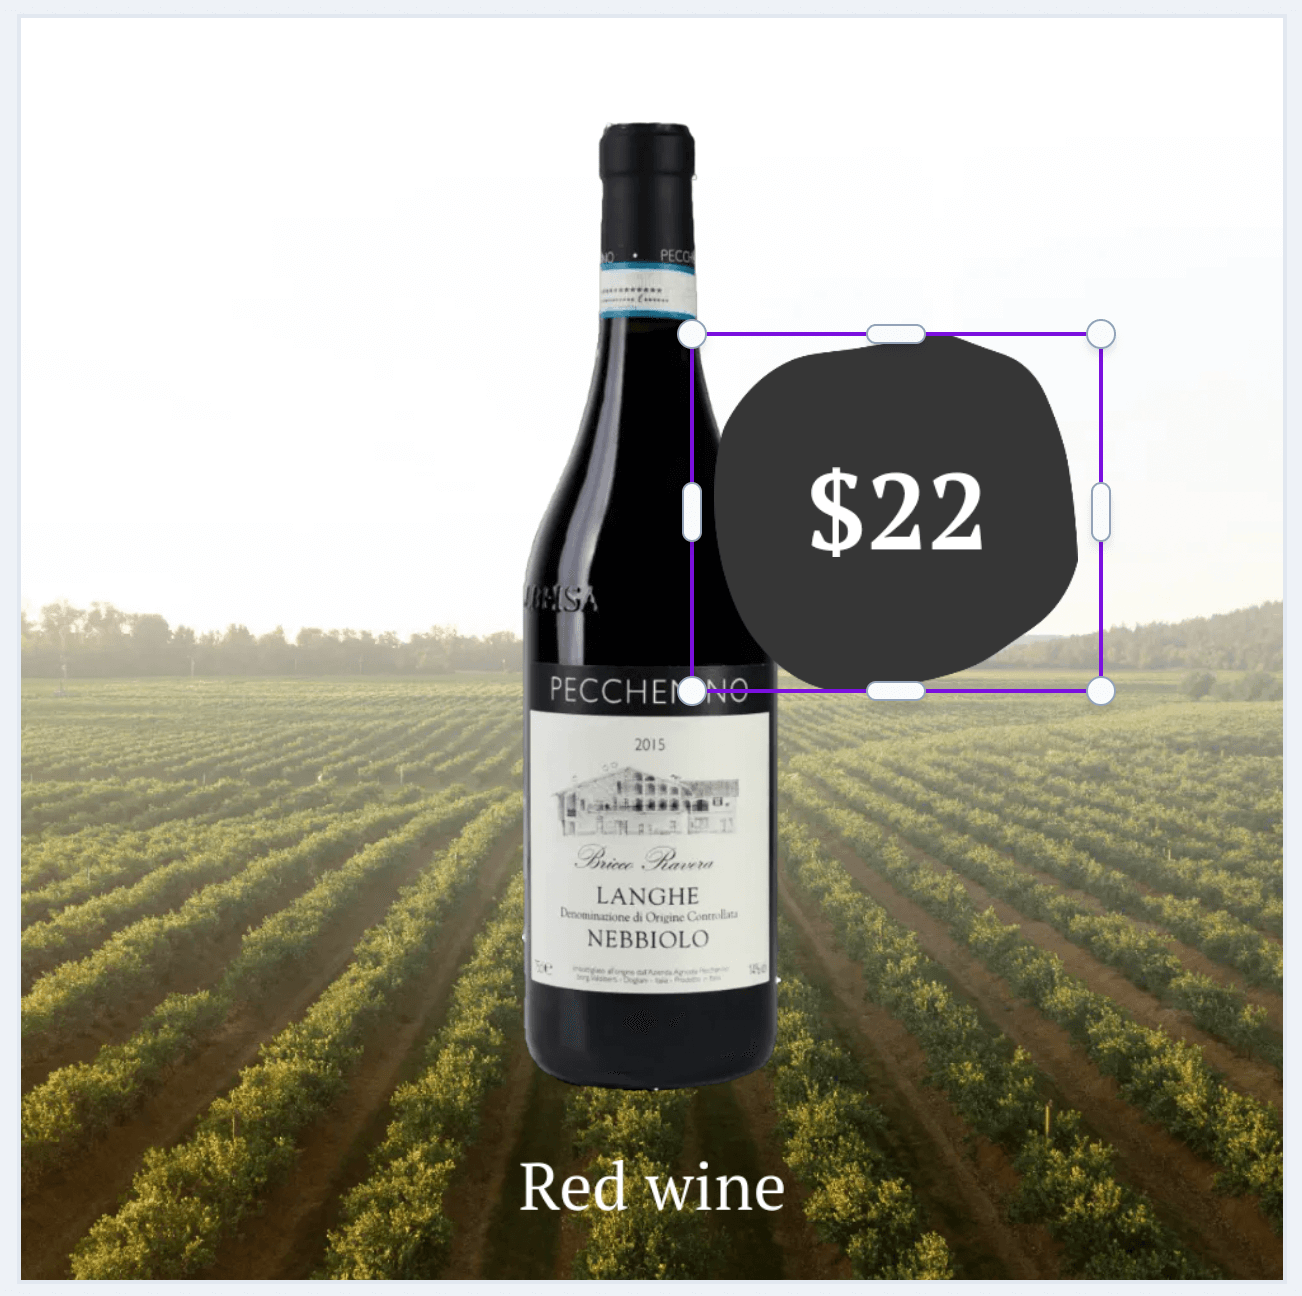
3. Shape layers
Adding a shape layer allows you to select from a square, triangle or circle, of a selected color, to be used in your design.
Shapes are commonly used either for "splashes" (a shape behind a text layer to highlight the price or other information), or to add more product images from your data source (if it contains additional product images).
4. Asset layers
Adding assets is a convenient way to change an element of the design based on the product being displayed.
Commonly, this can be used if your webstore offers products from more than one brand, and you’d like to show the logo in the design and have it change dynamically.
Product assets can also be used to display product information in a visual way, instead of using text (for example, the energy rating of electronics).
Read the full guide on using product assets here.
Editing layers
There are multiple ways to edit elements and layers to fit your design and brand, as well as tricks to make working in the design editor easier.
1. Adjust the size and position
You can select a layer by clicking on it either in the layer tab on the left side of your screen, or by clicking on it inside the design canvas in the center.
Once a layer is selected, you can drag it around the design to change the position, or drag the edges to change the size, similar to many other design tools.
2. Select multiple layers
If you want to adjust multiple elements at the same time, you can command-click, or control-click, on the layers to select them at the same time.
You can then move and scale them together or use the options above to group, match the size or align them.

3. Create groups
If you’d like to create a group with multiple elements, so you can move and scale the group as one element, you can drag the layer inside another layer (instead of above or below) and a new layer group will be created.
At any point in time, you can drag and drop an element out of the group if you no longer wish to have them together.

4. Change the order of layers
In the layers tab, layers are displayed in a hierarchical order, so the ones on top will cover the ones on the bottom.
By clicking on the element inside the layer tab on the left side and dragging it up or down, you can change the order of these elements, to have them displayed in front, or behind, others.
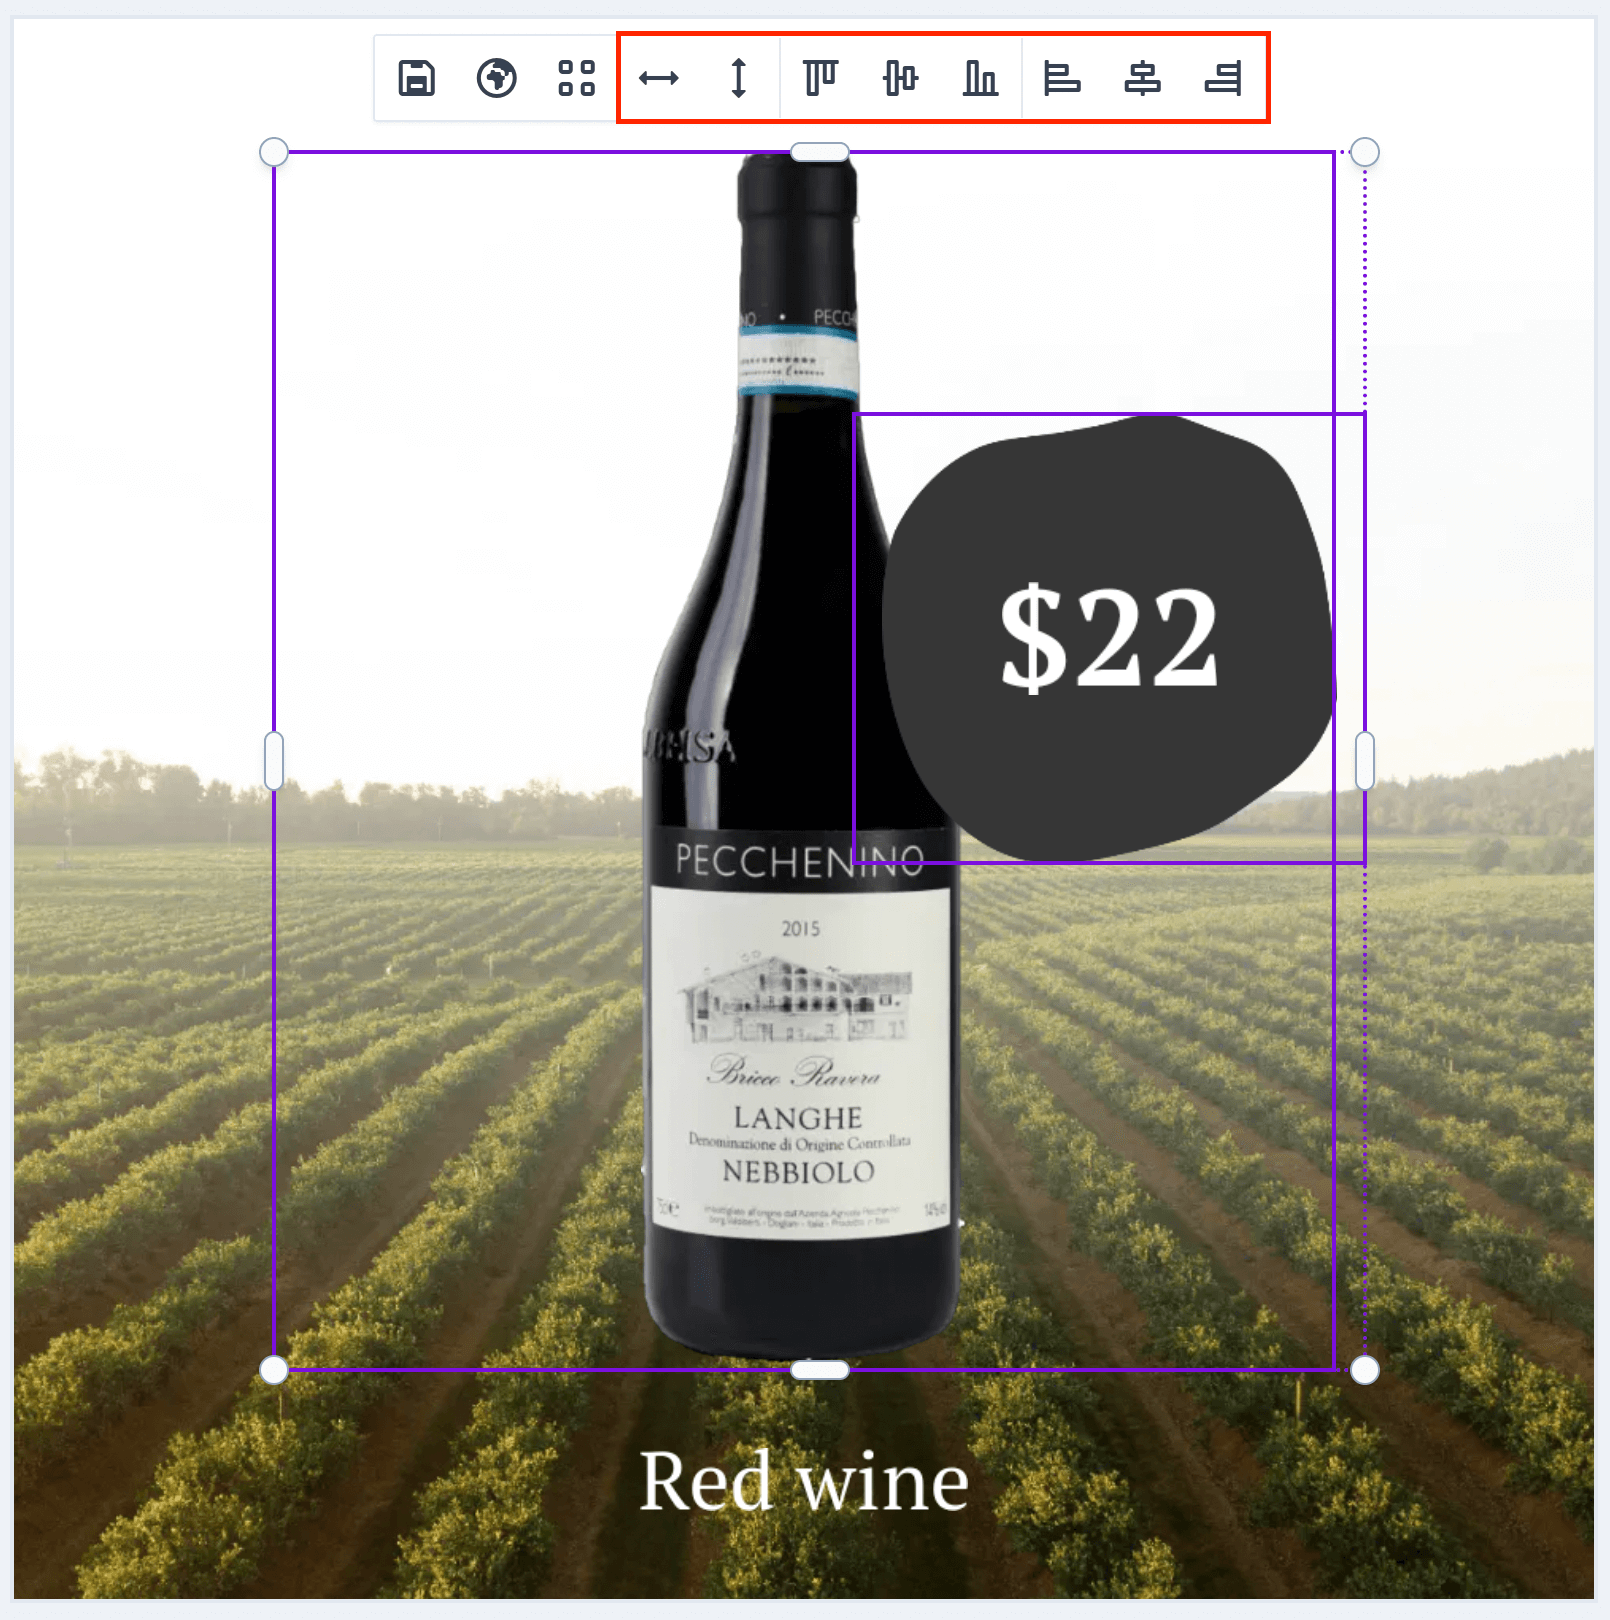
5. Align and match size on multiple layers
It can be particularly useful to change the size or alignment of an element to match a different layer, precisely down to the pixel.
Once you select multiple layers (by clicking on them while holding the command/ control key), a new menu will above the selected elements, allowing you to automatically match the size and alignment.
To align elements, choose to which side they should be moved. For example, clicking "Top" will move the layer, which is lower to align with the upper layer. Clicking "Left" will move the layer on the right to match with the one on the left.
To match the size, select either "Width" or "Height" to match the dimension to the larger layer.
6. Change the layer settings
There are a number of different settings available under each layer you create.
To access these, click on the options button, next to the layer, inside the layer tab on the left side of the screen.
Here, you can:
- Rename the layer
- Duplicate the layer
- Send it forward or backward
- Delete the layer
