Connect Confect to Meta
Upload customized Confect designs into a Meta catalogTable of Contents
1. Copy the Confect feed URL2. Go to your Commerce Manager3. Change the feed URLI'm not using Shopify (URL)I'm using Shopify (or another app)4. Preview your Facebook catalogAfter you’ve created your first design and Confect catalog, the next step is to import them into your Facebook Commerce Manager so that you can start using the customizable designs instead of white-background packshots.
- Get a Product Feed URL from your Confect catalog.
- Go to the Meta Commerce Manager and your current catalog.
- Open the "Data sources" tab.
- Click on the data source under "Data feeds" (top of the screen).
- Inside the data feed, go to settings and replace the URL.
If your catalog has a Shopify or WooCommerce integration:
- Instead of replacing, add the Confect URL as a "Supplementary feed".
This guide will walk you through the Facebook Commerce Manager to ensure that your new creatives replace the old packshots without losing any valuable optimization data.
You can find a follow-along guide inside your Meta catalog. This gives you a tailored process, depending on whether you have:
- A normal catalog: includes a feed URL
- A Shopify catalog: "Syncing from partner platform"

1. Copy the Confect feed URL
The catalog URL provided by Confect will update automatically if there are any changes in your data source, such as price or availability, and if you decide to change the design - and update this in Meta.
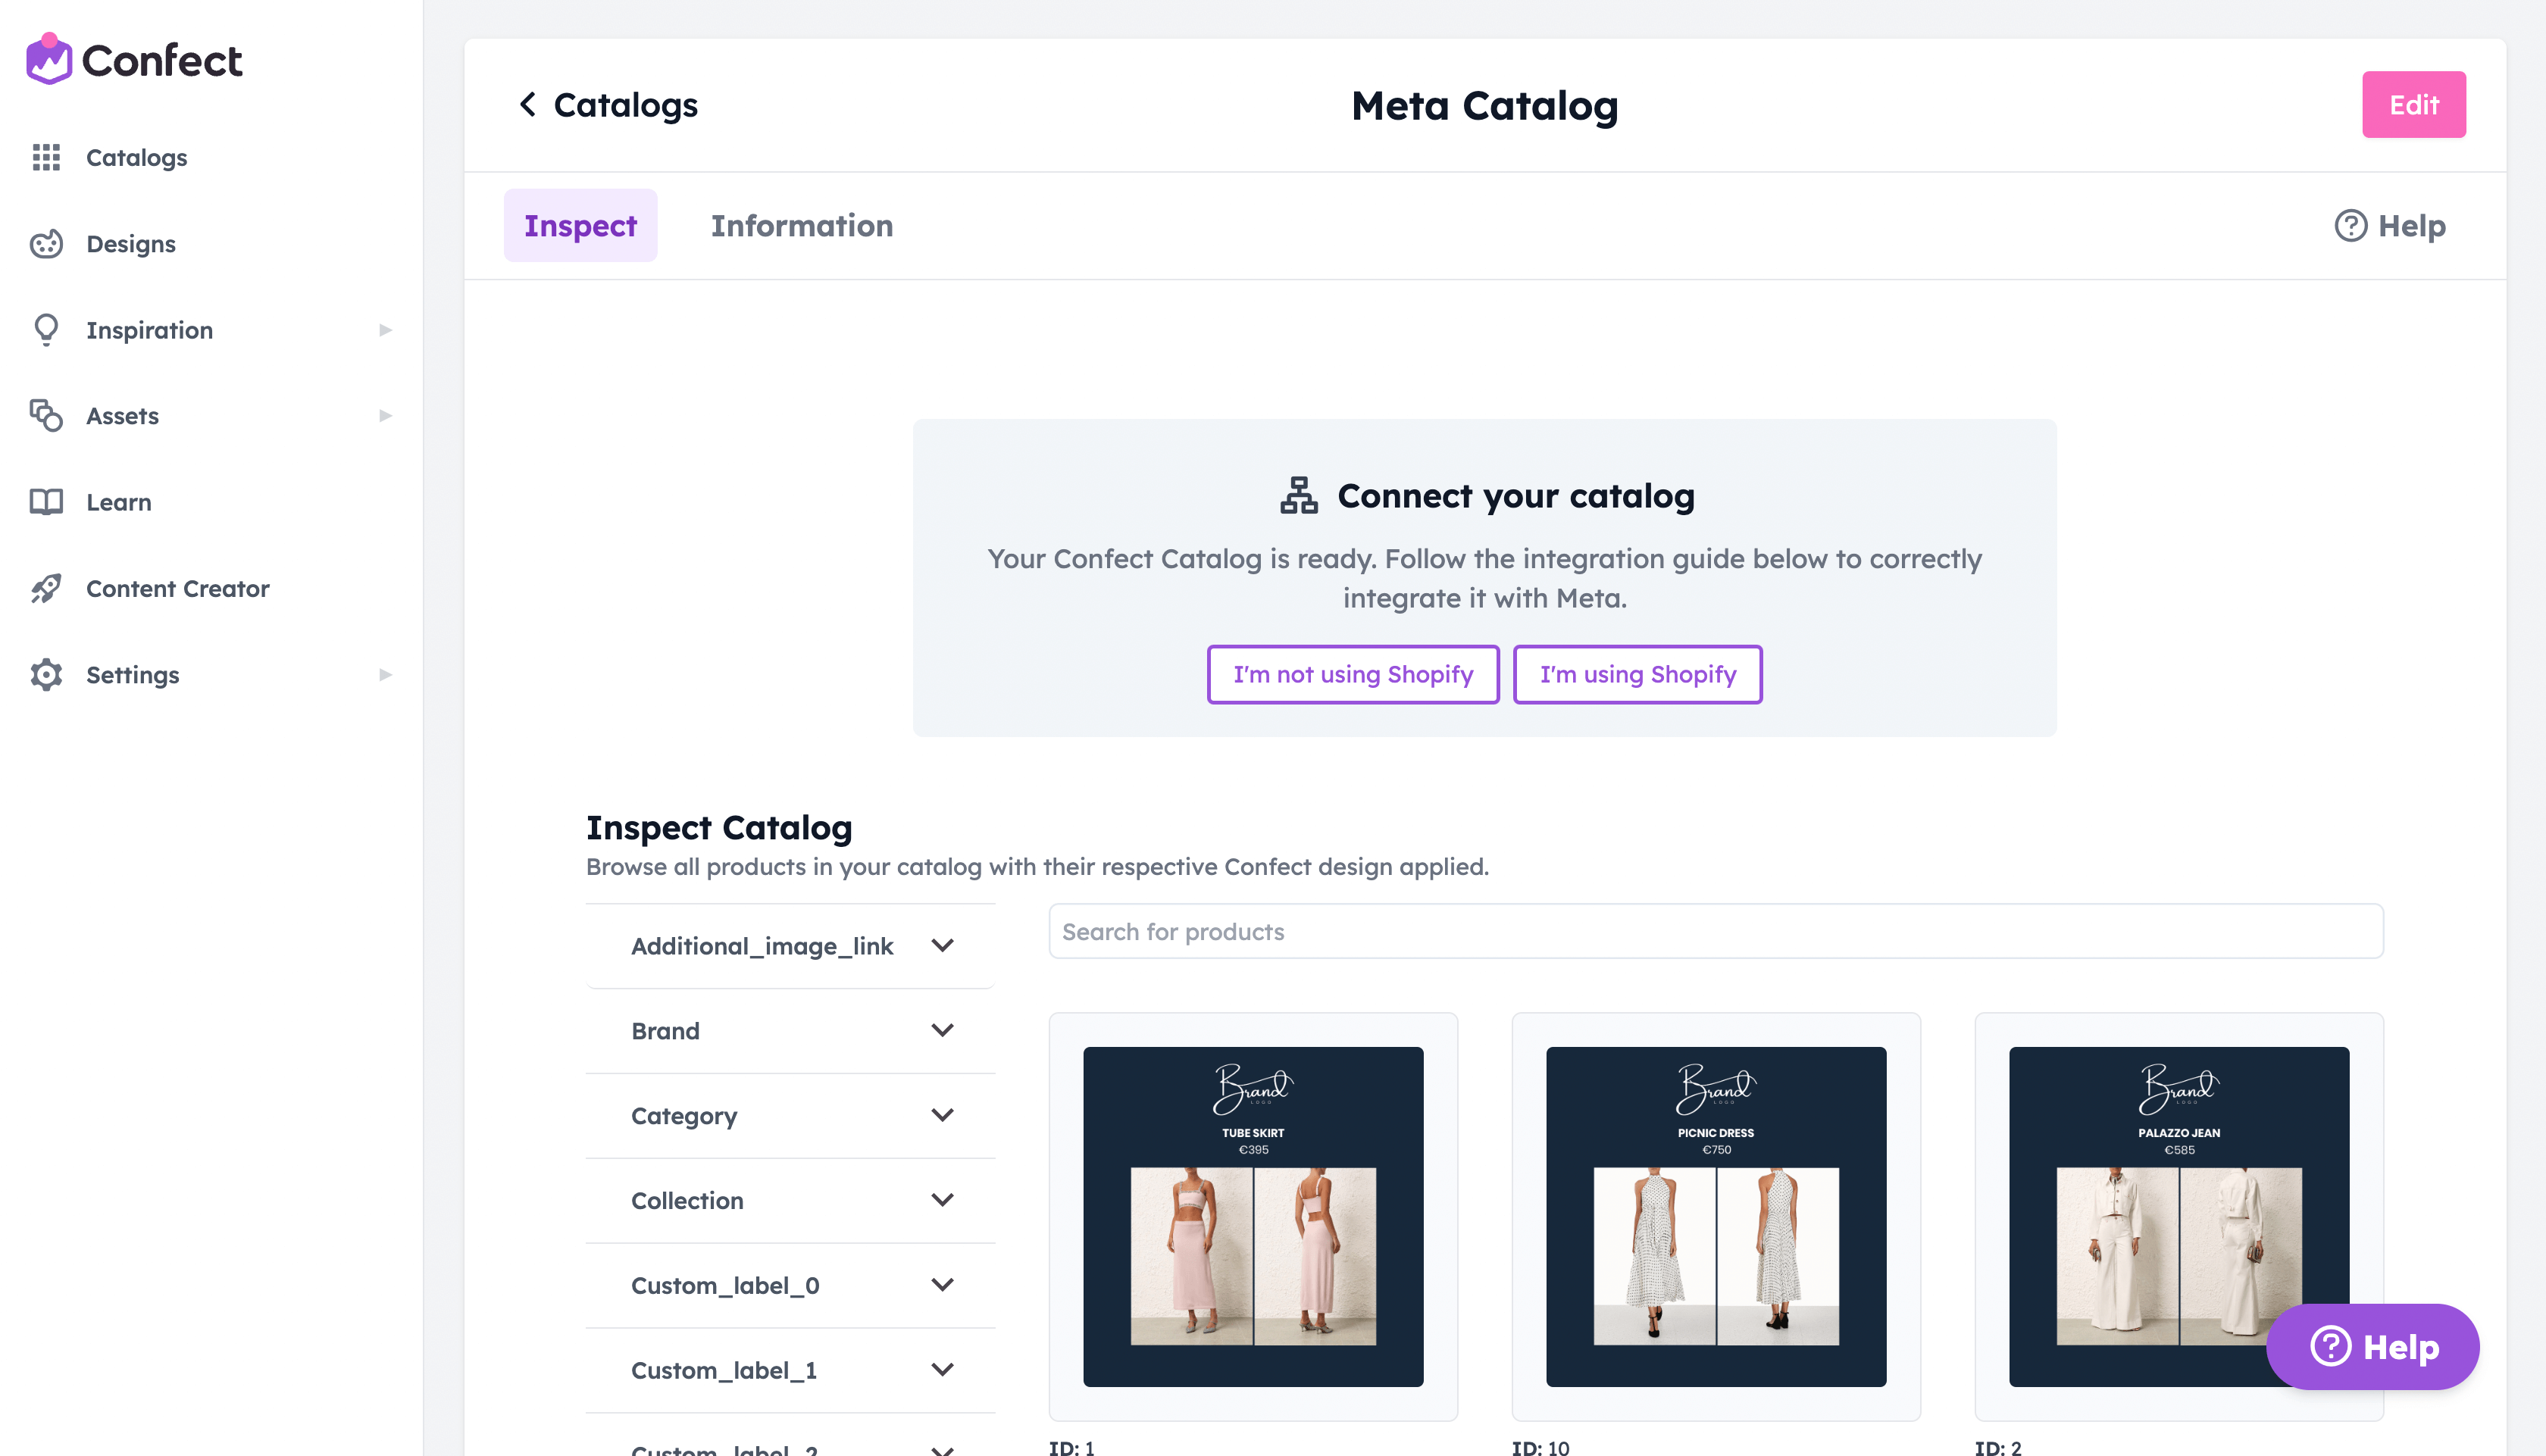
The first step is to go to "Catalogs" inside Confect.
Here, you have to click your "Meta" catalog and click on "Connect your catalog.".
- I'm not using Shopify: Your catalog inside the Commerce Manager includes a feed URL
- I'm using Shopify: Your catalog inside the Commerce Manager has "Syncing from partner platform" (also choose this if you have a WooCommerce or Magento app, not just Shopify)
The guide takes you through all the necessary steps.
If you're instead following along with this written article, you can go to step #4 (in either version) and copy the URL.
2. Go to your Commerce Manager
If you're managing multiple company accounts, ensure you have the correct business selected in the top-left corner of the screen.
First, go to your Commerce Manager. You can find this through "All tools" and then "Commerce Manager"
This is where you can see all the catalogs being used for this business.
Scroll down to "Catalogs" and select the catalog you want to replace if you have more than one.
It is key to connect Confect to your existing main catalog in Meta. Creating and using multiple catalogs leads to worse performance.
Do not create a new Meta catalog at this step, which would lead to a loss of learning data. Meta will also warn you that creating a new catalog leads to a lower return on ad spend and a higher cost per result.
3. Change the feed URL
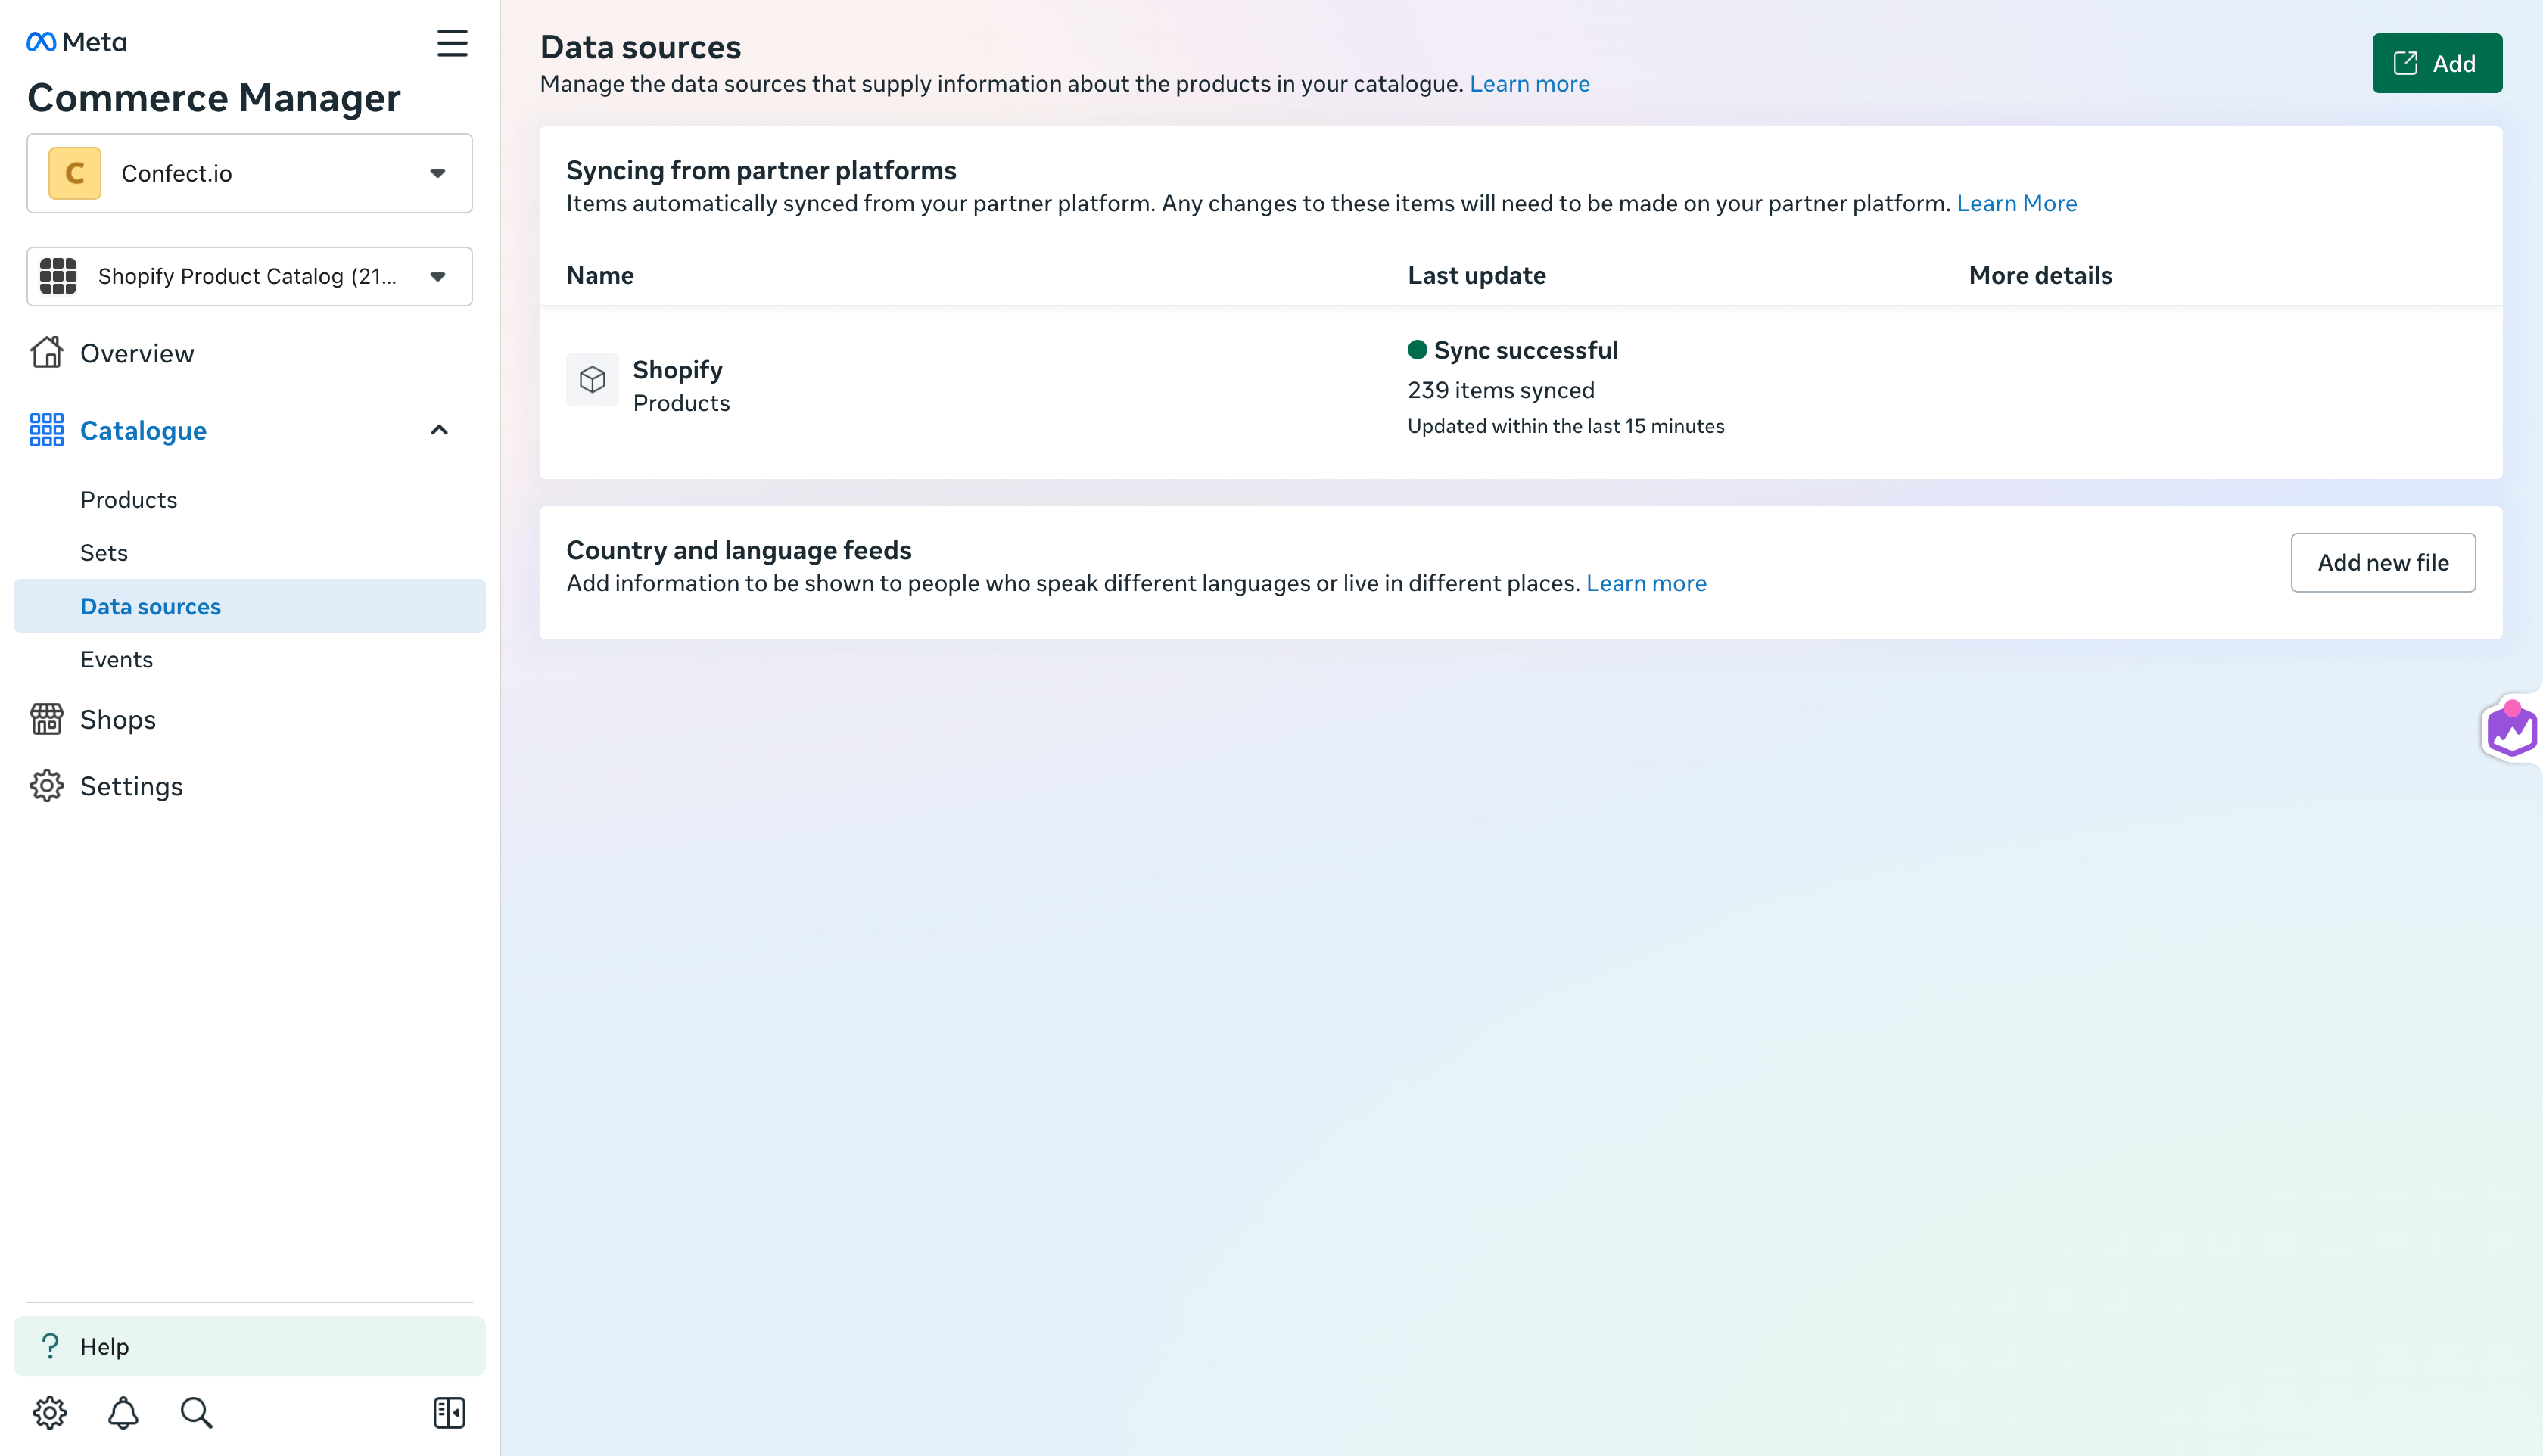
Inside the Commerce Manager for the right business and catalog, click on "Data sources", in the left-hand menu.
- If your top-most source is a URL, you'll be following the "I'm not using Shopify" method.
- If your top-most source is "Syncing from partner platform", you'll be following the "I'm using Shopify" method (this applies to other partner-sync apps such as WooCommerce or Magento as well).
I'm not using Shopify (URL)
In this method, you'll replace the main feed in your catalog.
The Confect feed substitutes the original feed - all your information and products will still be regularly updated, including price changes, availability, or any adjustments to the design.
No learning data is lost by doing this.
Click on the top-most feed URL and go into its "Settings".
Now, scroll down to find the original feed.
It is important that the URL is added as a "Replace schedule" - simply click "Edit" and replace the URL.
Lastly, click "Save".
I'm using Shopify (or another app)
If your catalog uses an integration (called "partner platform" in Facebook), like most Shopify shops do, you'll add the Confect URL as a "Supplementary feed" inside the catalog.
Many Shopify catalogs no longer have the option to add Supplementary feeds manually.
Reach out to your Onboarding Manager contact, or use the live-chat to get help in enabling this method.

Once you reach the page in the video below, in "Select a data feed," choose "Shopify".
Then, paste in the Confect URL, click "Next", check if the default currency is correct, and press "Save".
If any errors show after the upload, such as "IDs not matching", contact us for personalized guidance.
Lastly, it's also important to click "Configure sources" and prioritize the new Confect feed for "Image" and "Additional image link".
All this guarantees that the Confect designs will be used in ads instead of the original images.
This doesn't reset any learnings and is easy to revert.
4. Preview your Facebook catalog
To get the images to update right now, click on "Request update now" and wait for the changes to load.
Depending on the number of products, this may take anywhere from 2 minutes to an hour.
Go into "Items" and preview all your new, custom images. All the product information will be the same as in the data source you’ve entered into Confect.
Anytime you’d like to adjust the design, you can do this directly inside Confect, without changing the URL in Facebook Manager.
Congrats! You’re now ready to start running much better, and eye-catching Catalog Ad campaigns.