Add intro and outro effects in videos
Add intro and outro effect animations to your layersTable of Contents
1. Add an effect2. Choose an effect3. Edit the effectA Pro or Global tier subscription is required to create video templates for catalog ads in Confect. You can change your current plan in Settings > Billing.
This article focuses exclusively on video effects inside the design editor. If you still need to familiarize yourself with the editor's video layout, read the product-level video guide here.
Once you’ve got the basic design you want to use, you can begin adding effects.
1. Add an effect
This is done by clicking on the layer you want to animate and adding either an intro or outro effect (a layer can have both simultaneously).
 (1).png)
2. Choose an effect
Once you click to add either an intro or outro effect, there will be a few pre-made options you can use as-is or customize to your liking.
If you don’t want to use any of the pre-made ones, but make your own, click "< Back" in the top left of the popup.
 (1).png)
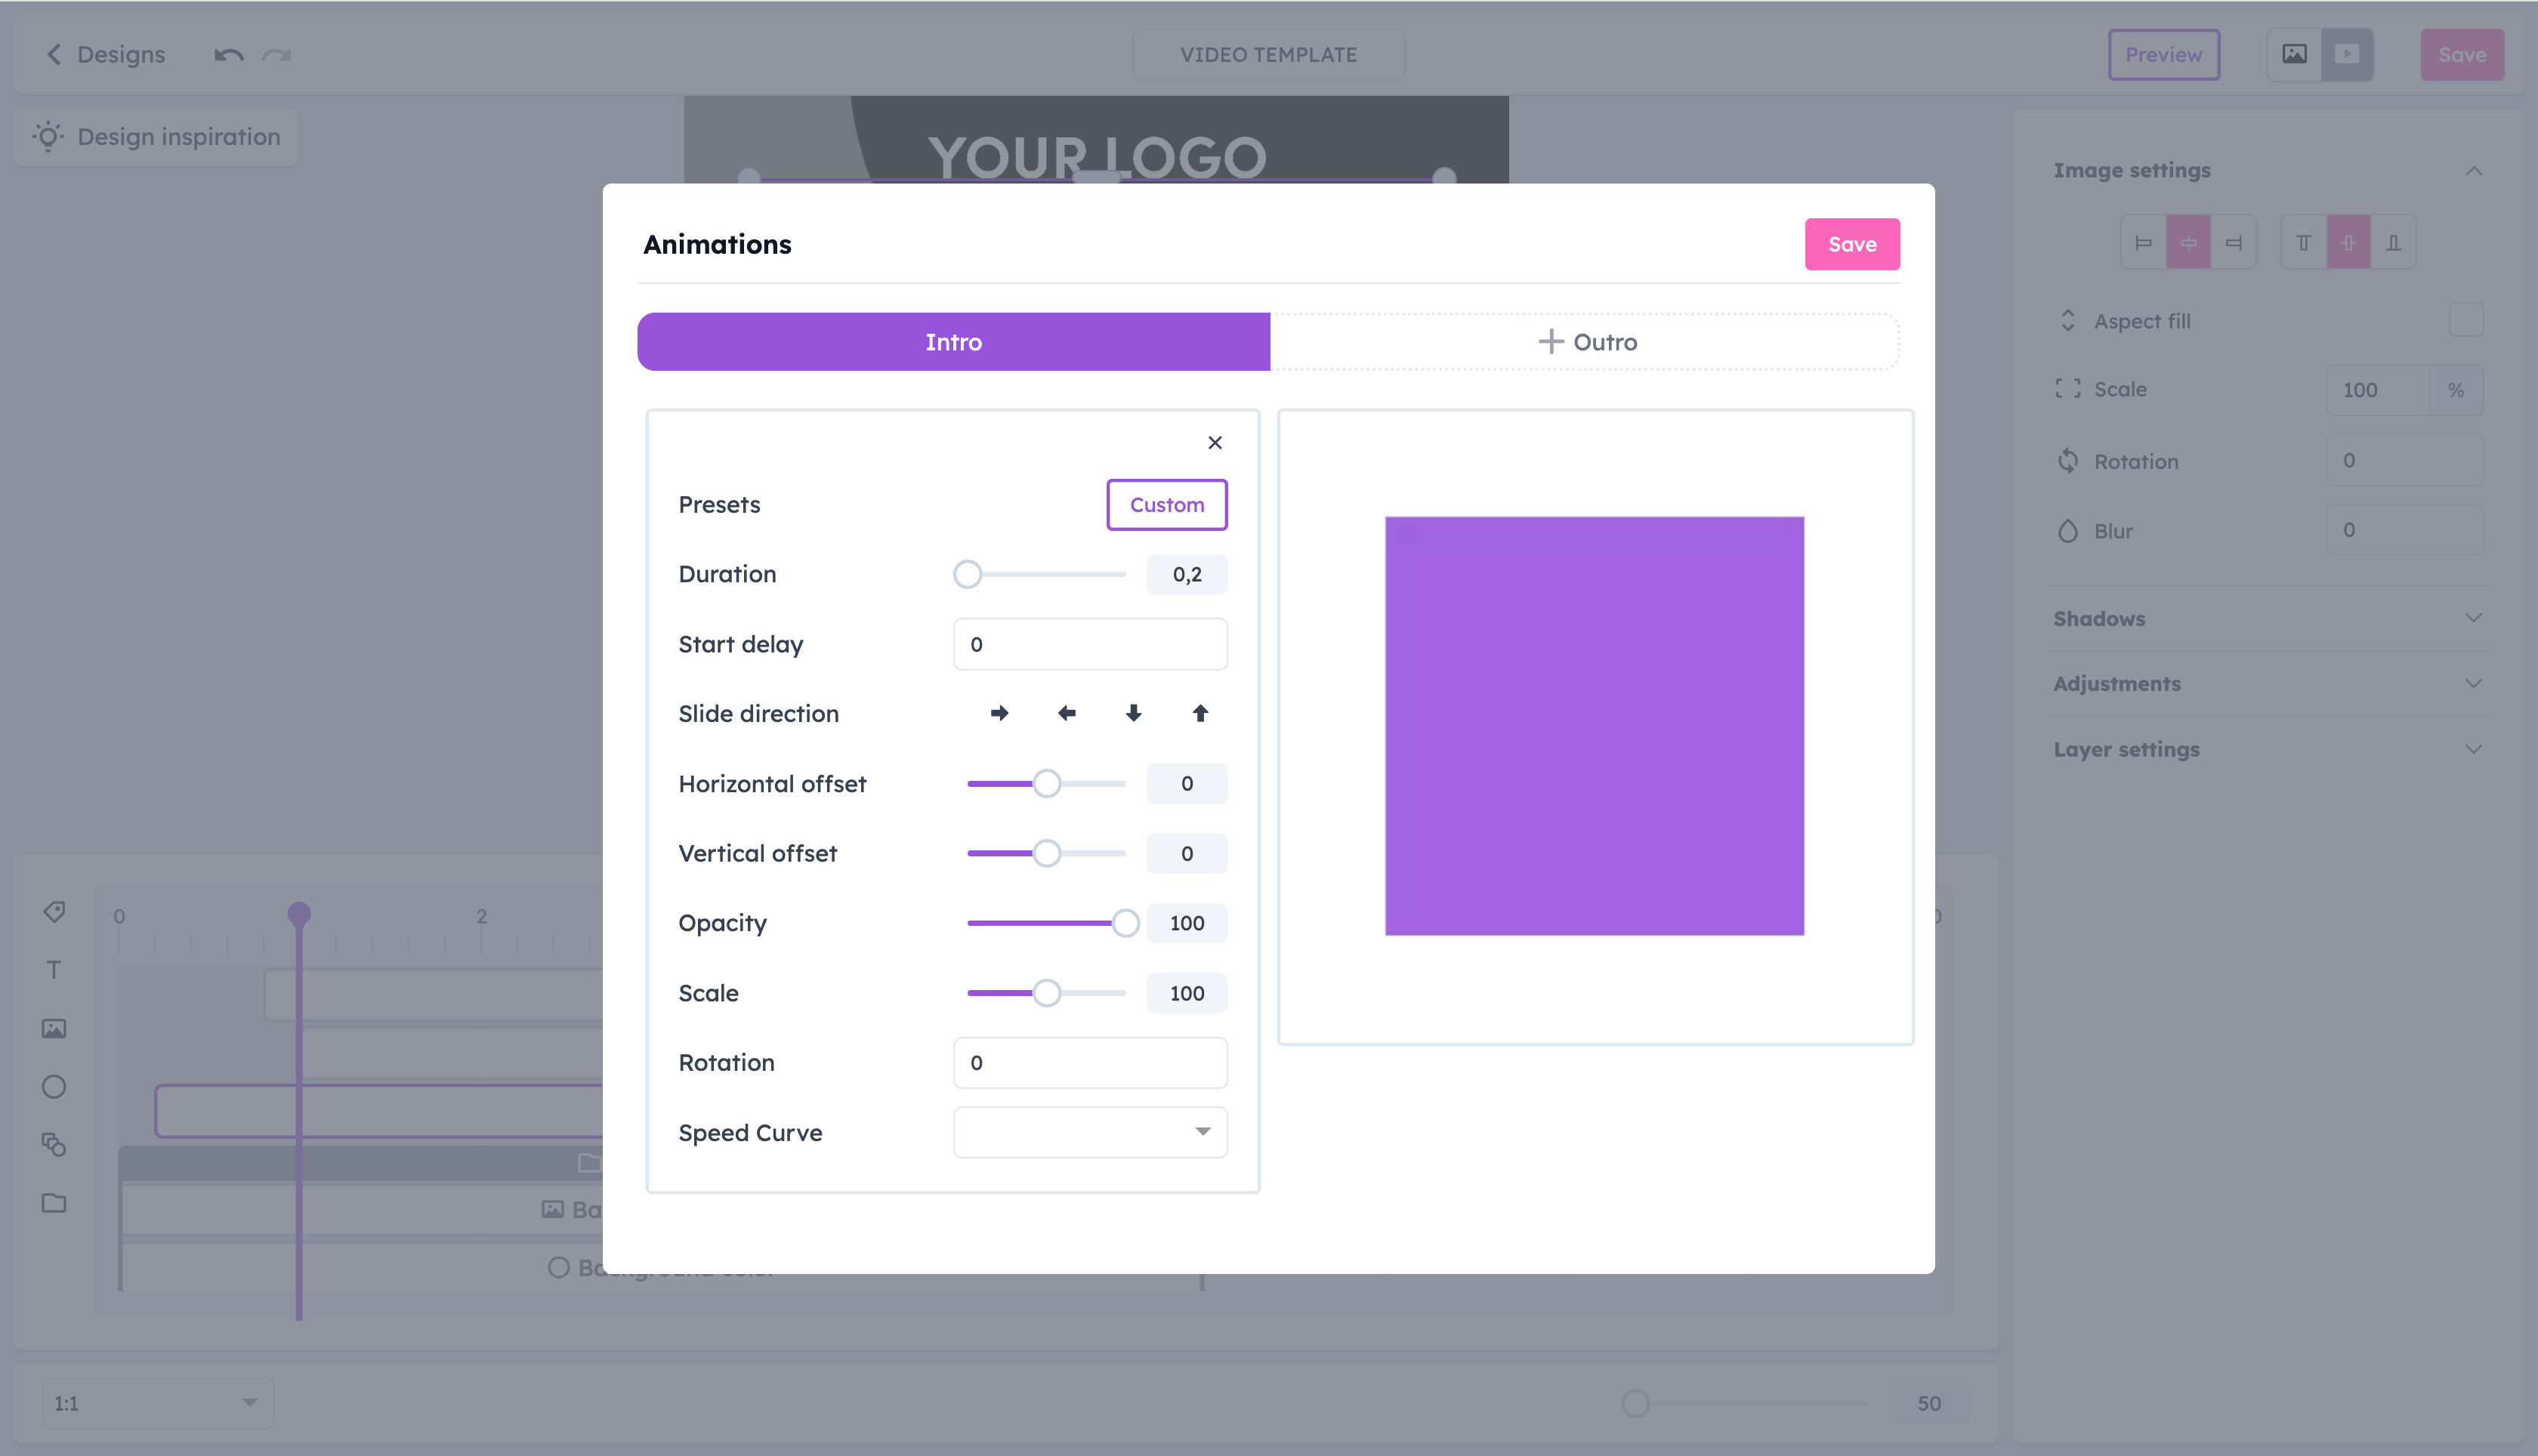
3. Edit the effect
Once the effect editing window opens, you will see a couple of options you can control. You can also preview how the effect changes while you edit it.
The key thing to understand is that these settings determine "how the layer begins for intro effects" and "how it ends for outro effects".
- Duration
- Start delay
- Slide direction
- Horizontal and vertical offset
- Opacity
- Scale
- Rotation
- Speed curve
When creating an intro effect, setting the “opacity to 0” and “scale to 200” means the layer will START at 200% of its size, be completely transparent, and END at its normal size and full opacity.
On the other hand, setting, for example, “scale to 200” on an outro effect means the layer STARTS at its normal size and ENDS at 200% of its size.
Try adjusting the different options, and finally, click "Save" on the effect pop-up if you’re satisfied with it.
Experiment with various timings and effects on all of the layers in your template until you achieve the look you want.
 (1).png)