Change email banner settings dynamically (rules)
Assign different designs, items and URLs for specific product attributes, time periods and recipient contact propertiesTable of Contents
Setting up email banner rulesDesign rulesProduct rulesLink rulesSpecifying custom variablesWhen creating email banners, you can do a lot more than just always use the one design template. You can automatically set the banner to change its design, product shown, or the destination URL, based on different rules and conditions.
This allows you to schedule banners for time-sensitive campaigns, customize the banner based on recipient information, or highlight different product categories to different customer segments.
There are three types of rules you can add to an email banner:
- Design rules: This will change the design itself when the conditions are met.
- Product rules: This will change the product being shown when the conditions are met.
- Link rules: This will change the destination URL when the conditions are met.
Setting up email banner rules
To access the rule settings, go into “Automate”, “Email Banners”, and click on “View” next to the banner.
Then, click “Edit” in the top right corner.
You will then see a window with all the rule options on the left side.
It is not necessary (or in some cases viable) to set up all these rules and options. Consider your use-case and create the rules appropriate for your specific scenario.
Additionally, rules can be combined. For example scheduling a specific design and product at the same time for a time-sensitive campaign.
Design rules
You can set the design of the banner to change when specific conditions are true.
This can either be based on a product filter (the product shown matches certain properties), schedule (a specified time period), or the URL parameters (when recipient contact properties match a specified value).
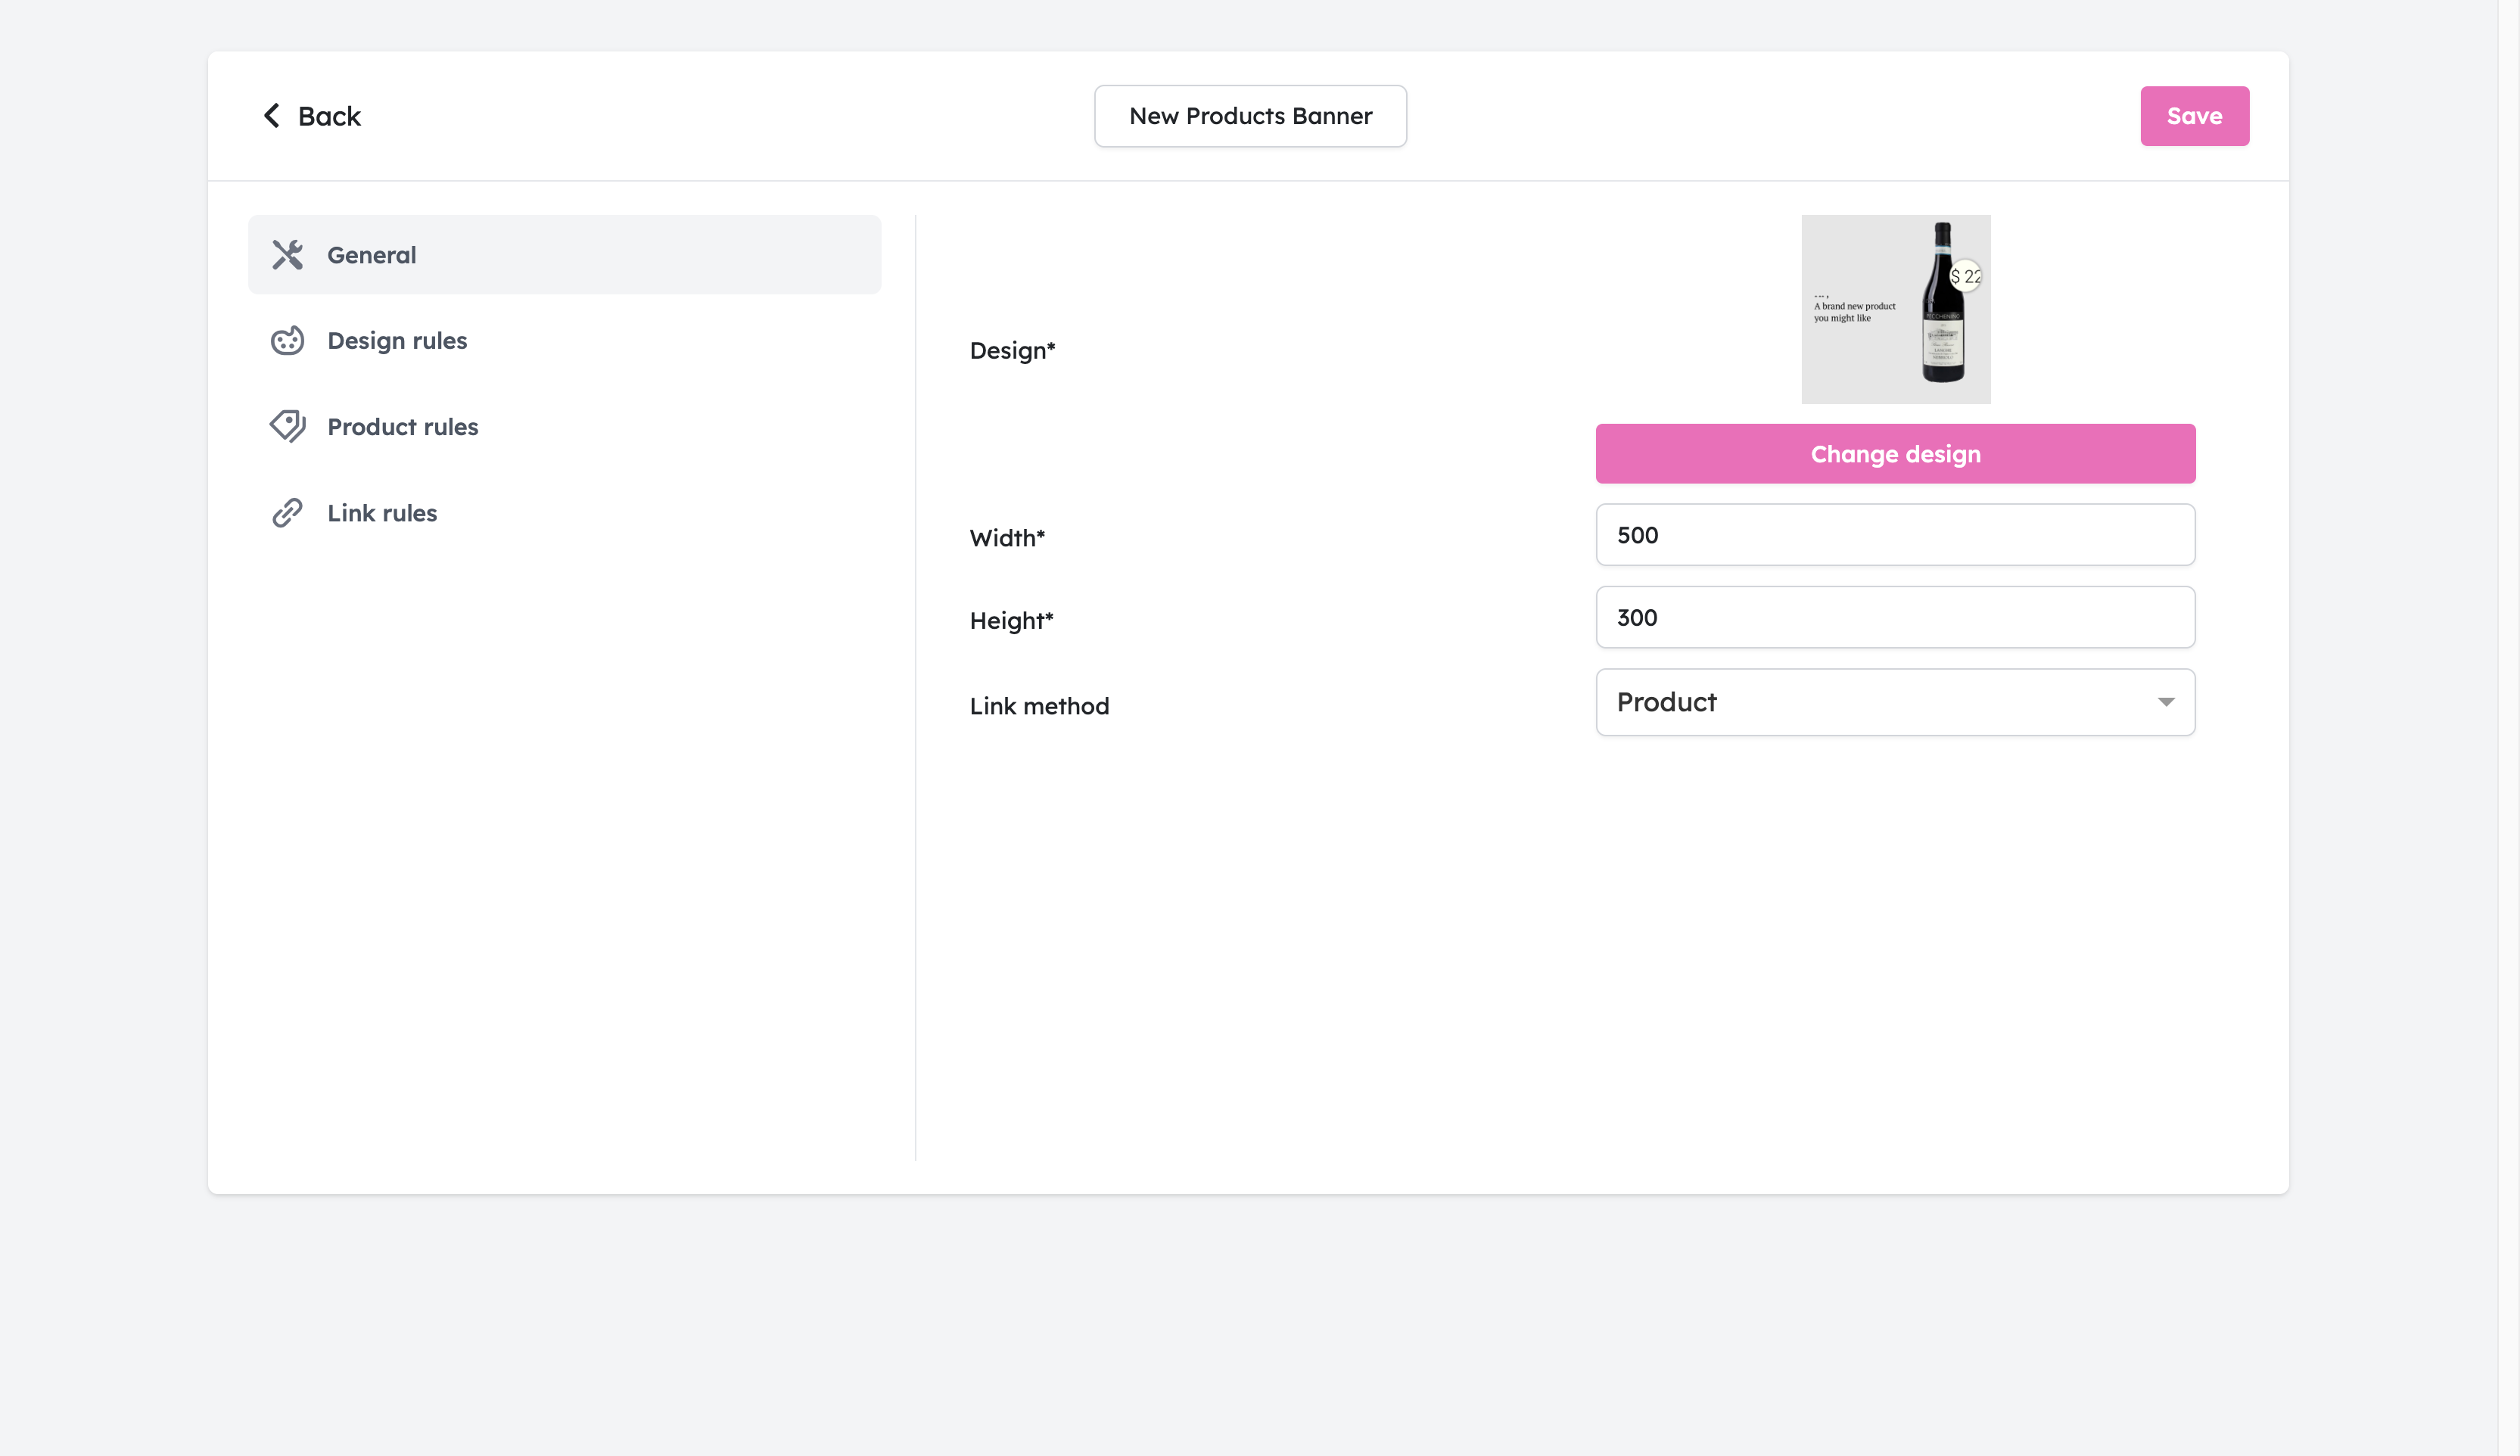
Before creating a design rule however, it’s important to create the template that the banner design should switch to. An easy method is to duplicate your current banner template in the “Design” tab, and editing the duplicate for the specific use-case.
Once you have created your alternative design, the first step is to click “Add rule”.
You can now click on the type of condition you want to add and fill out the specifics.
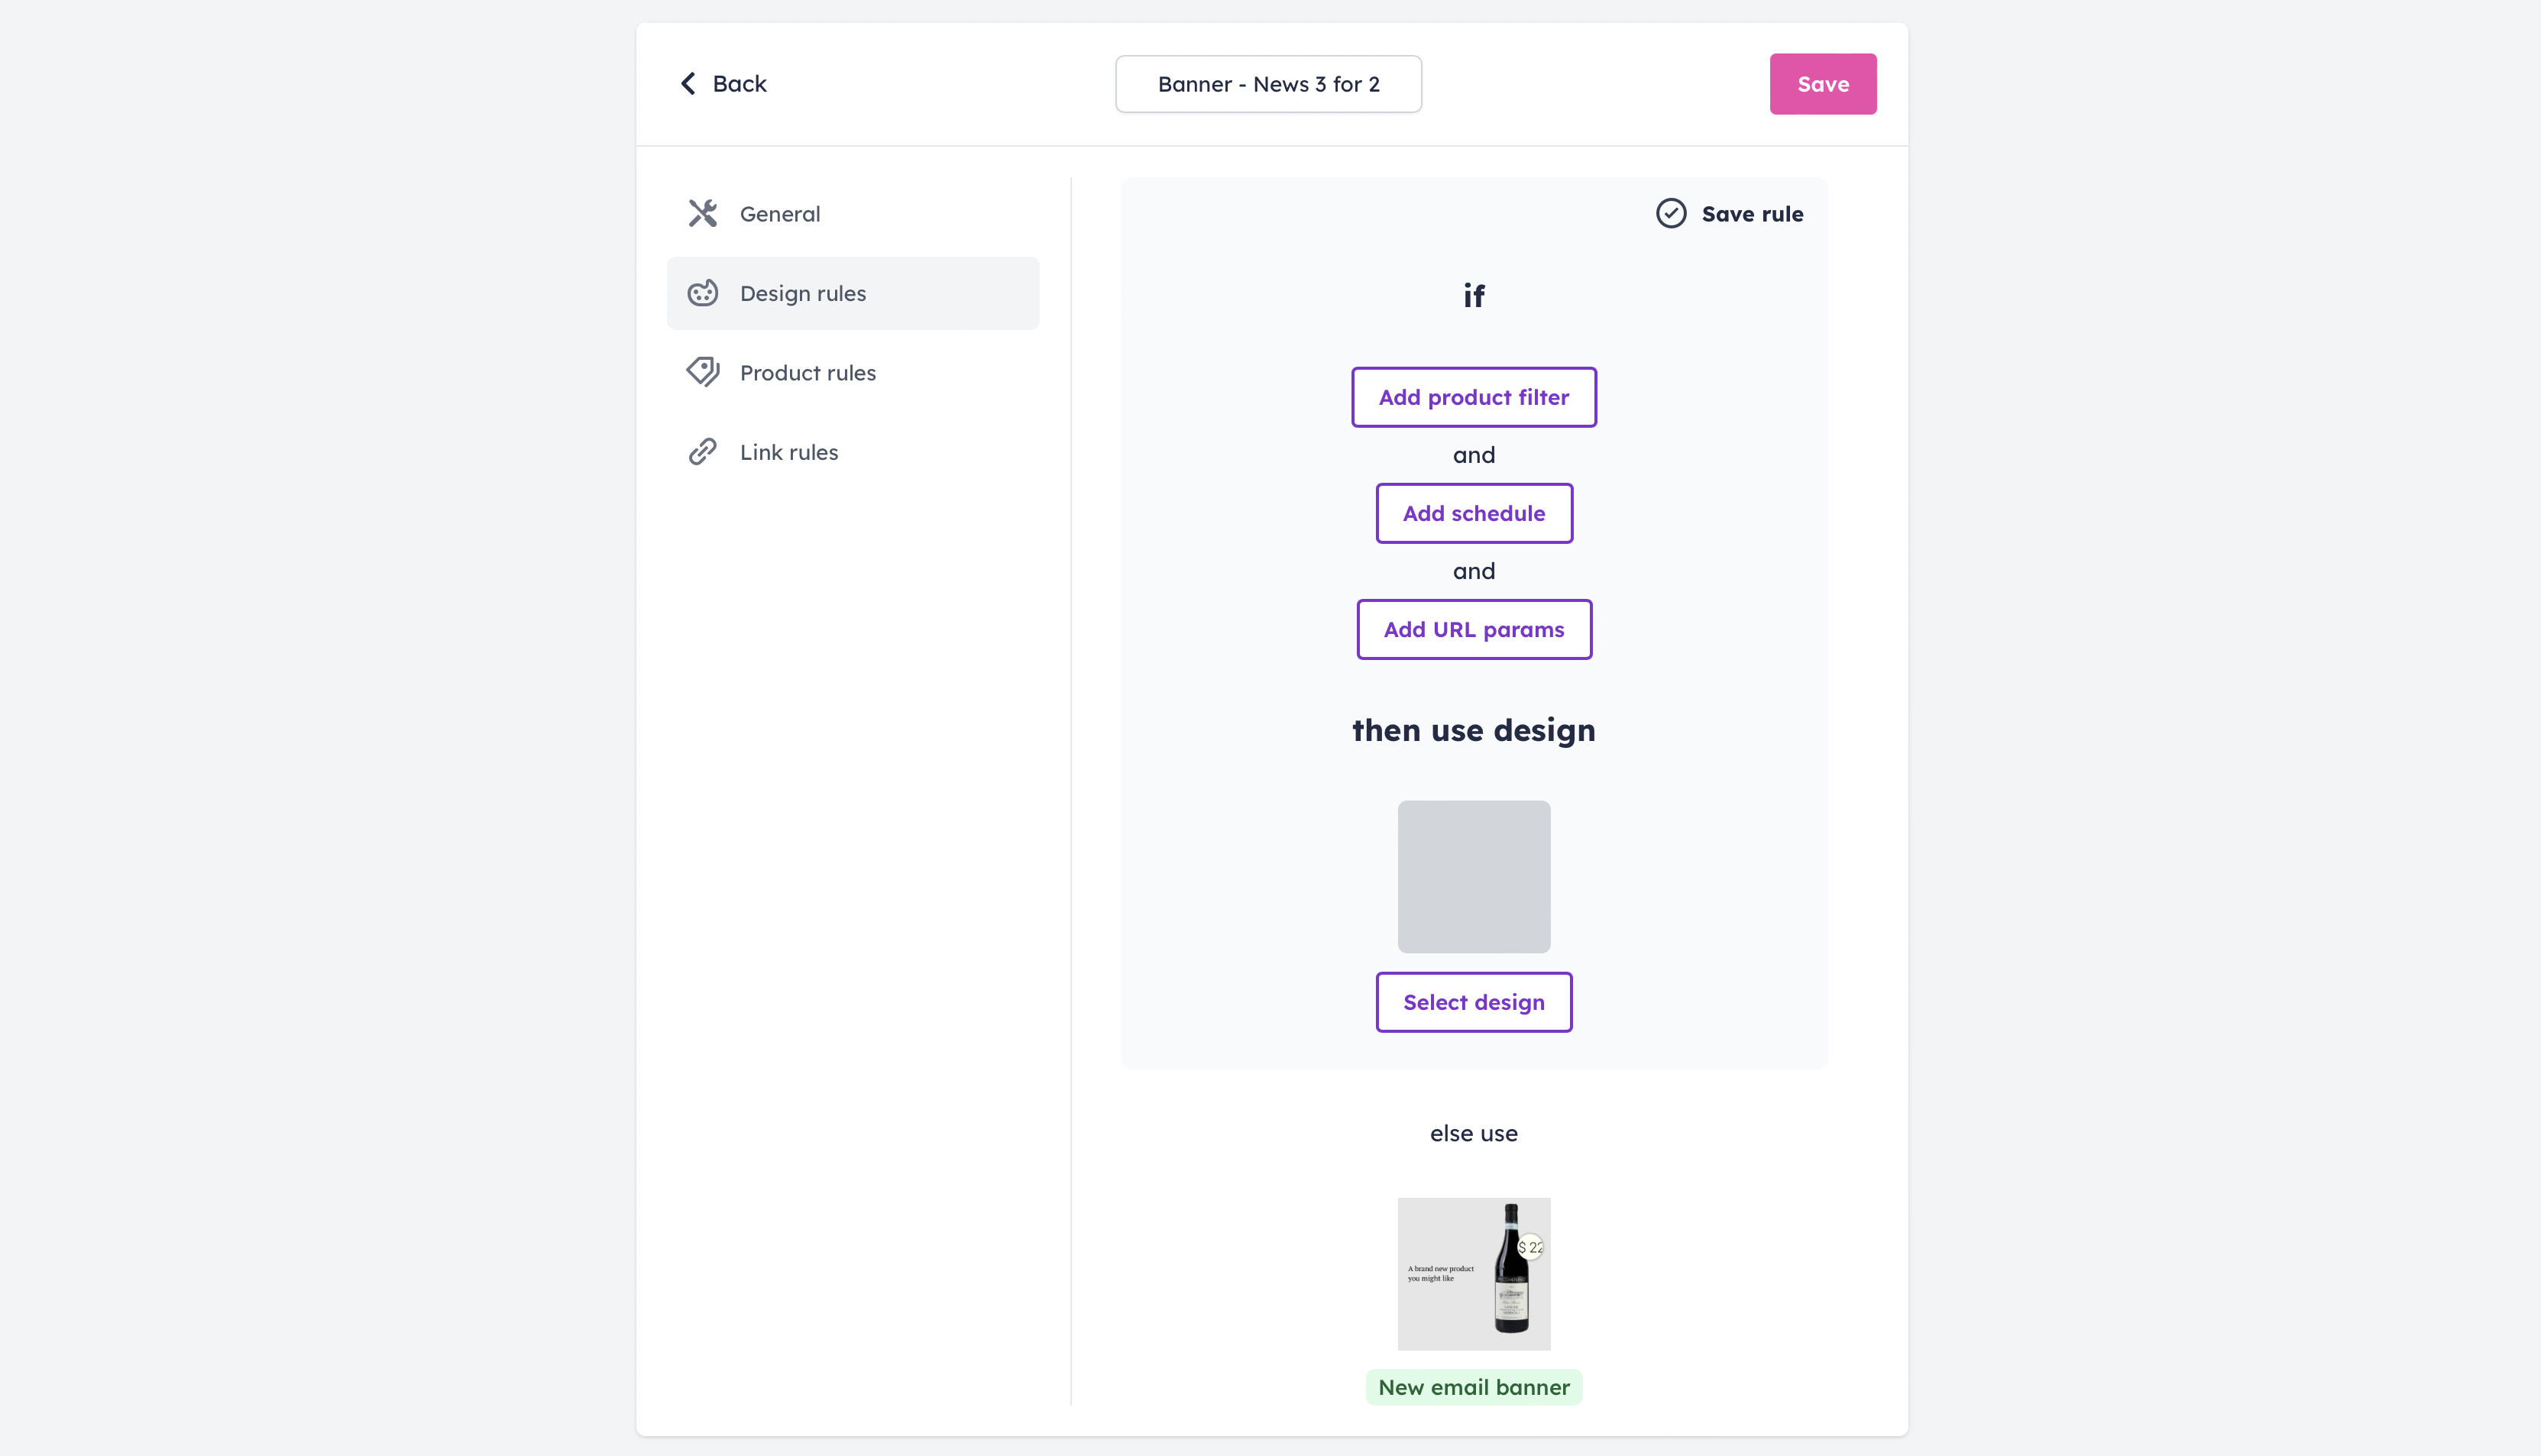
The “product filter” works by specifying the properties that the product shown needs to match to show a different design. This could be belonging to a category, being on sale, or having a custom label of your choice.
The “schedule” works by specifying the time period in which the design should change. This can be used to automatically change the design for time-specific campaigns such as Black Friday or Christmas. After the period is over, the design will change back to the default.
The “URL params” filter works by comparing the contact properties of the recipient to the specified value. This can be based on Country, CustomerSegment, or other data you might know about your customer.
Always make sure to check the supported contact properties of your email system to see which segmenting options are available to you.
If you’ve added URL parameters, remember to read the last section of this guide on “Specifying custom variables”.
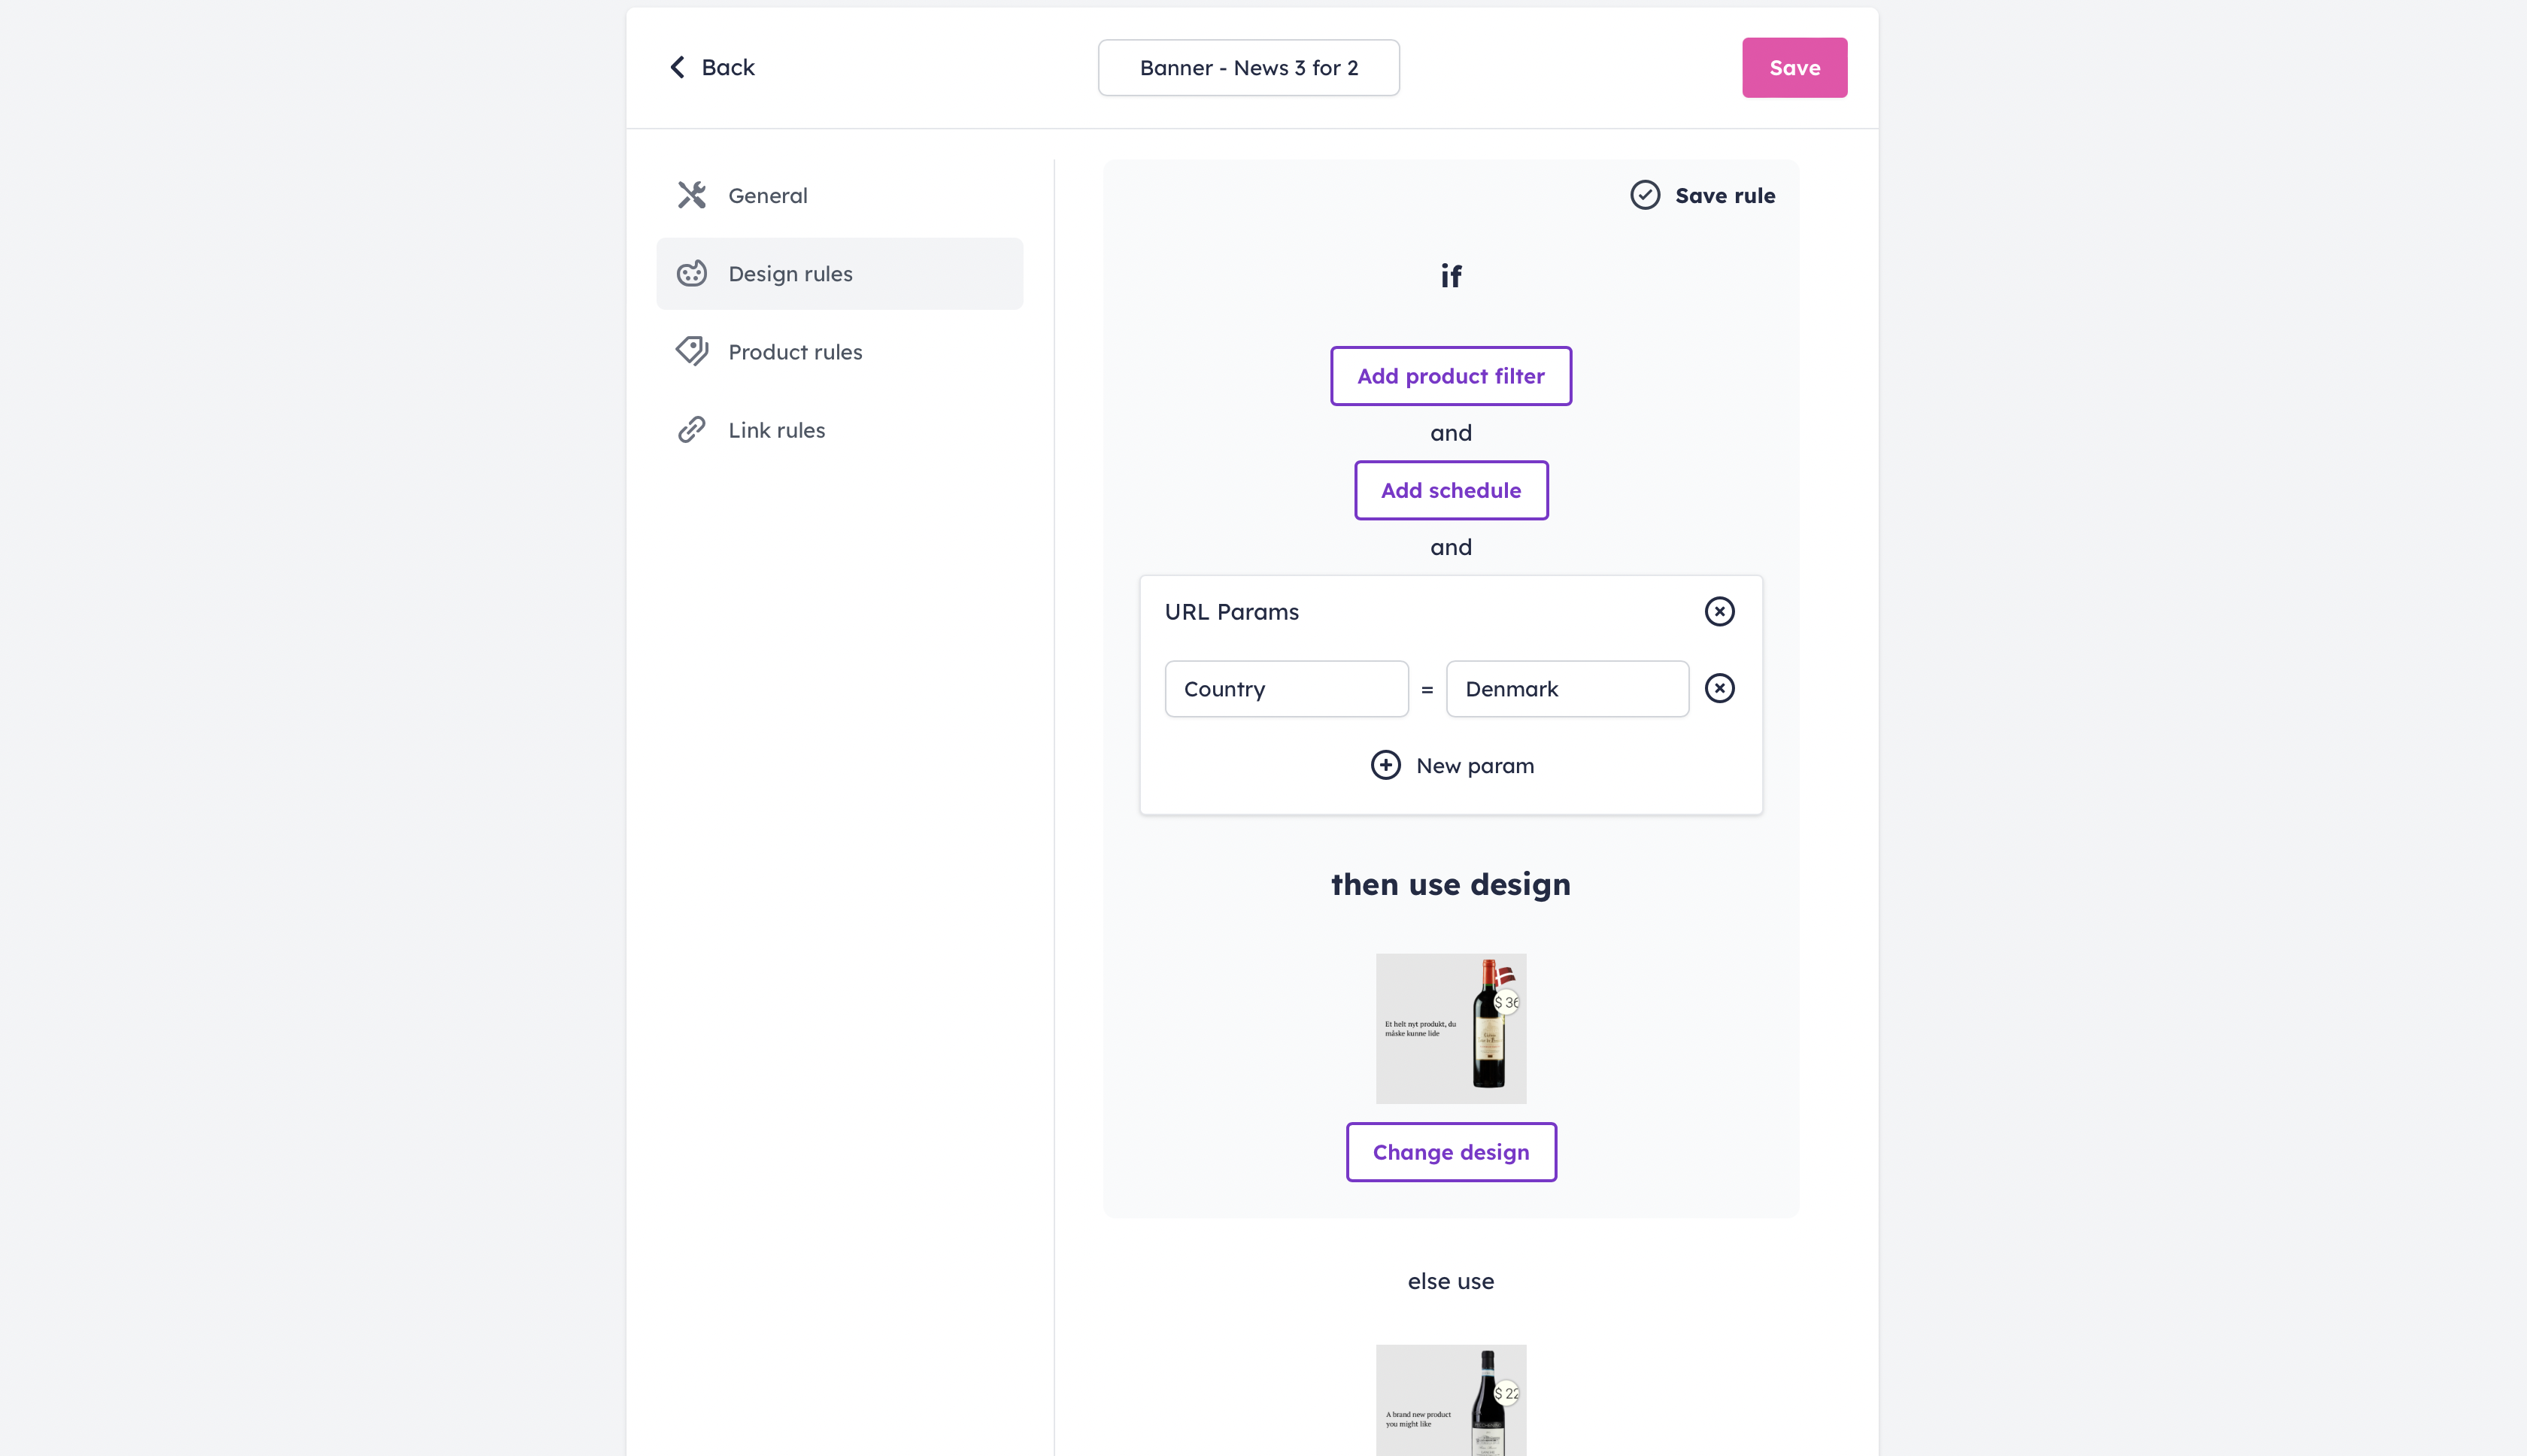
After adding the desired design rule condition, click on “Select design” and choose which template the banner should switch to.
Finally, click “Save rule”, and the “Save” button in the top right corner.
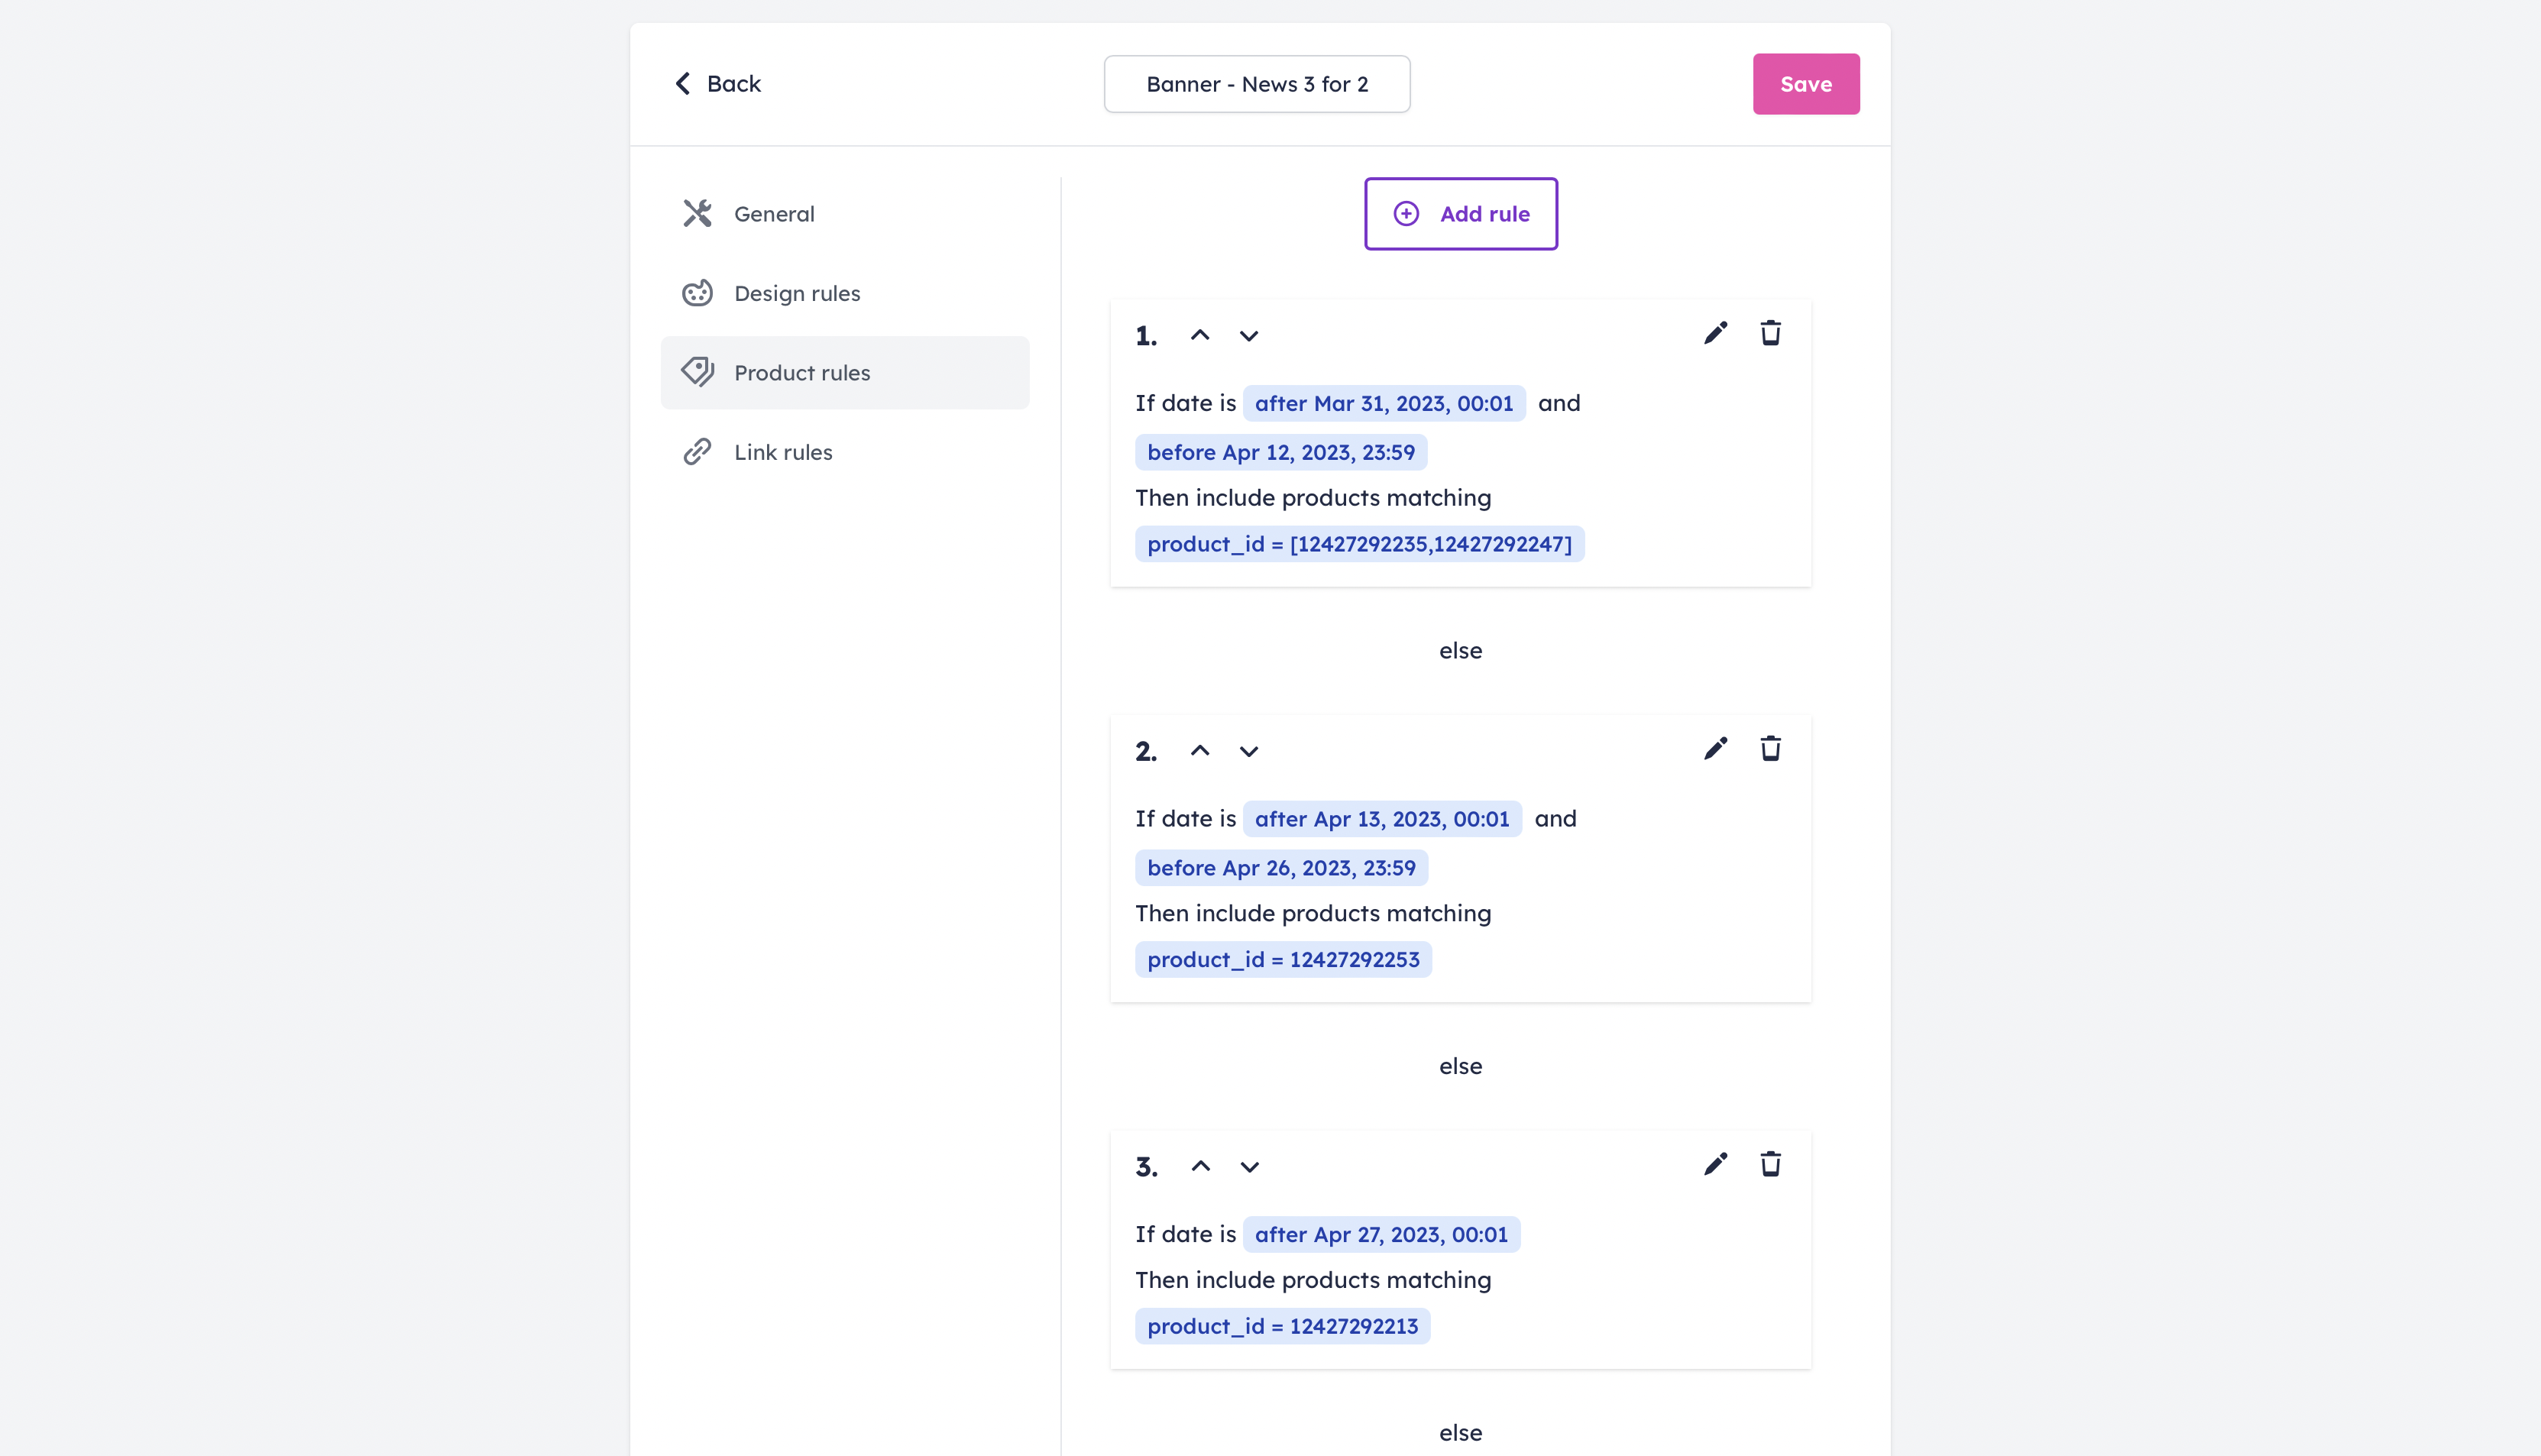
Product rules
You can change the product being shown based on the time period (i.e. to show off a new product, or a time-sensitive campaign), or URL parameters from your email system.
When adding a schedule condition, the product(s) specified will only be used during the time period of your choice.
Be aware that if the current date matches none of the specified schedules, no products will be shown.
A URL parameter condition is based on the contact properties stored in your email database. Depending on, for example, the Country or FavoriteProductCategory of the recipient, you can change which product will be included in the design.
Always make sure to check the supported contact properties of your email system to see which segmenting options are available to you.
If you’ve added URL parameters, remember to read the last section of this guide on “Specifying custom variables”.
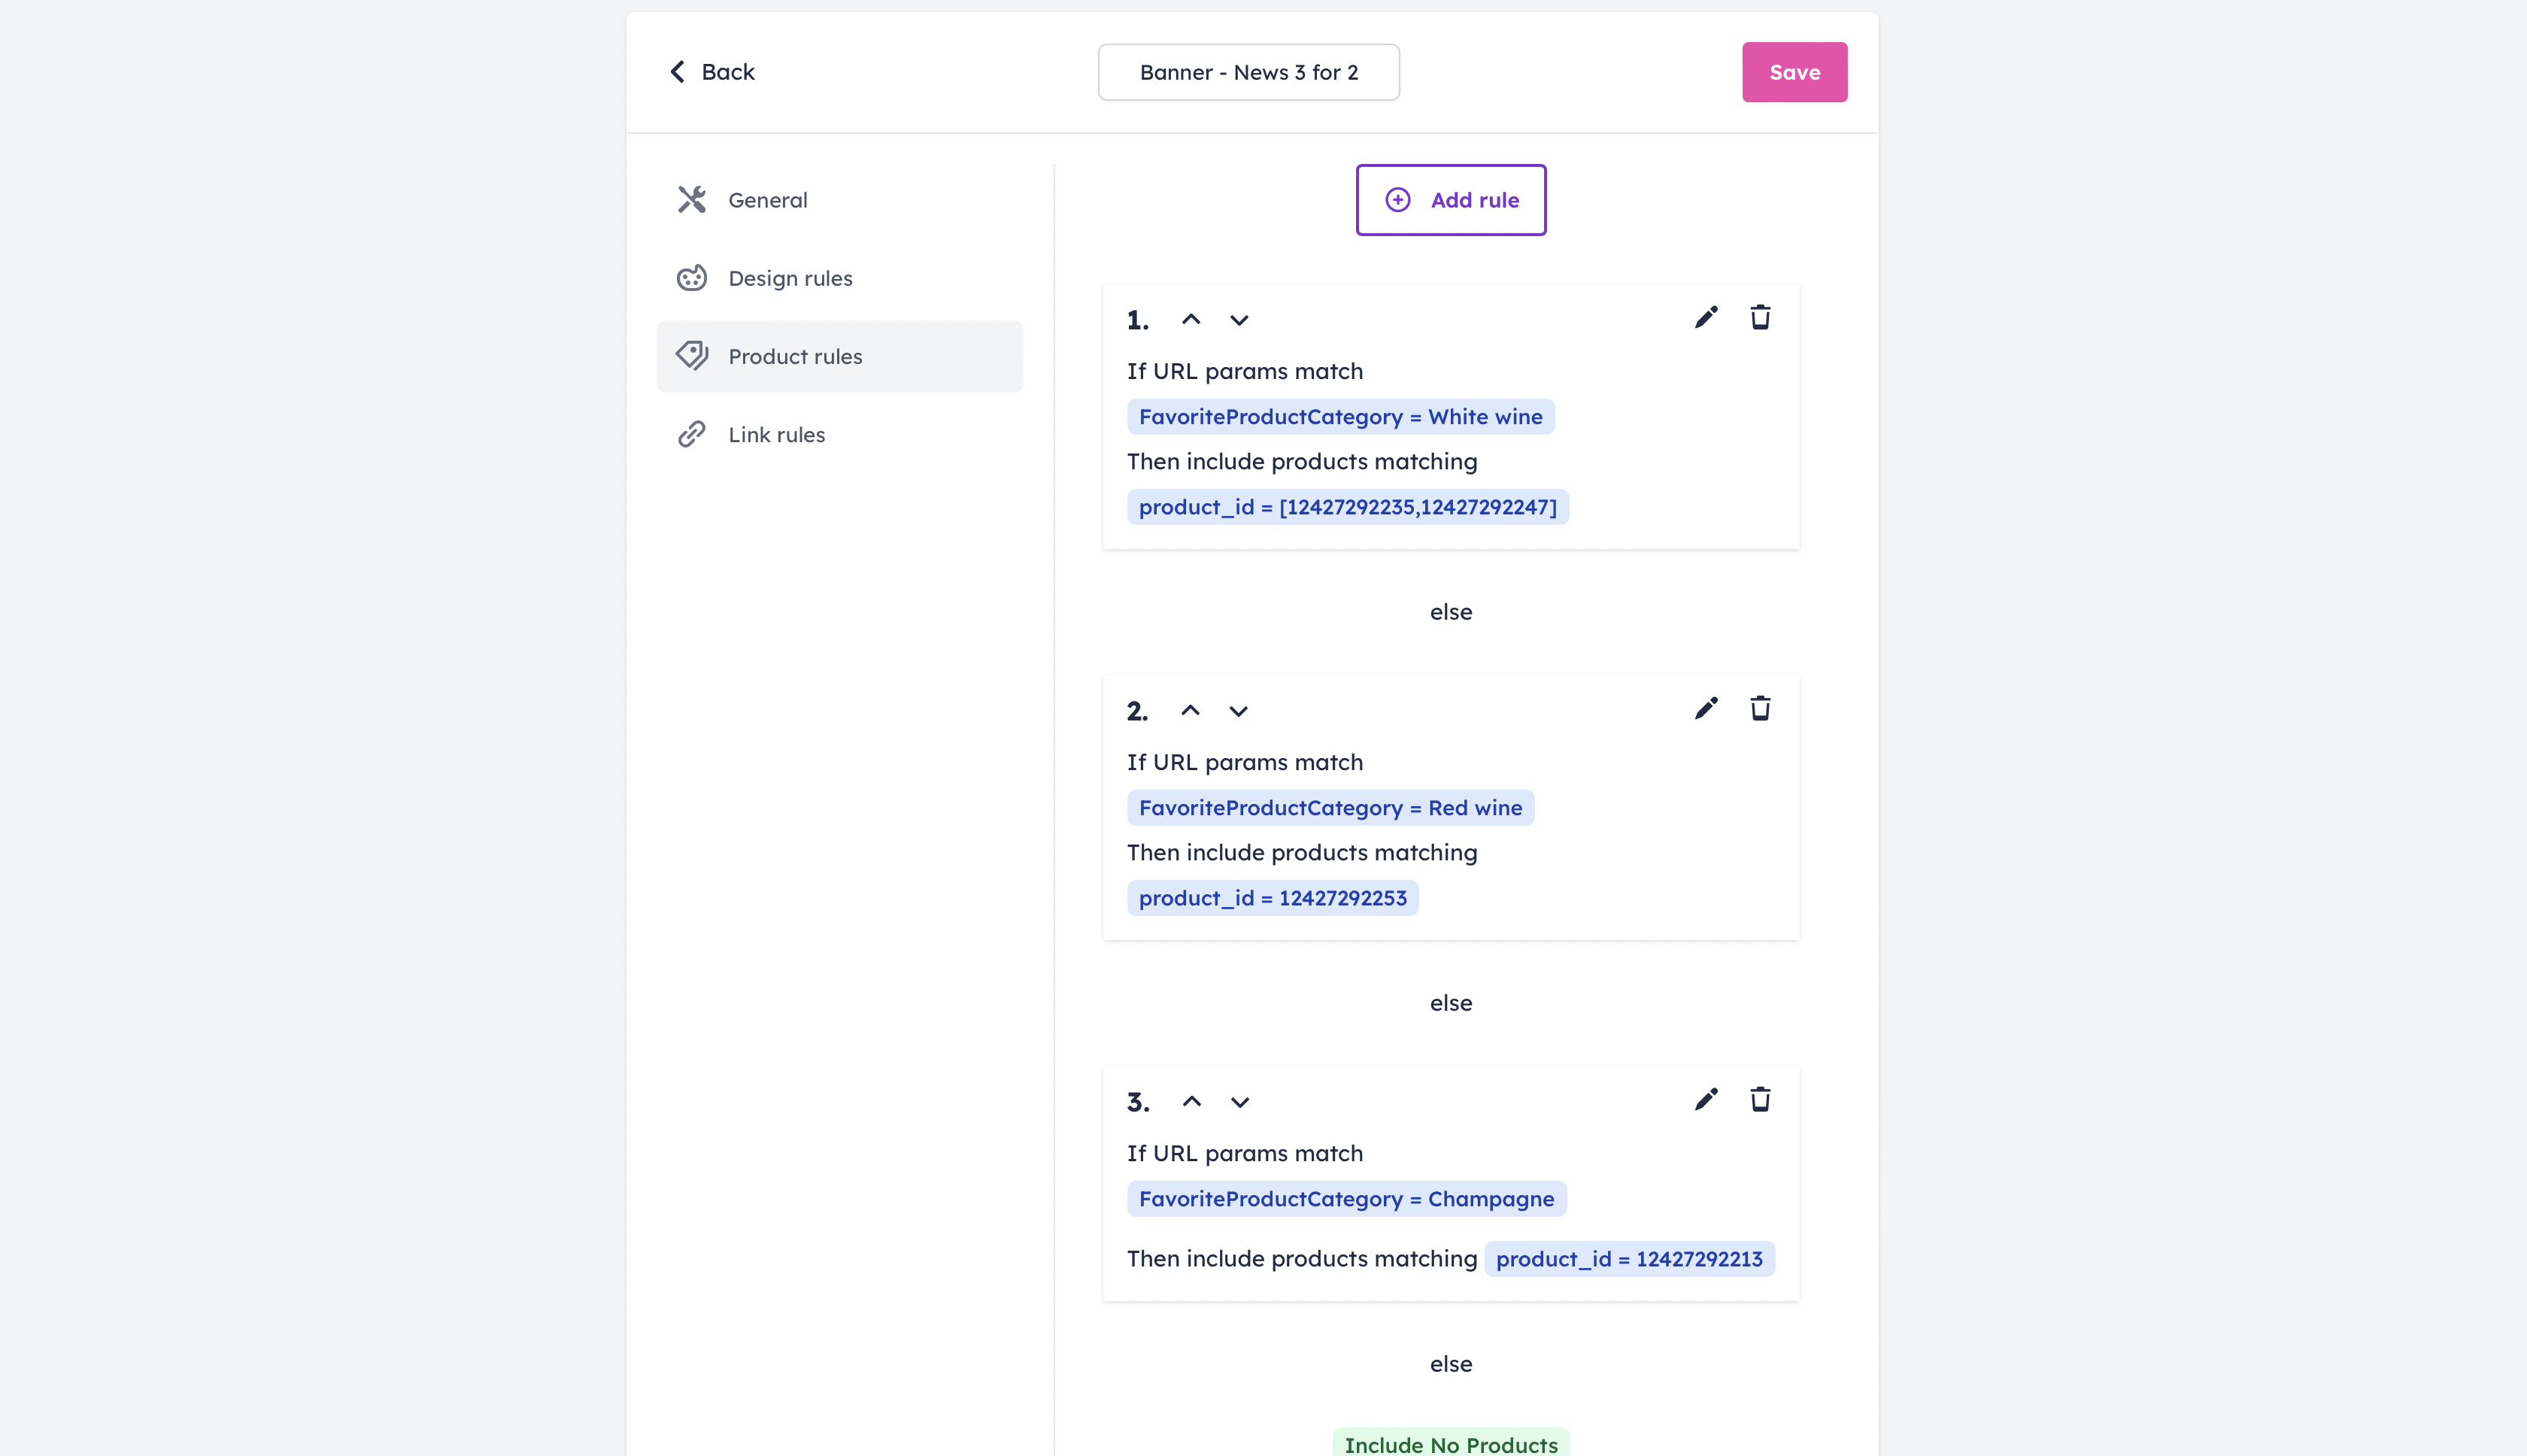
After adding the desired product rule condition, click on “Change products” and choose which items the banner should switch to.
Finally, click “Save rule”, and then “Save” in the top right corner.
Link rules
With no link rules, when the recipient clicks on the banner, the destination URL will, by default, always be the product page of the item being shown.
If you’d like to change this, and instead redirect the user to a different page if certain conditions are met, you can set up link rules based on a schedule, or URL parameters.
This can be done, for example, if you want to redirect the user to a category, instead of a specific product page. In our example, we’d like to send the customer to an easter sale category page from March 31st to April 12th.
Make sure to change the link method to “manual” and enter the desired destination.
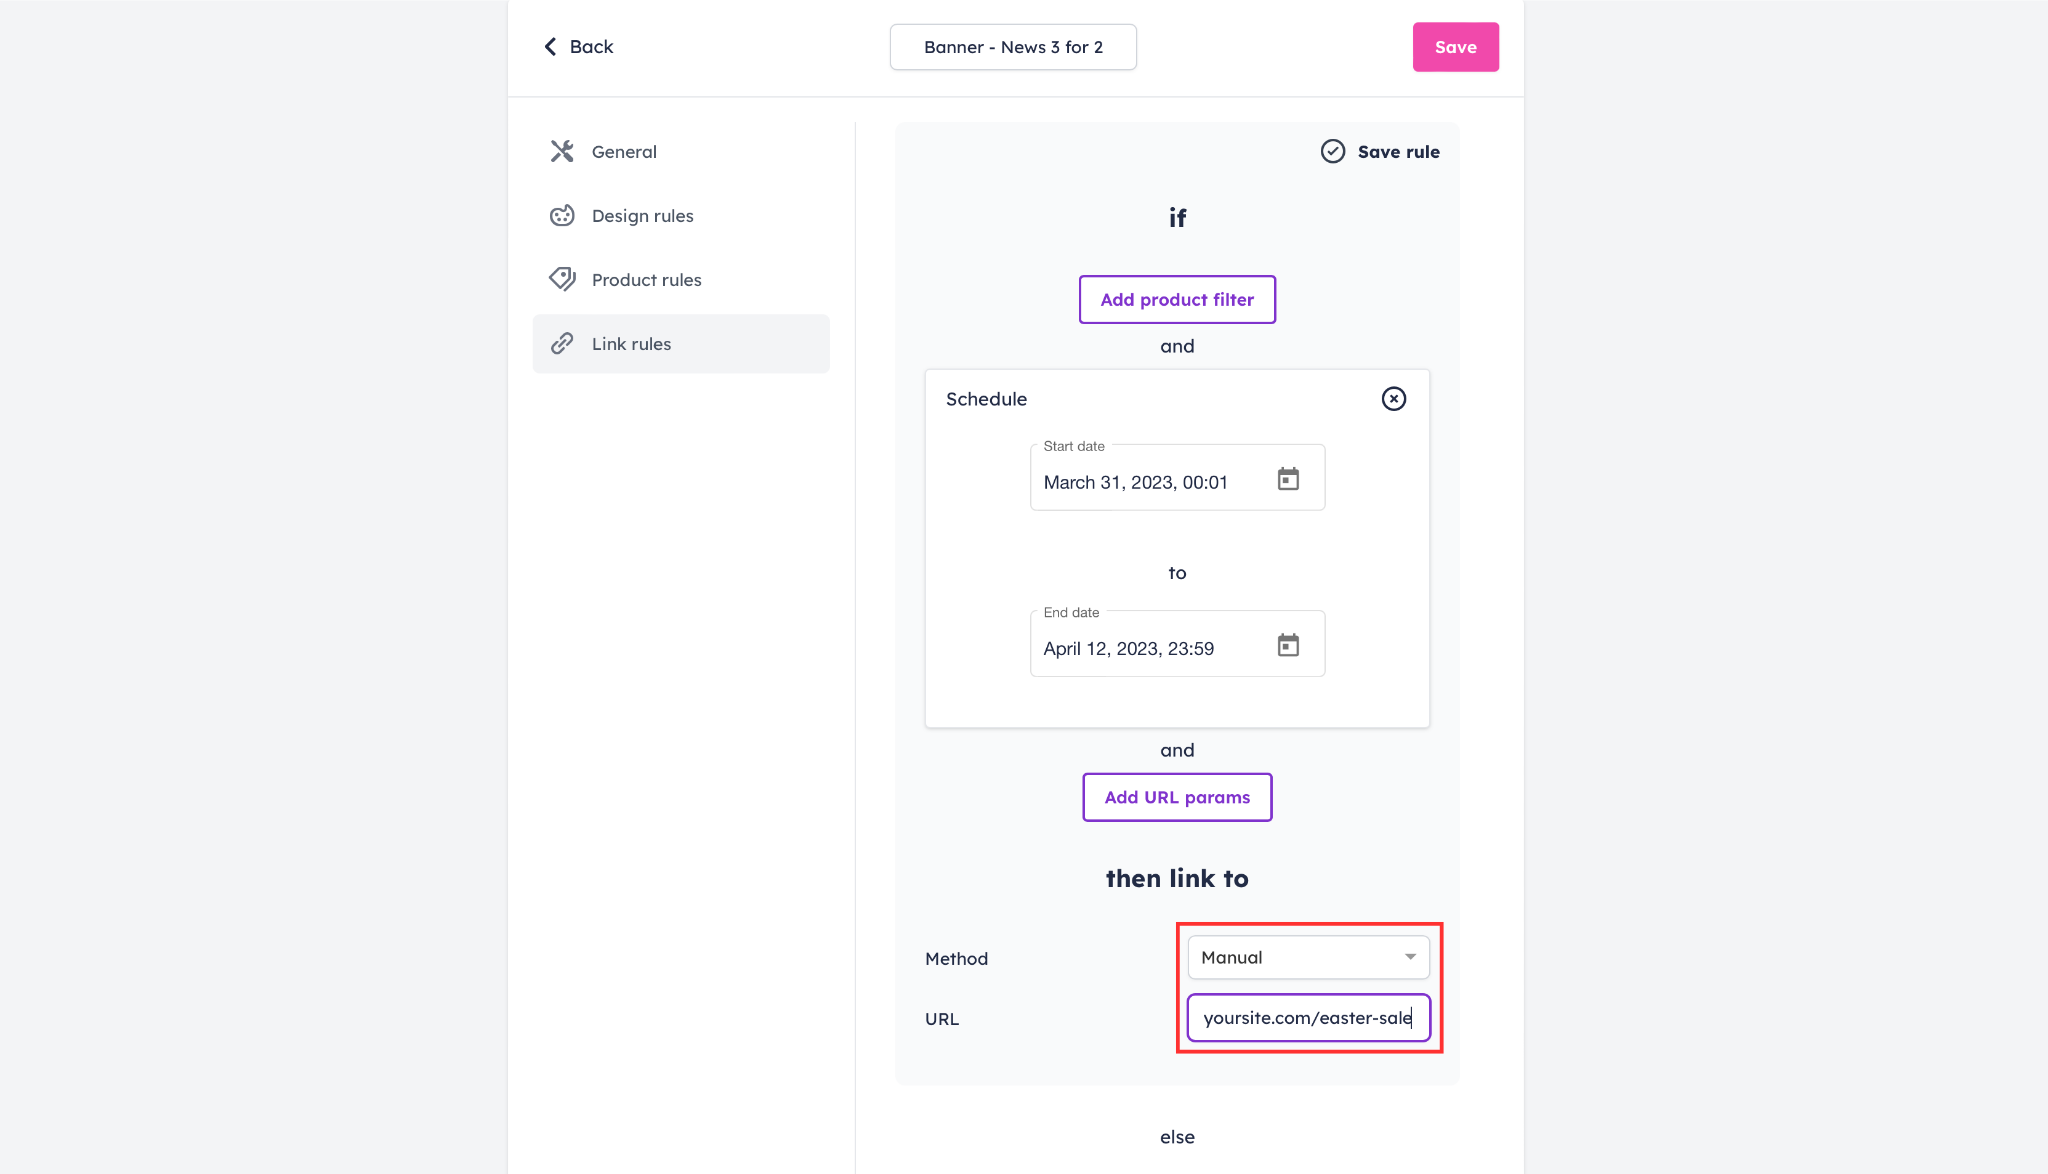
After adding the desired link rule condition and URL, click “Save rule”, and then “Save” in the top right corner.
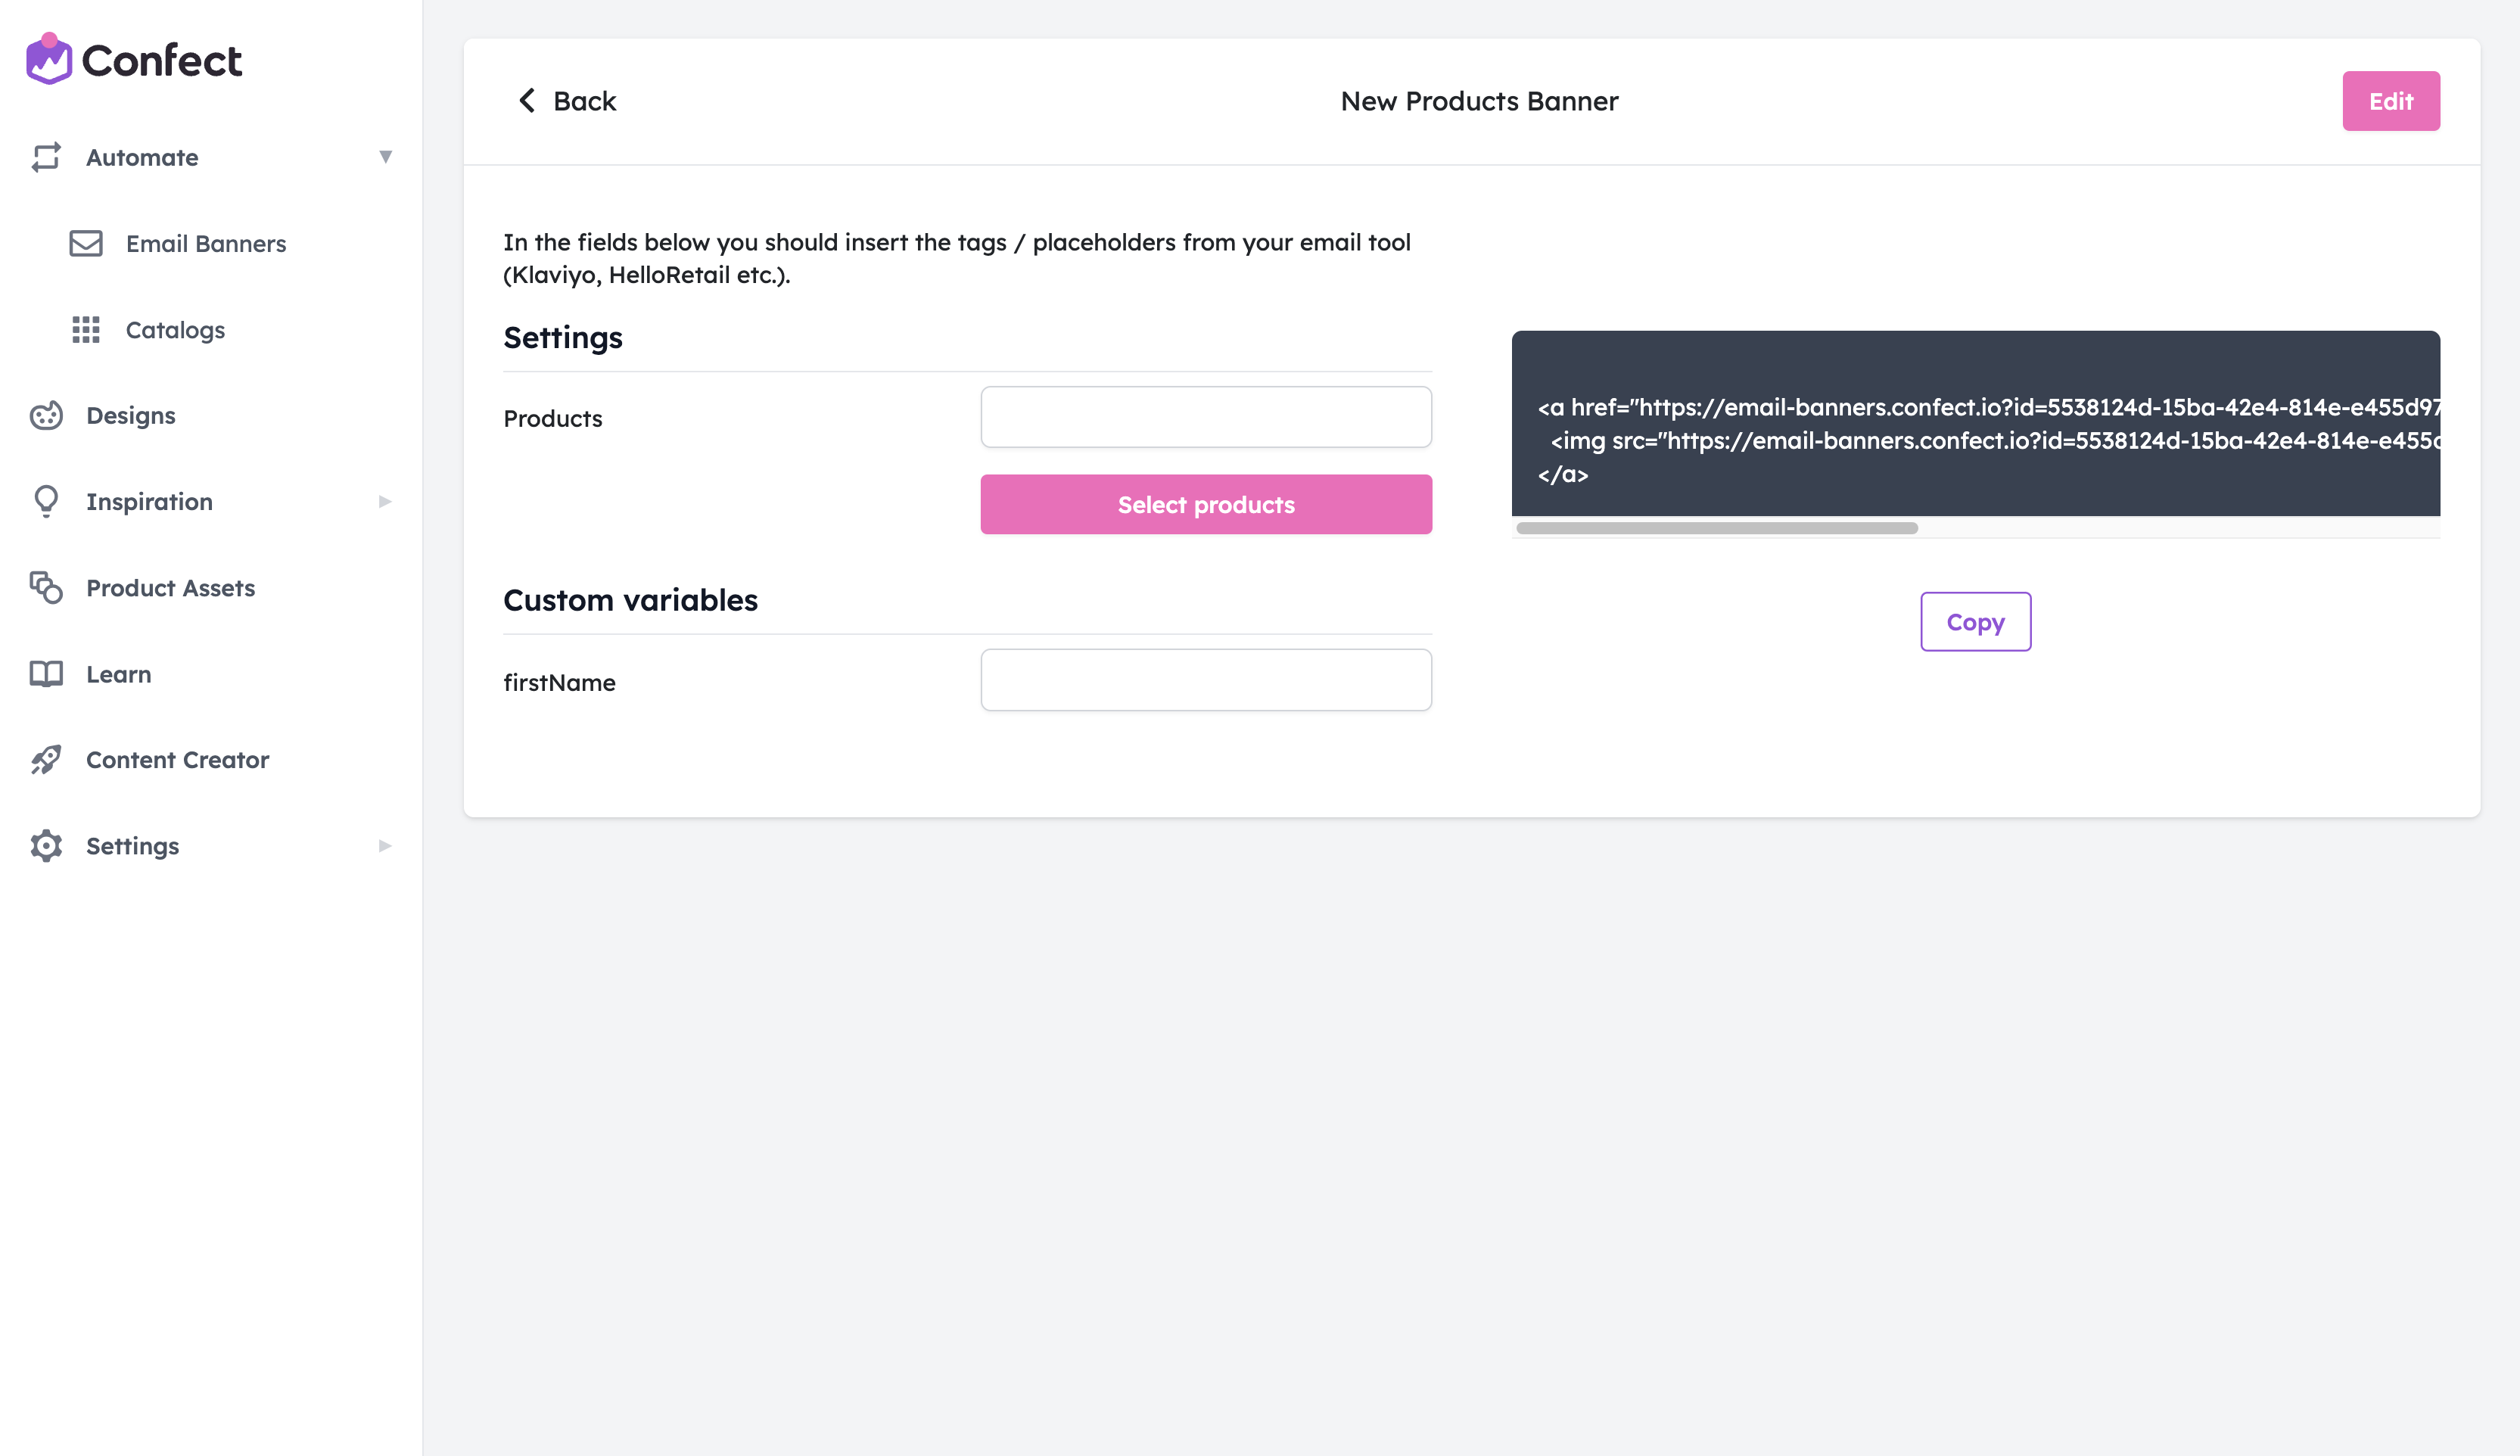
Specifying custom variables
If you’ve chosen to set up some rules based on URL parameters, after saving, you will have to specify the custom variables you’ve added.
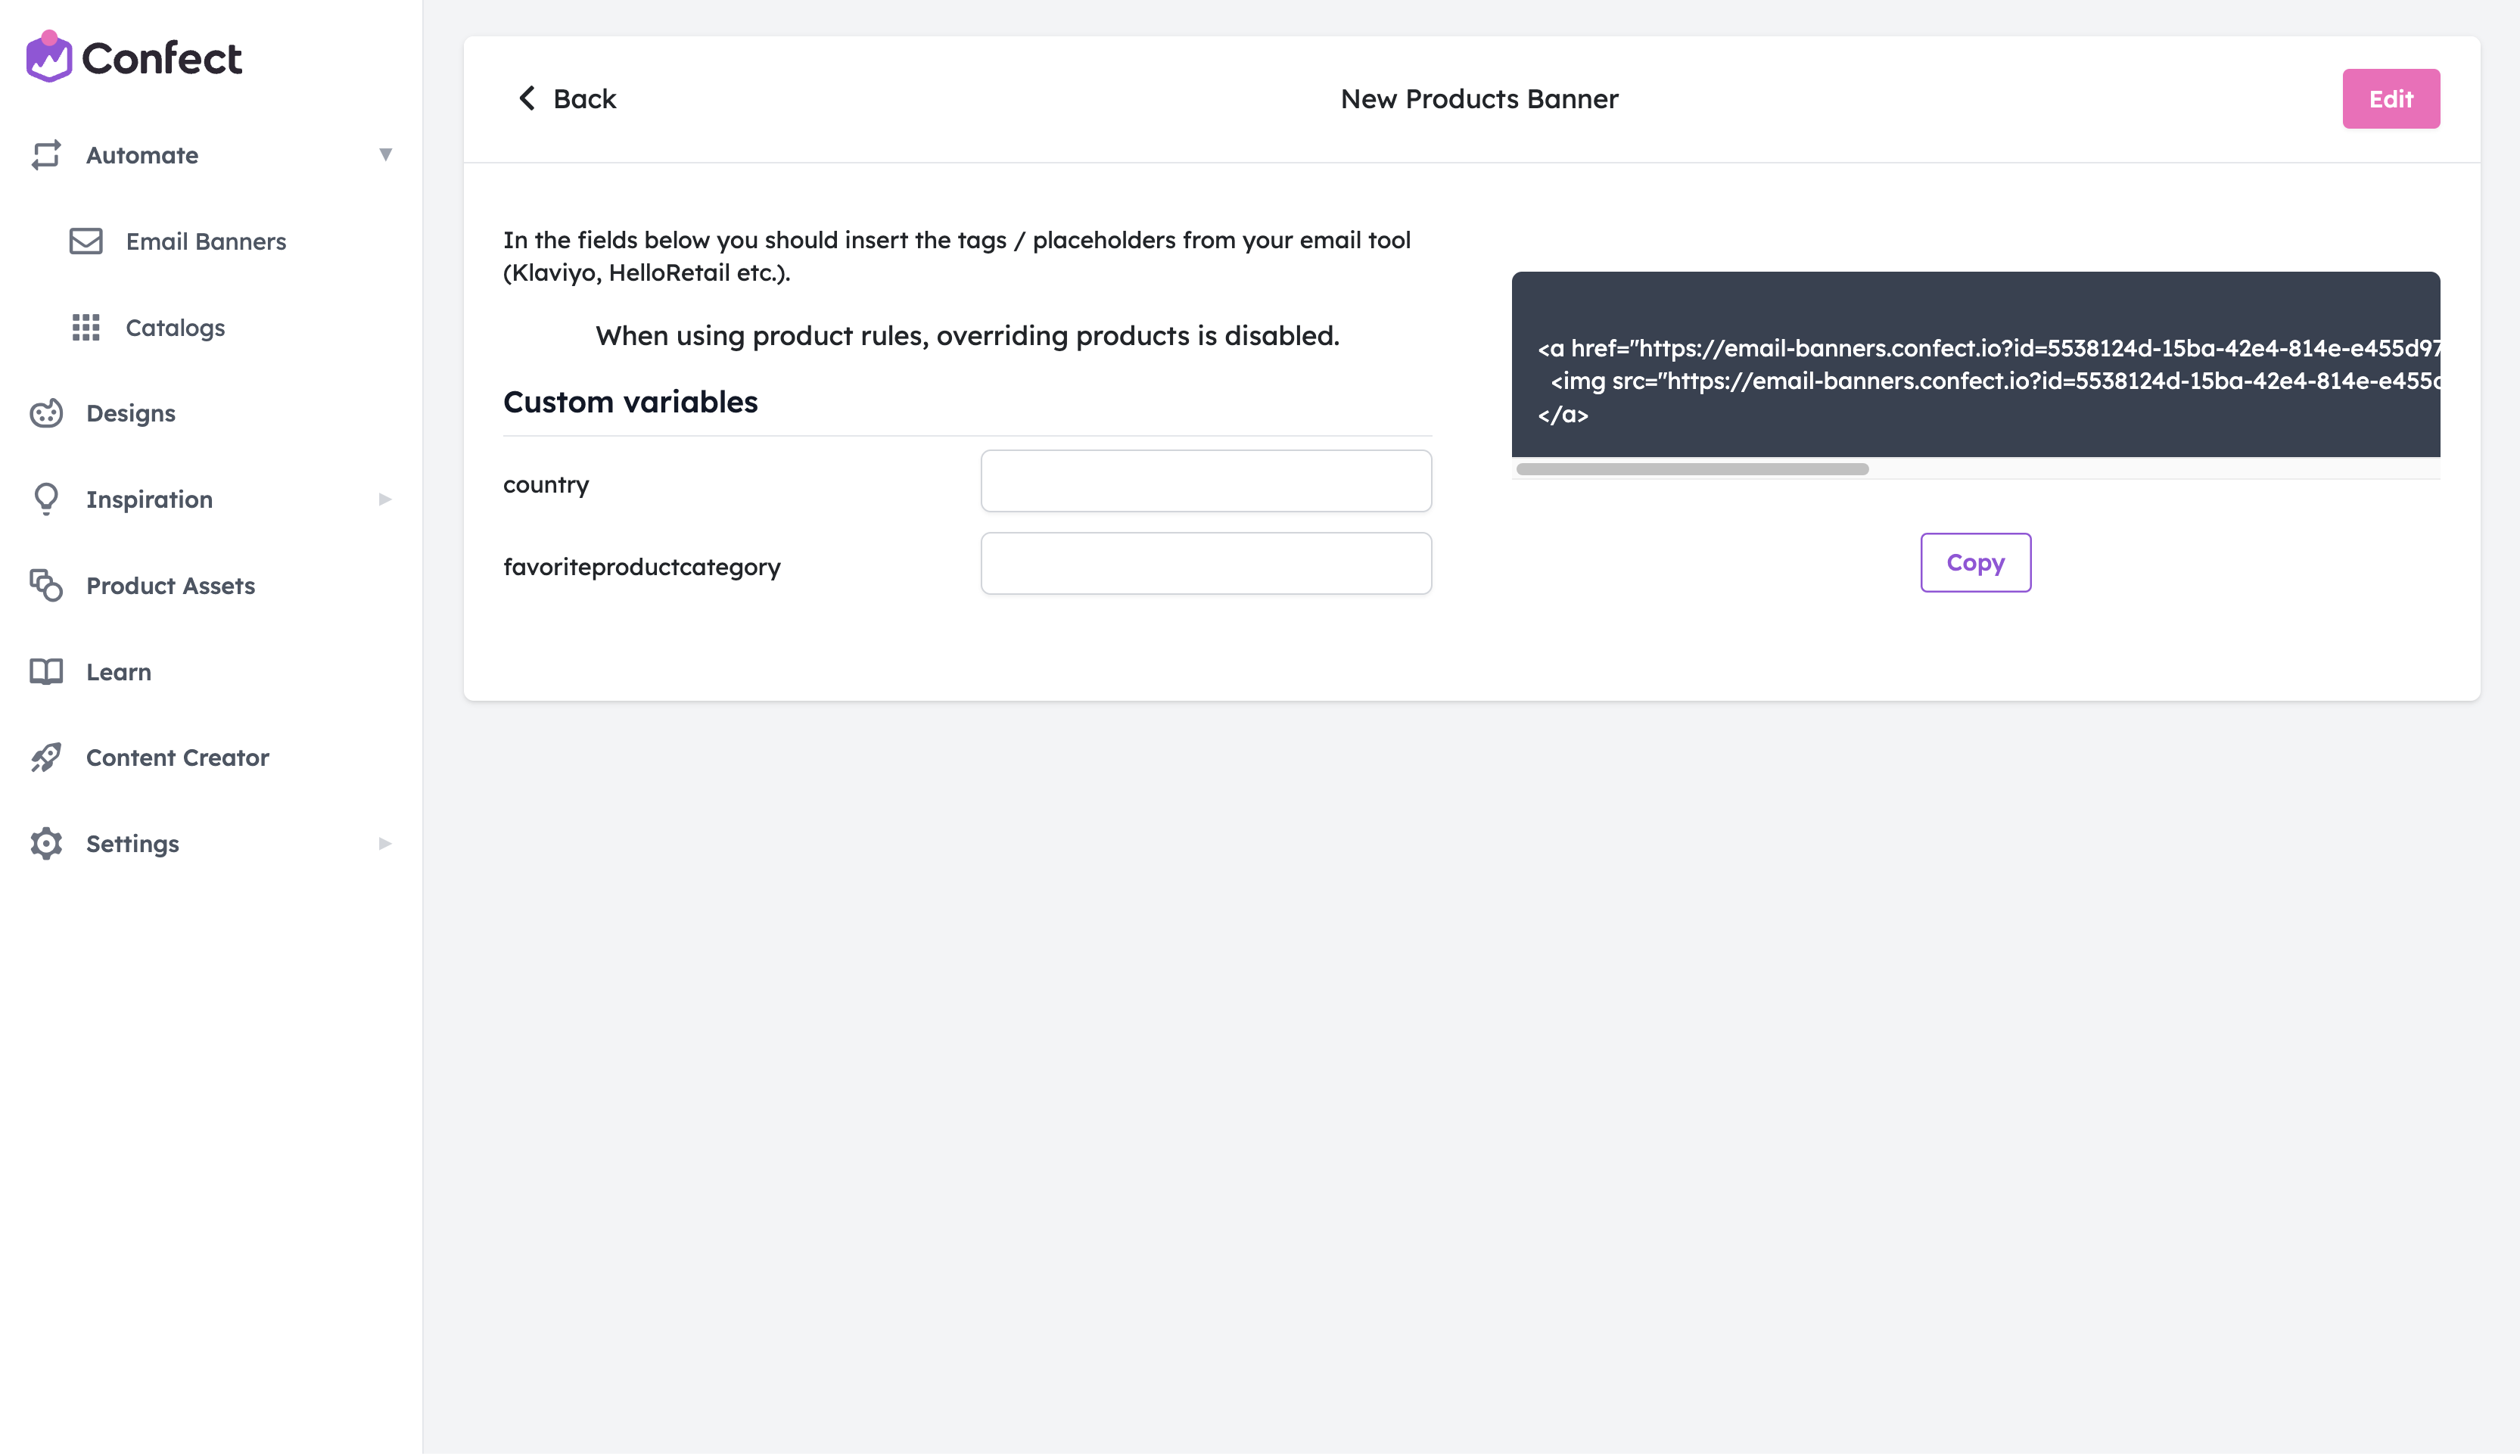
This has to be the exact same format as in your email software, in double curly brackets.
When adding these email software parameters, always make sure to check the specific formatting in your system! This will vary from one software to another (i.e. Hubspot: {{contact.property}}, Klaviyo: {{customer.property}}, Encharge: {{person.property}} ).
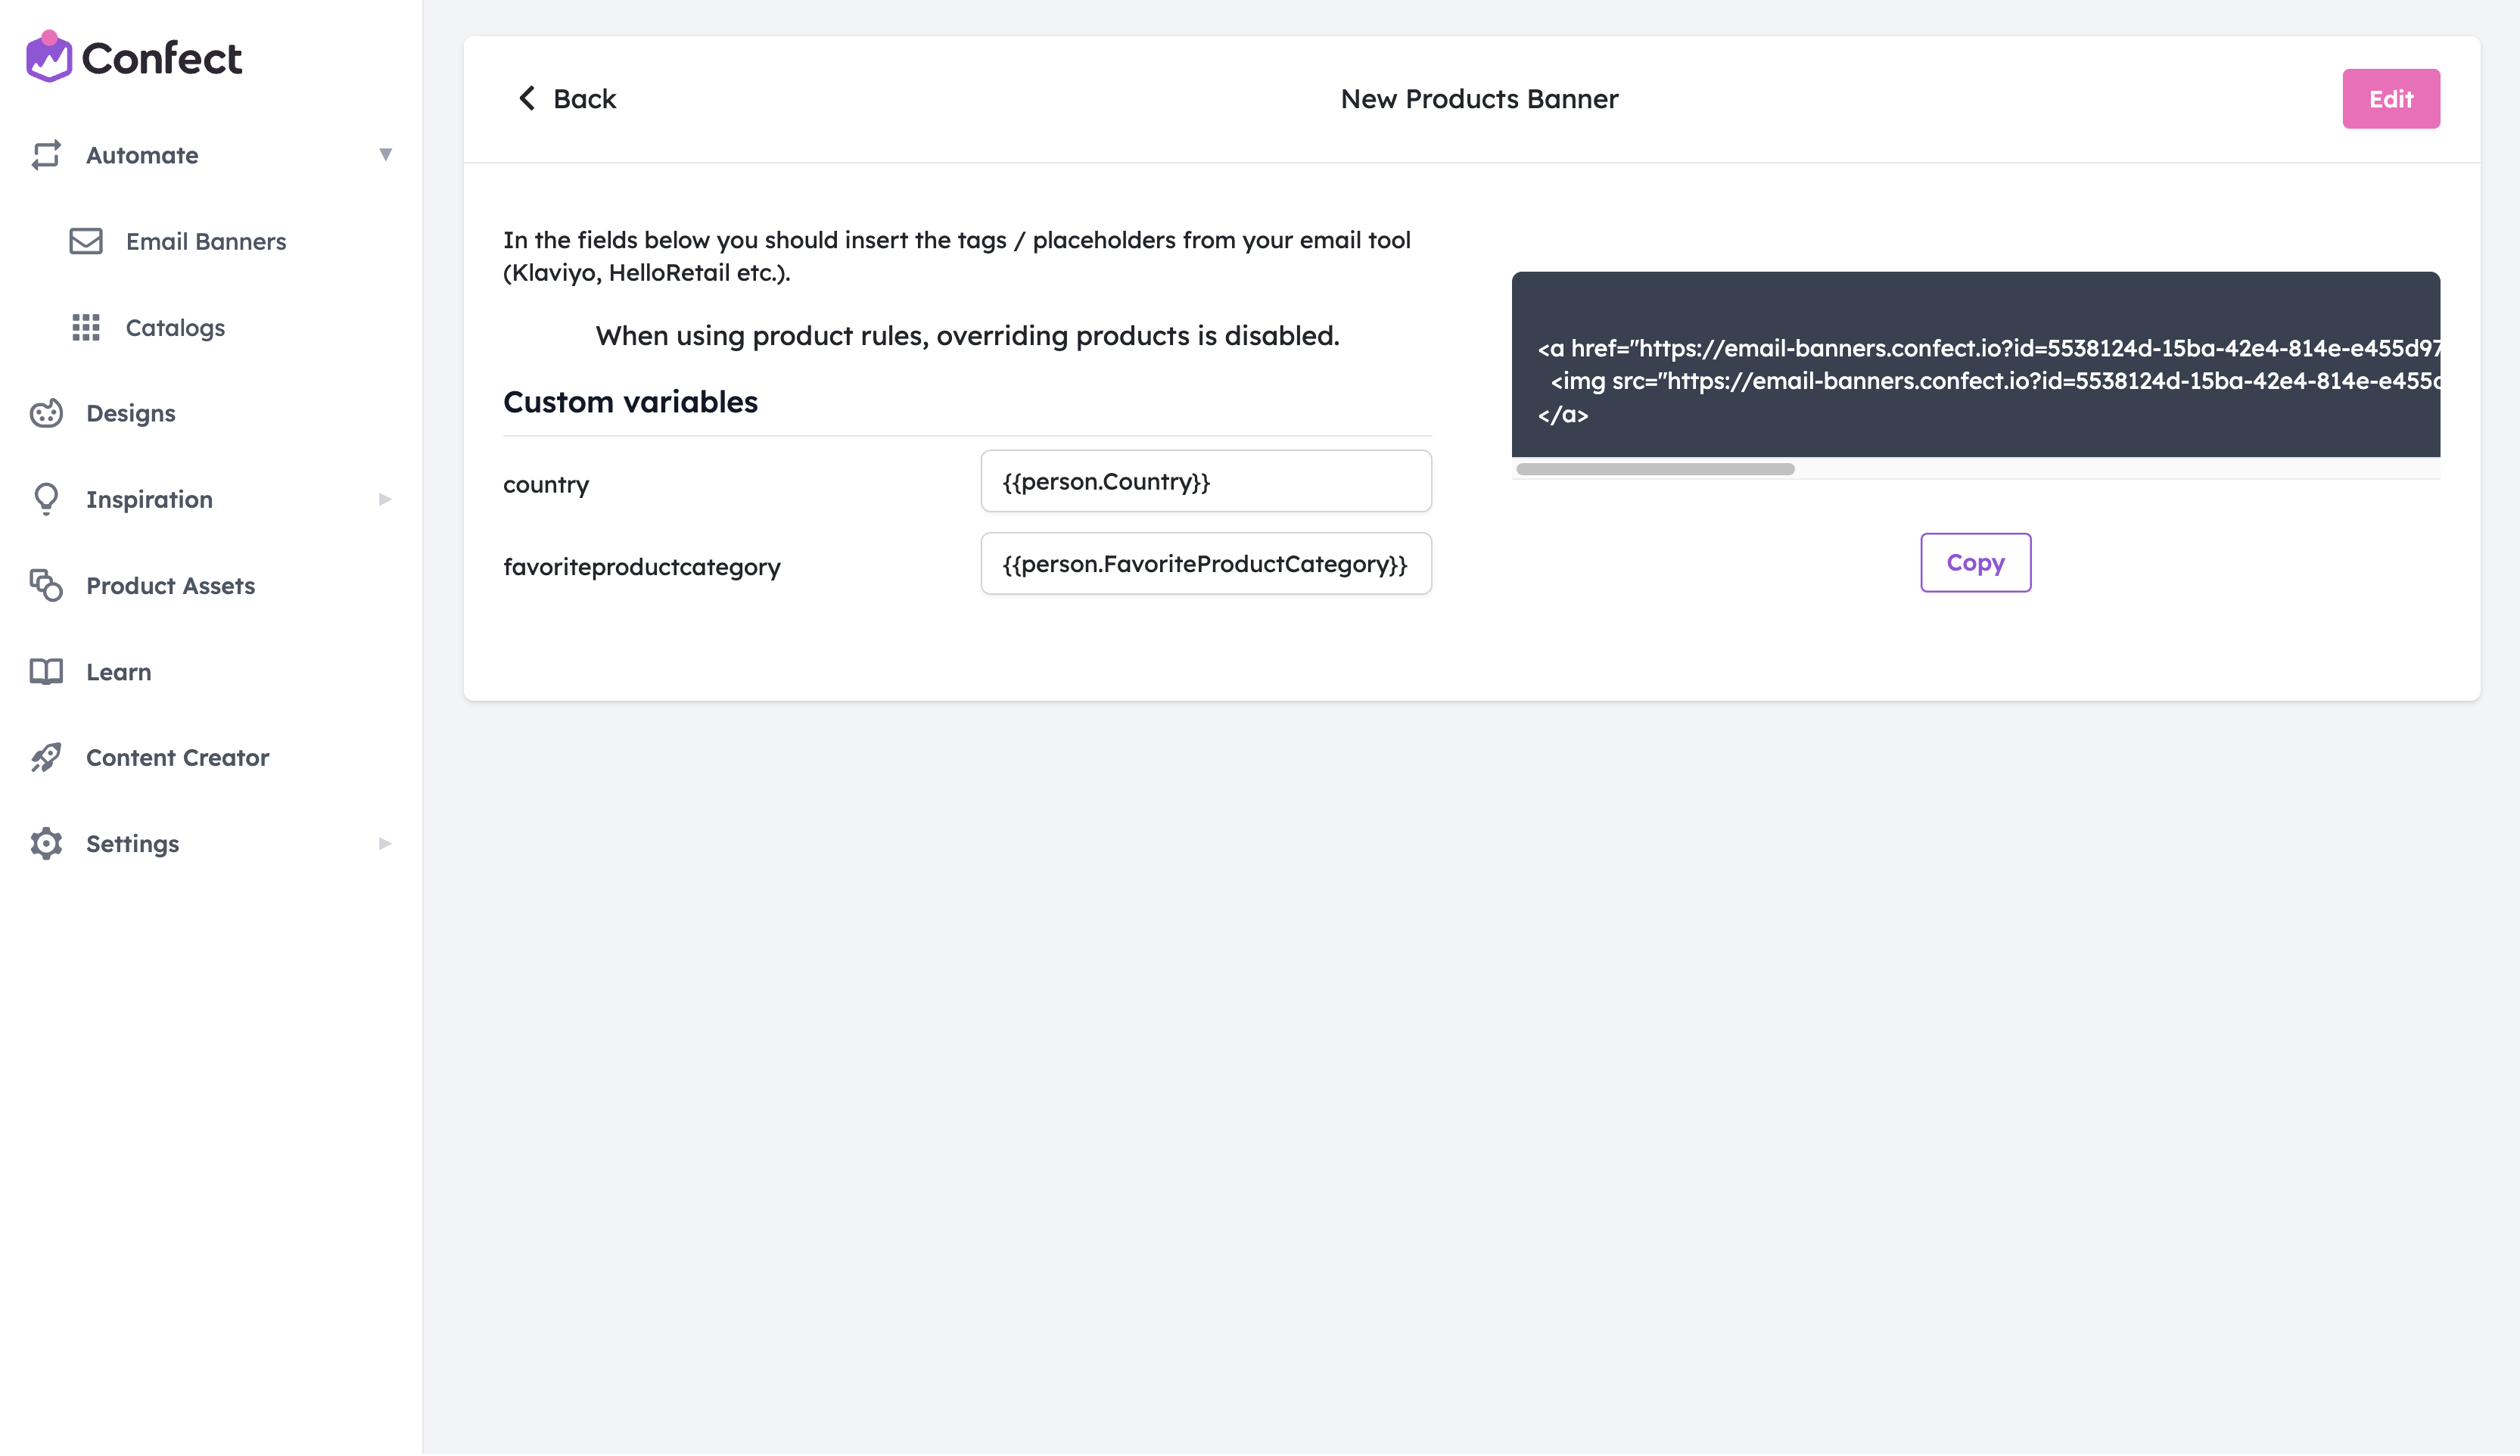
After doing this, click the “Copy” button underneath the code snippet.