Create an email banner automation
Use a design template to generate an email banner, ready to be embedded in your flowsTable of Contents
Creating an email banner automationSetting up the email banner automationCustom variablesProduct settings - manualProduct settings - dynamicIntegrating the email bannerOnce you’ve created a design template for your email banner, you’ll now have to set up an automation for this to be able to embed the banner into your email flows as an HMTL snippet.
Aside from simply using the image as is, there is a number of rules and conditions you can set up that will change the product or information inside the banner to fit your use case.
Creating an email banner automation
First, go into “Automate” and “Email Banners”.
Here, you have to click “Create new” in the top right corner.
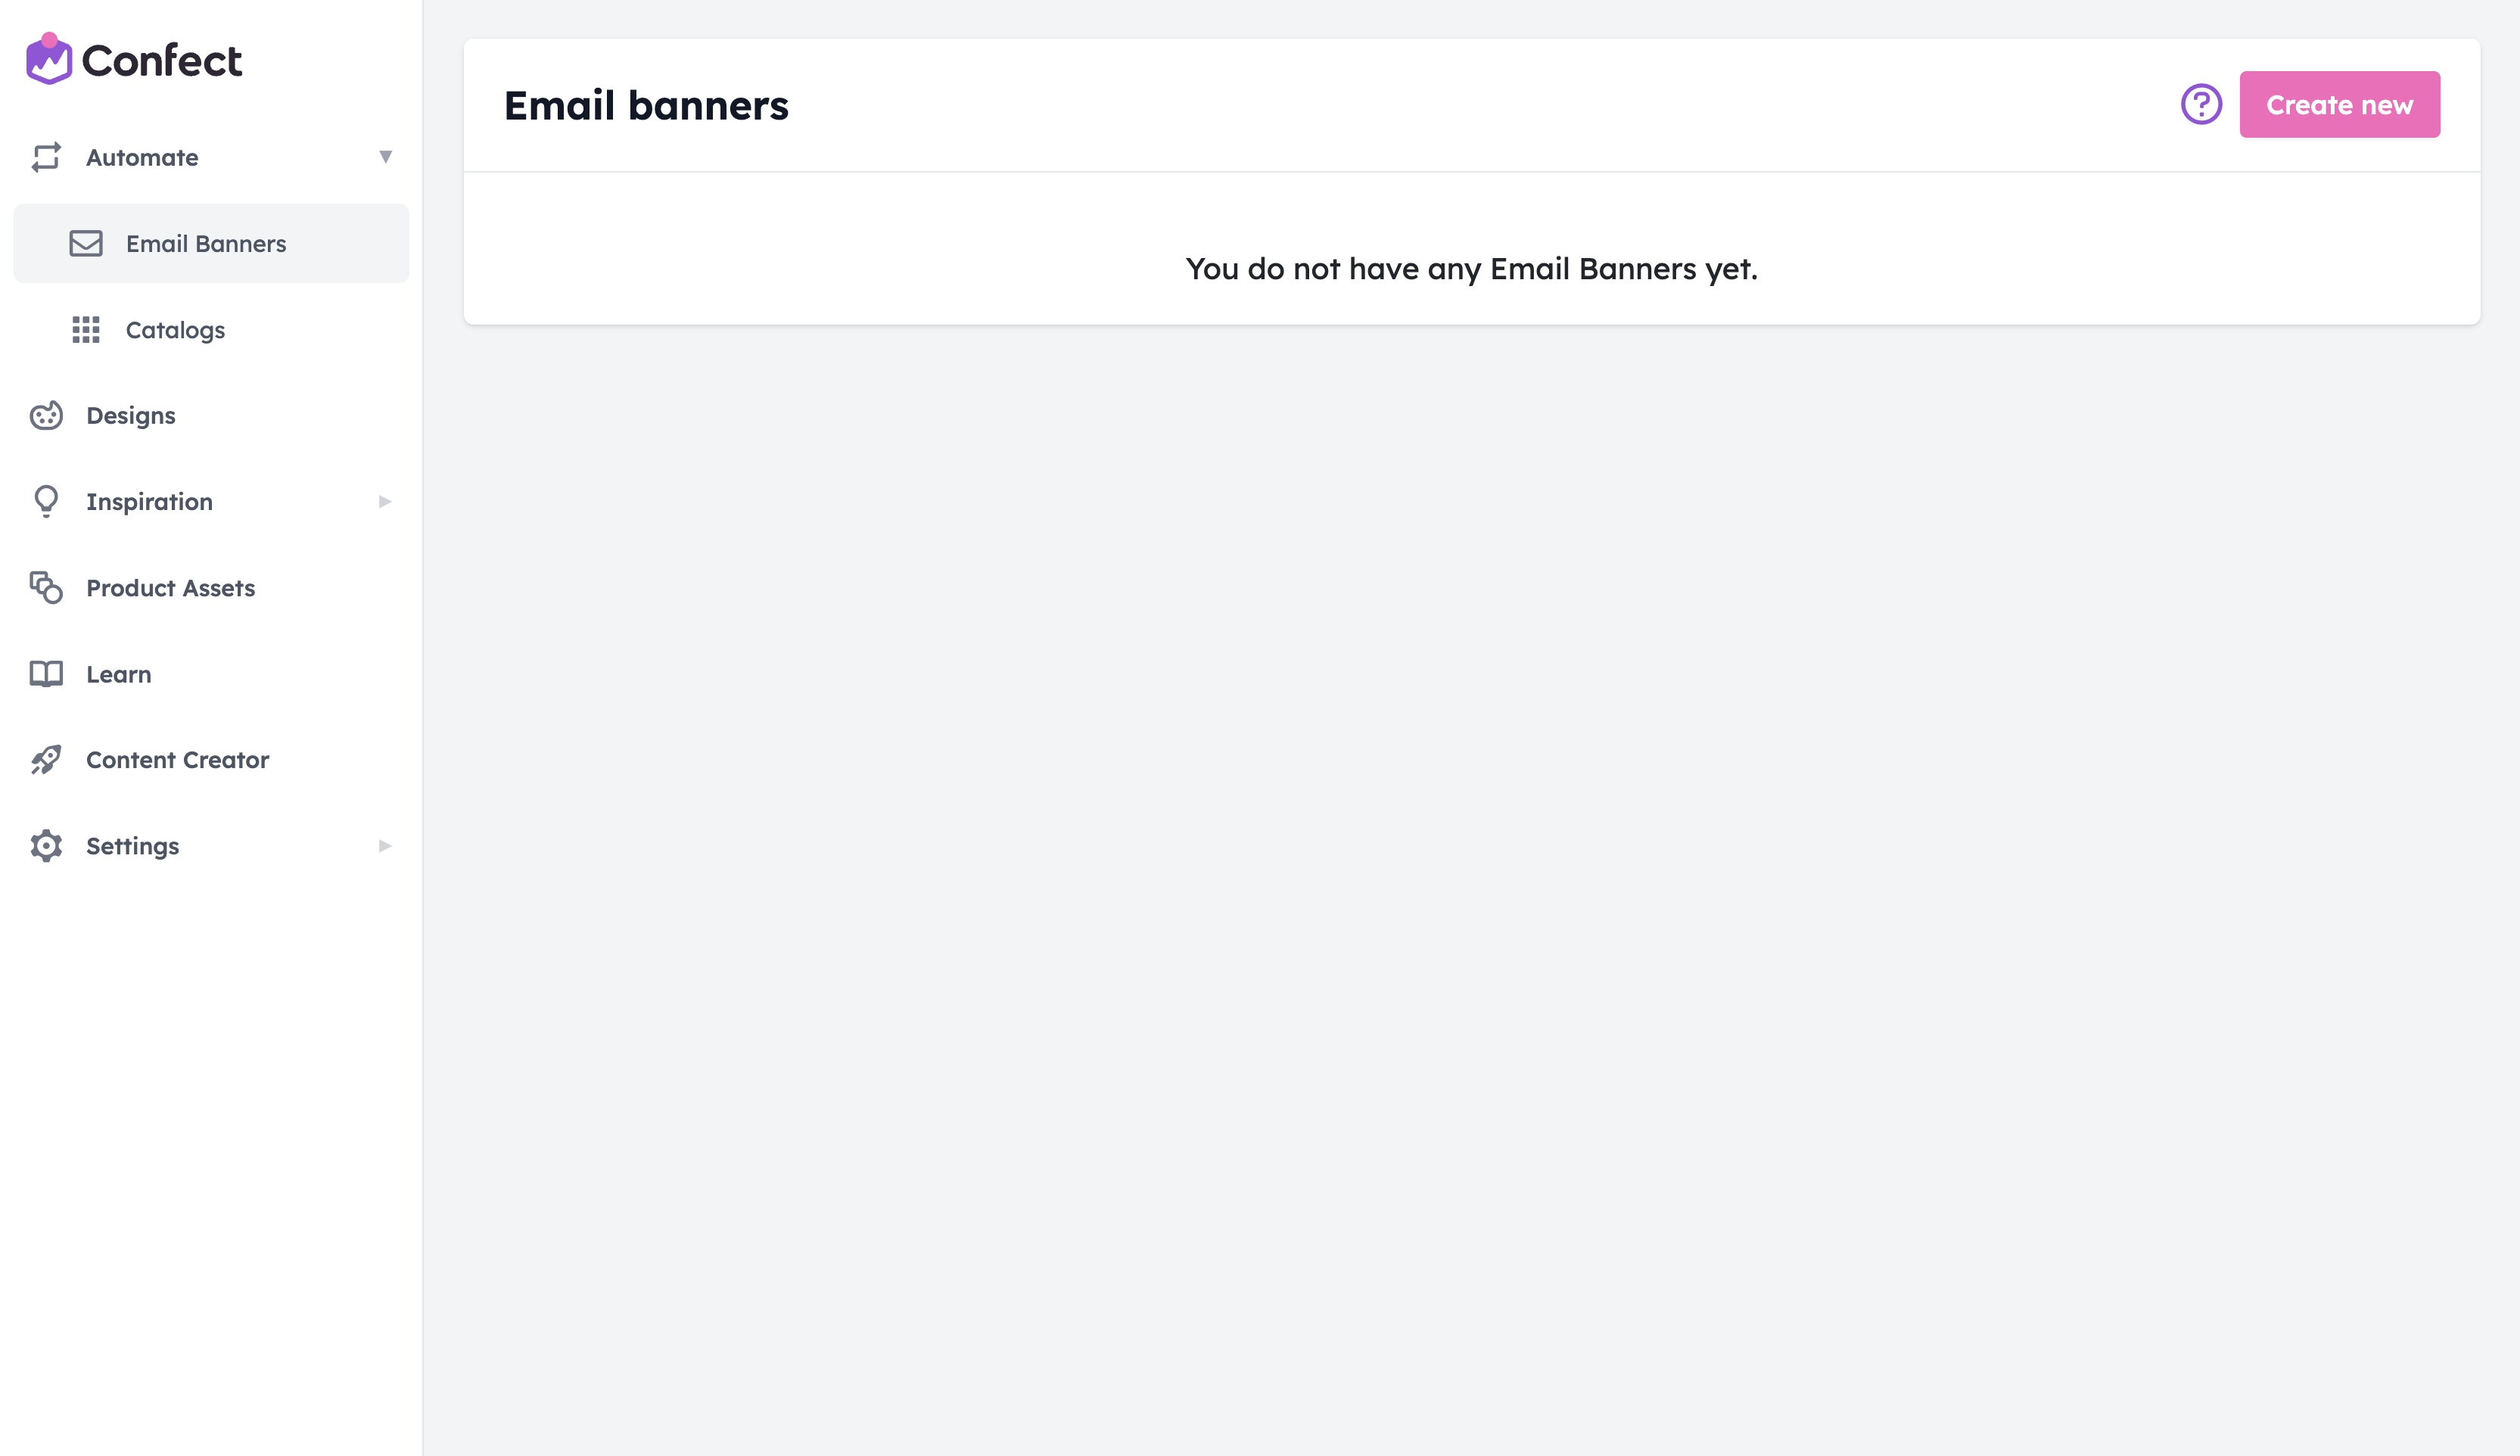
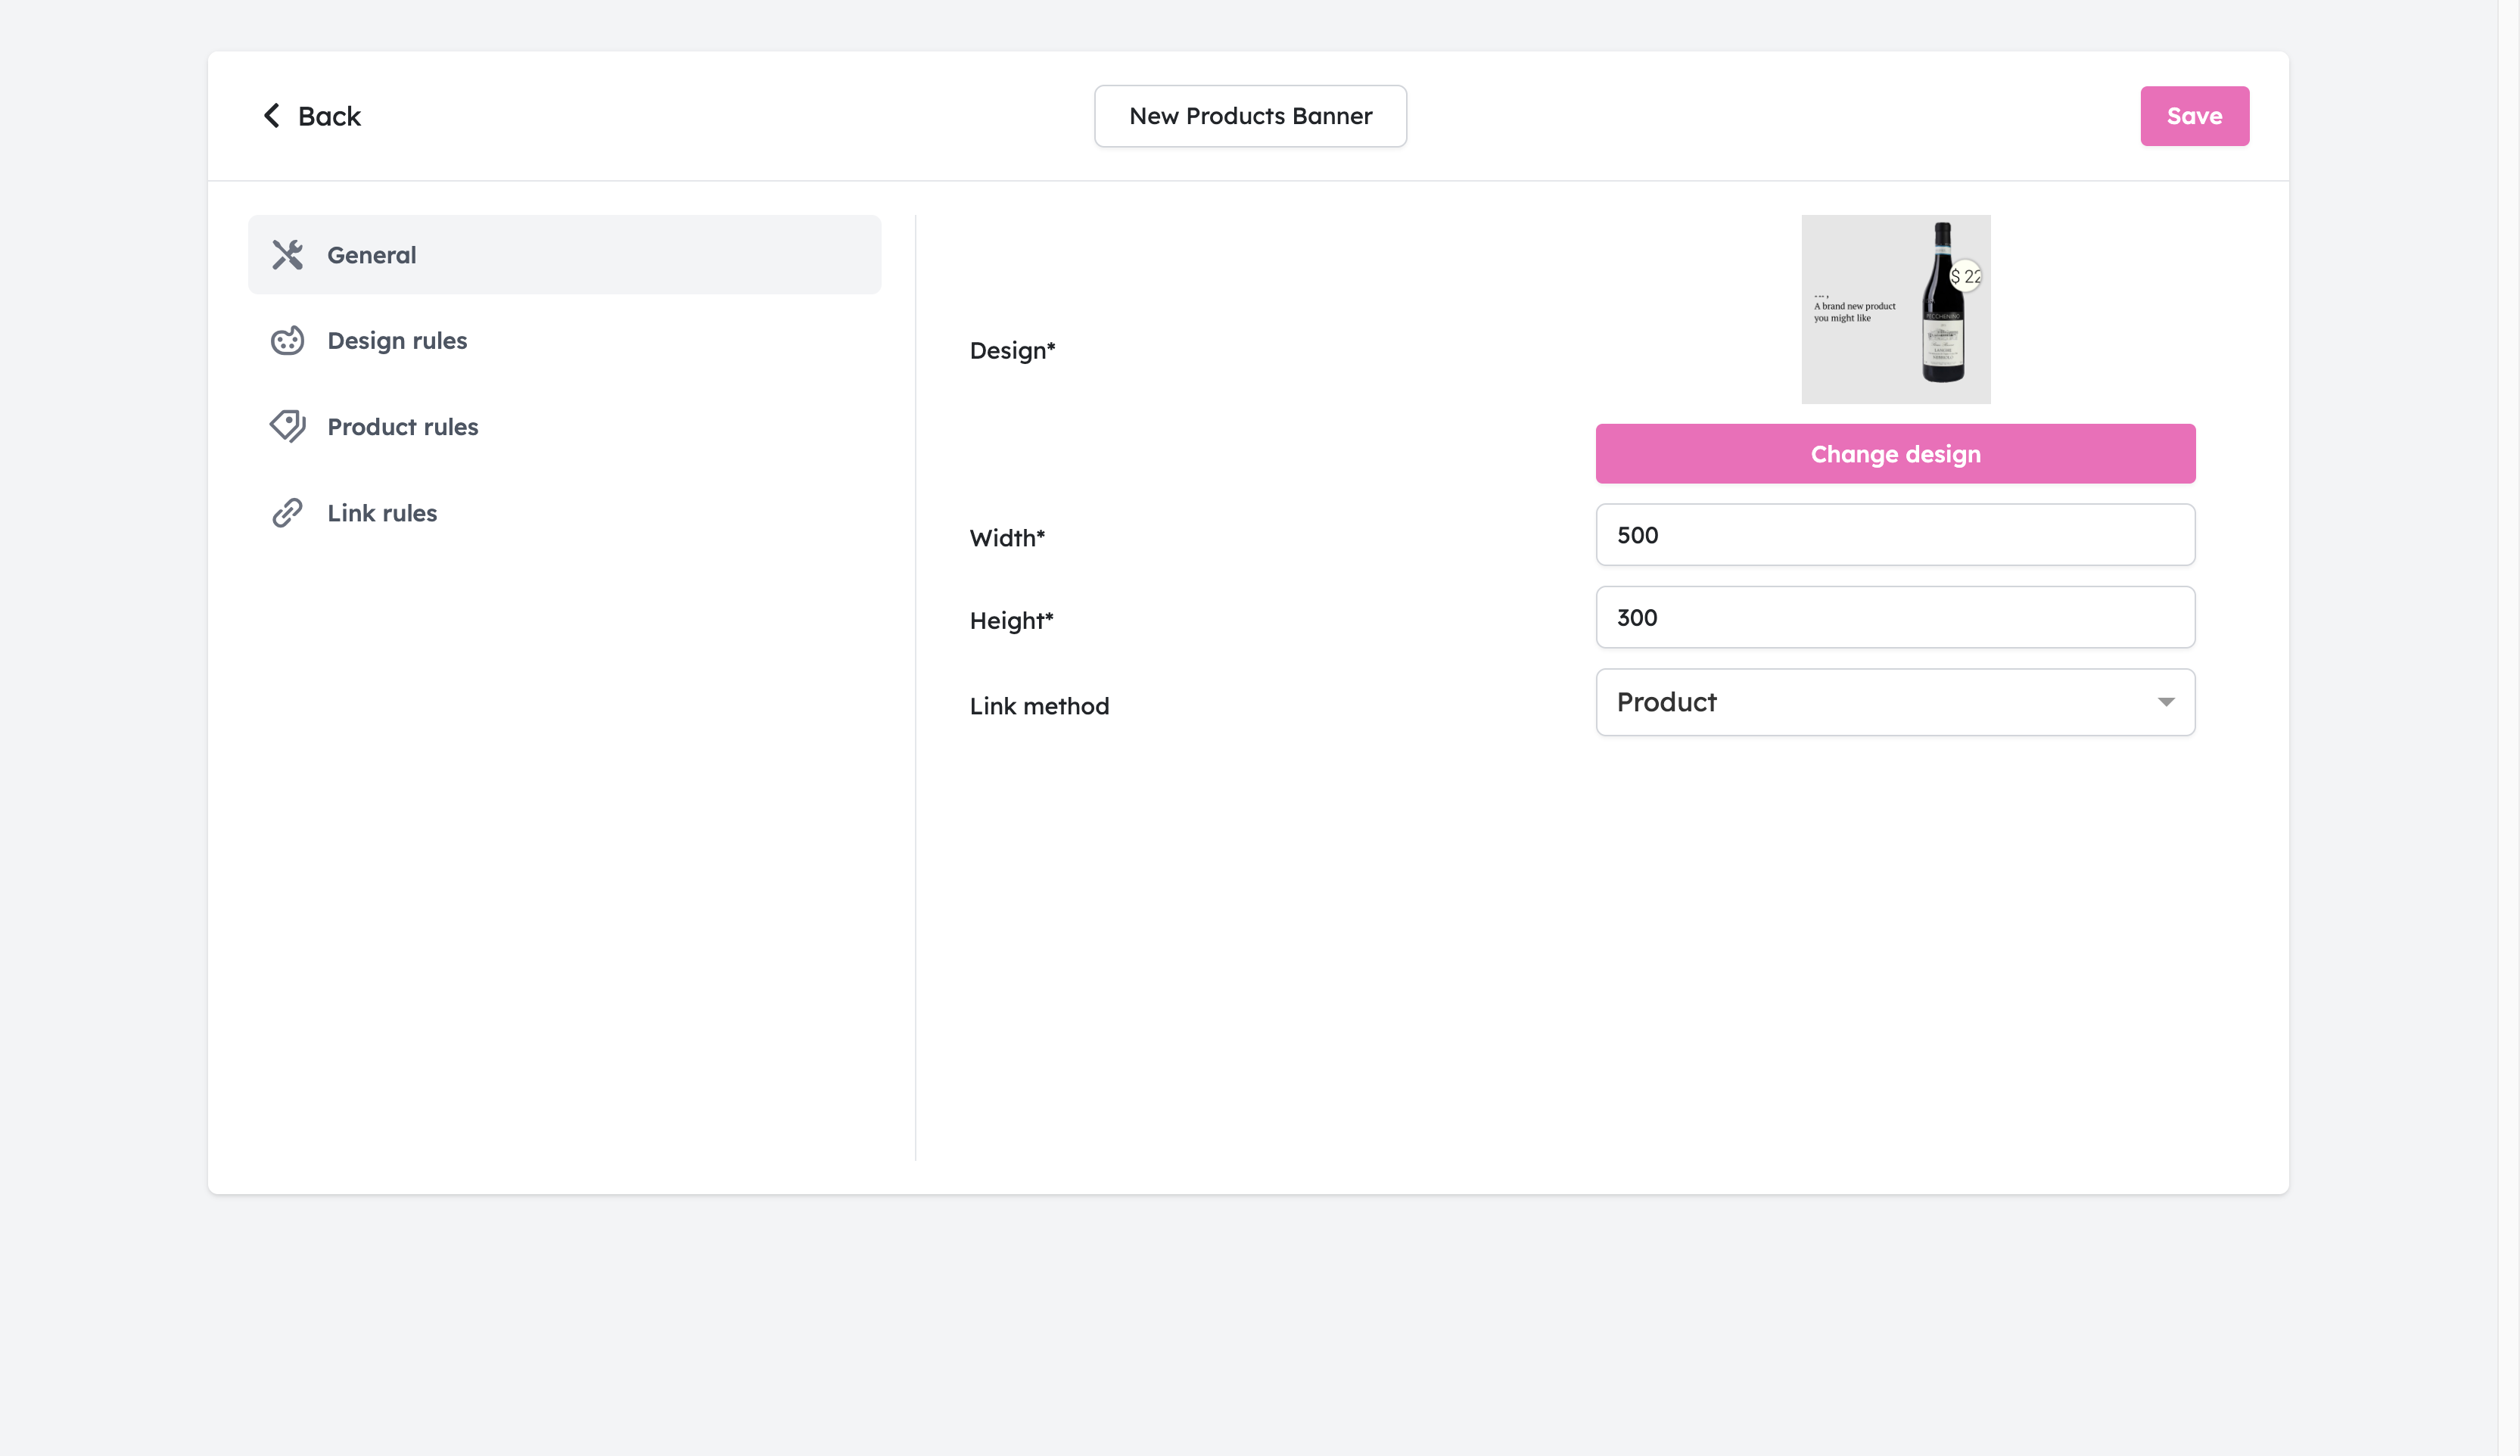
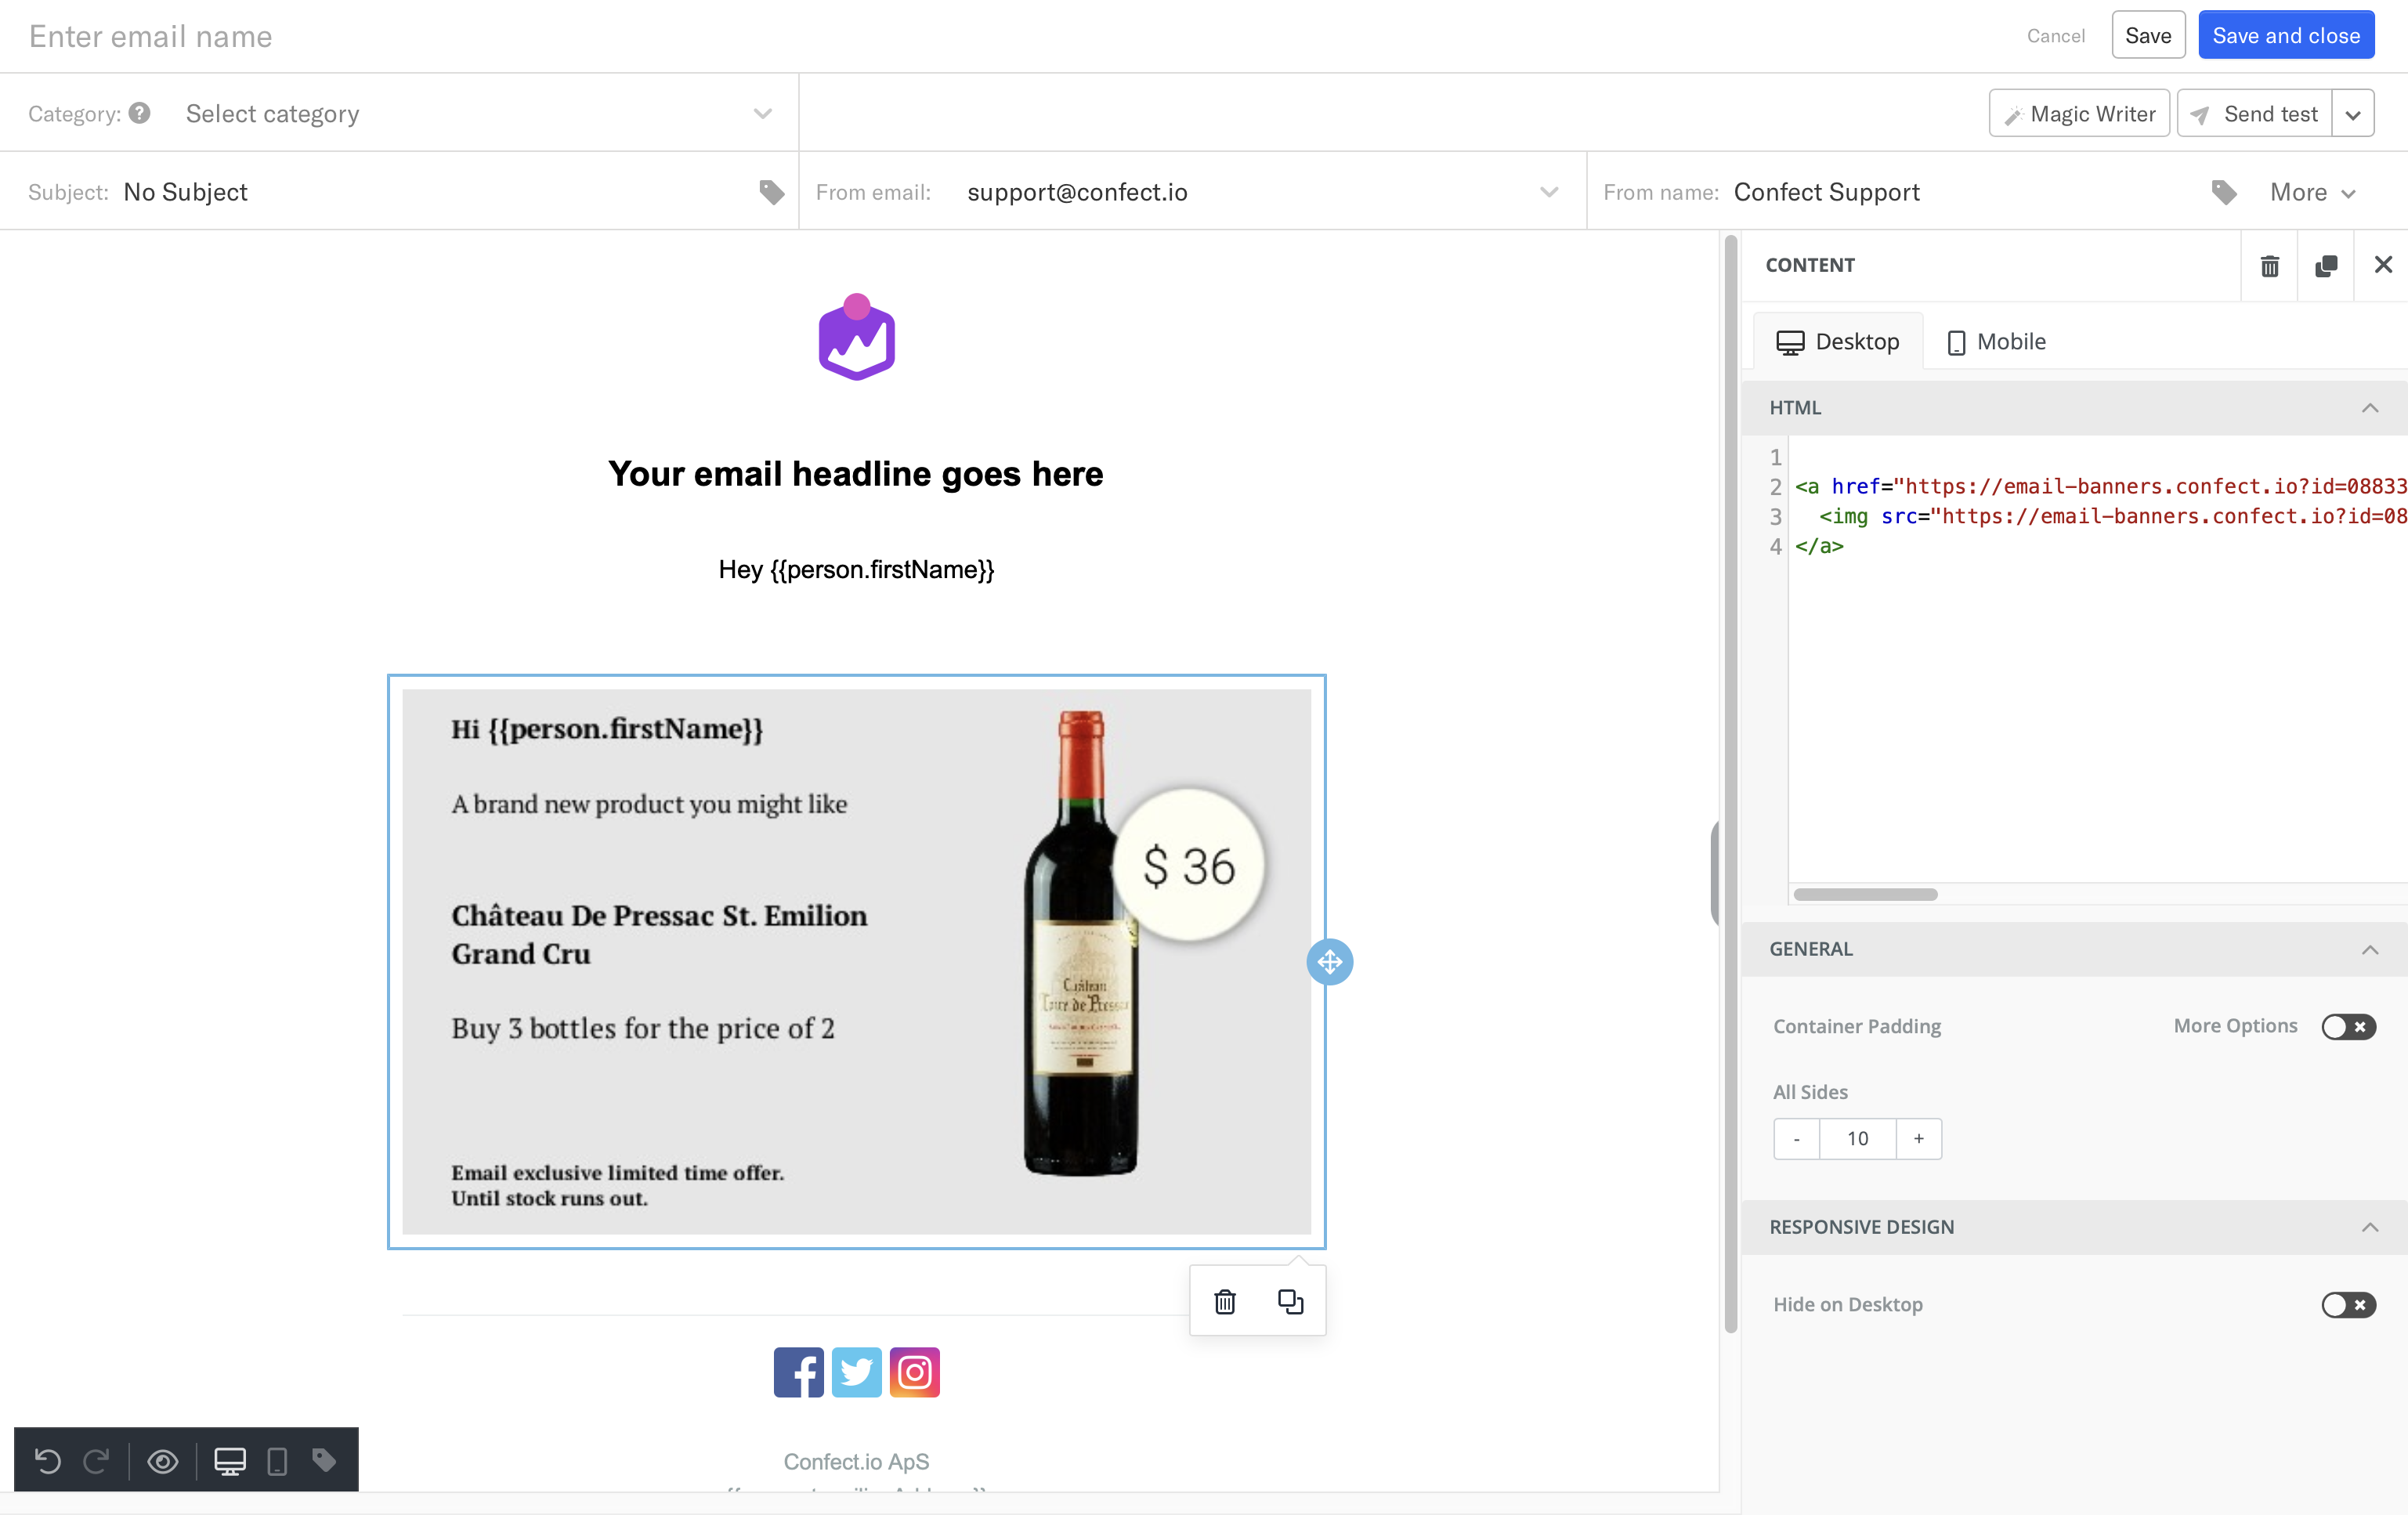
Name your email banner once the new window opens to keep everything organized.
Then click “Select design” and choose the template you’ve created.
Make sure to set the “width” and “height” to match the template.
Finally, click “Save”.
Setting up the email banner automation
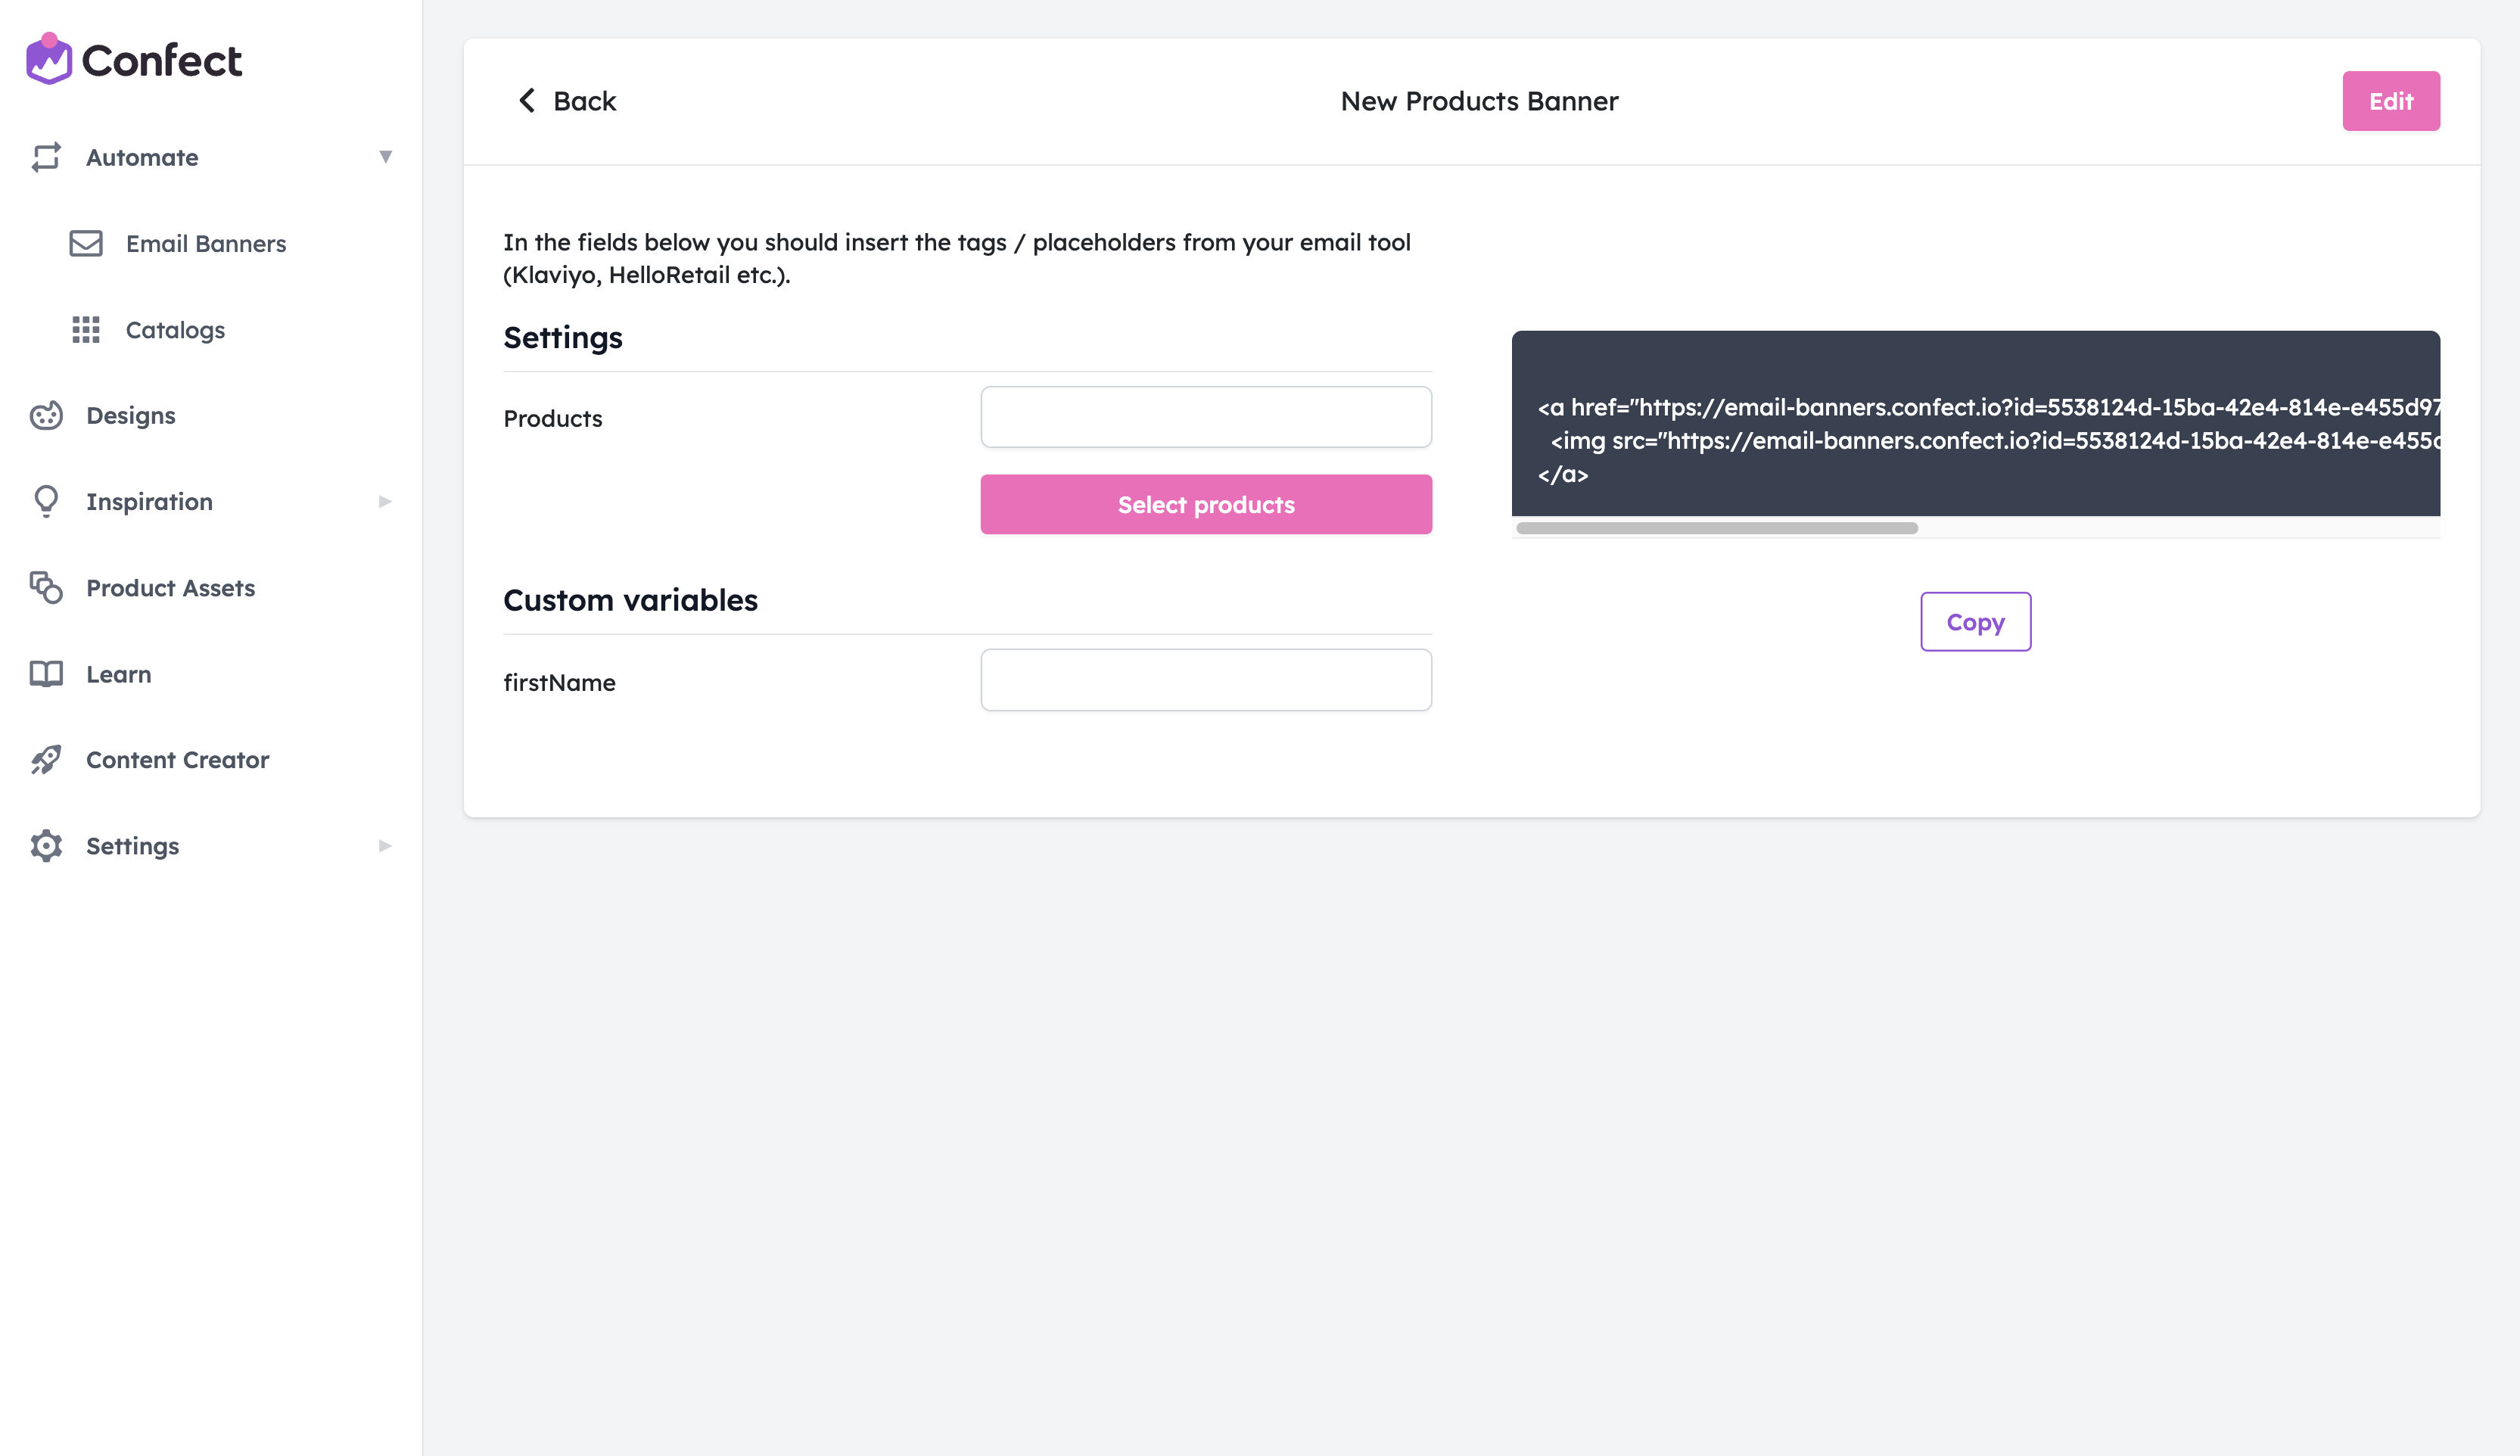
Once you’ve created and saved the email banner, the following window will appear to you.
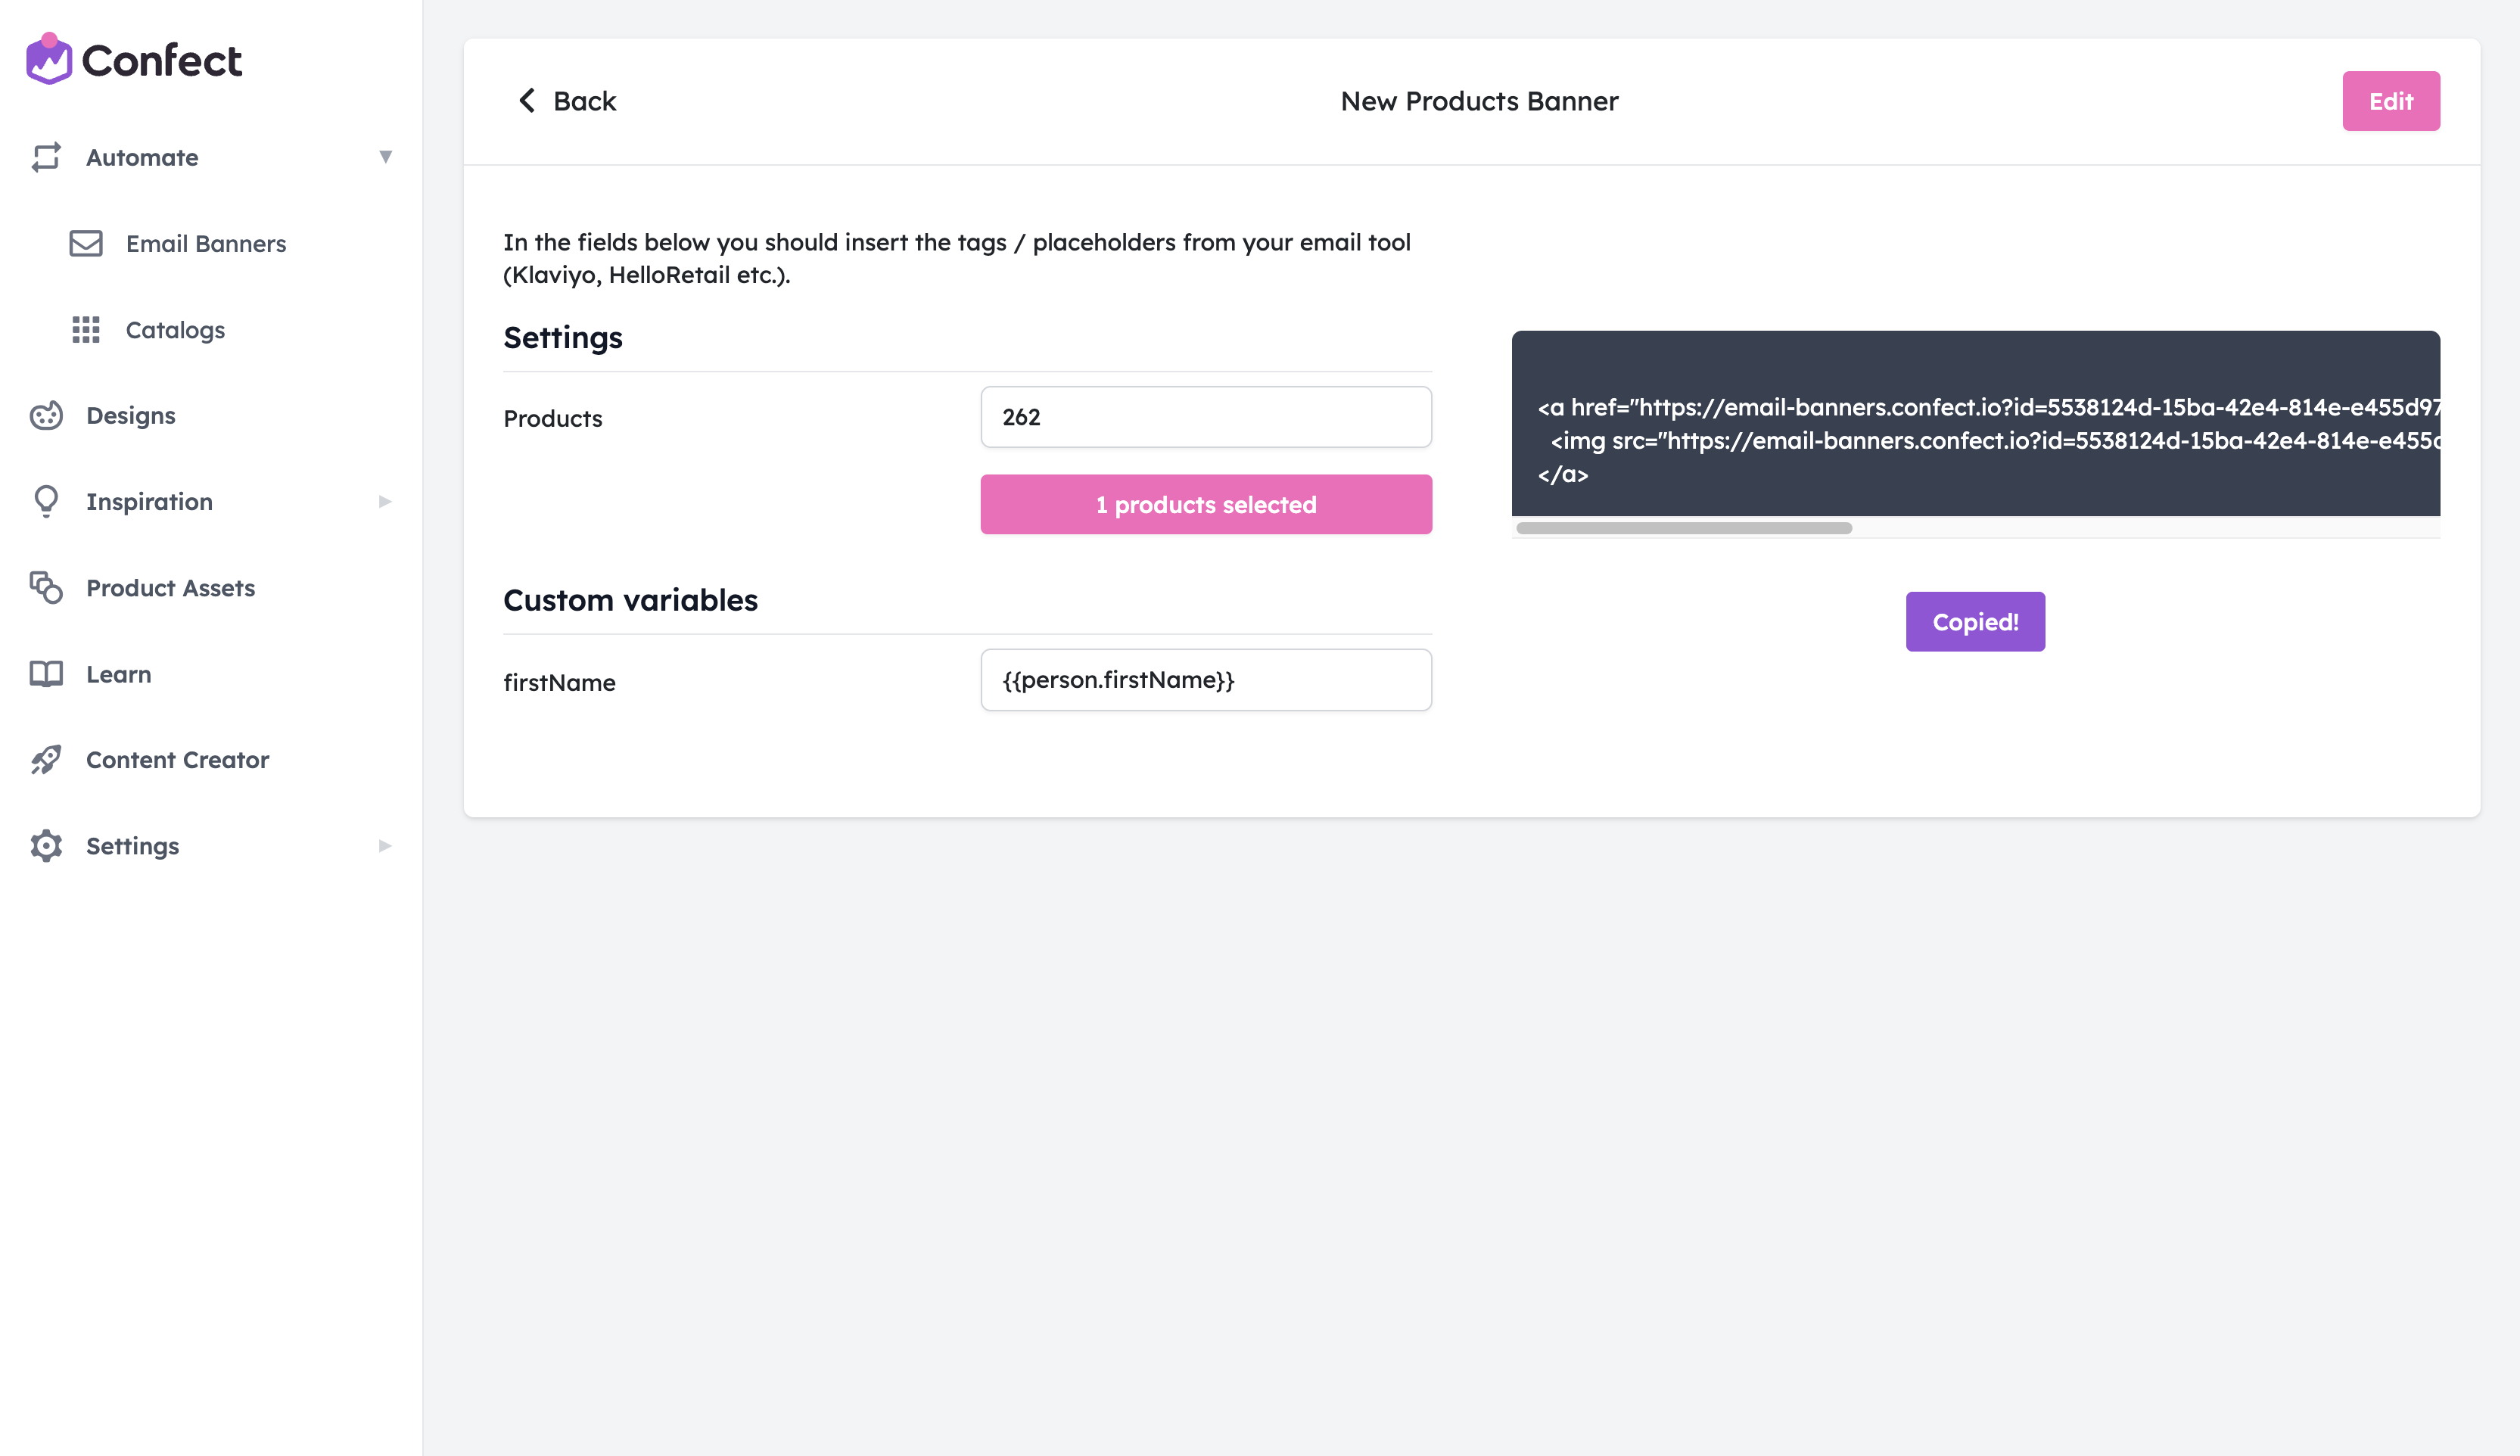
You will now have to select the products, and set up any custom variables you might have added to the design in double curly brackets (i.e. {{firstName}} in our example design).
Custom variables
Custom variables in Confect email banners are used to display recipient data that is stored inside of your email software.
To properly set this up, you will first need to find the exact formatting of this field inside your email software.
For example, our email software uses {{person.firstName}} as the “First Name” contact property.
This will vary from one email software to another (i.e. Hubspot: {{contact.firstname}}, Klaviyo: {{customer.firstName}} ). So make sure to check the contact properties on your specific system.
You will now have to insert this snippet (contact property) into the custom variable field in the Confect email banner.
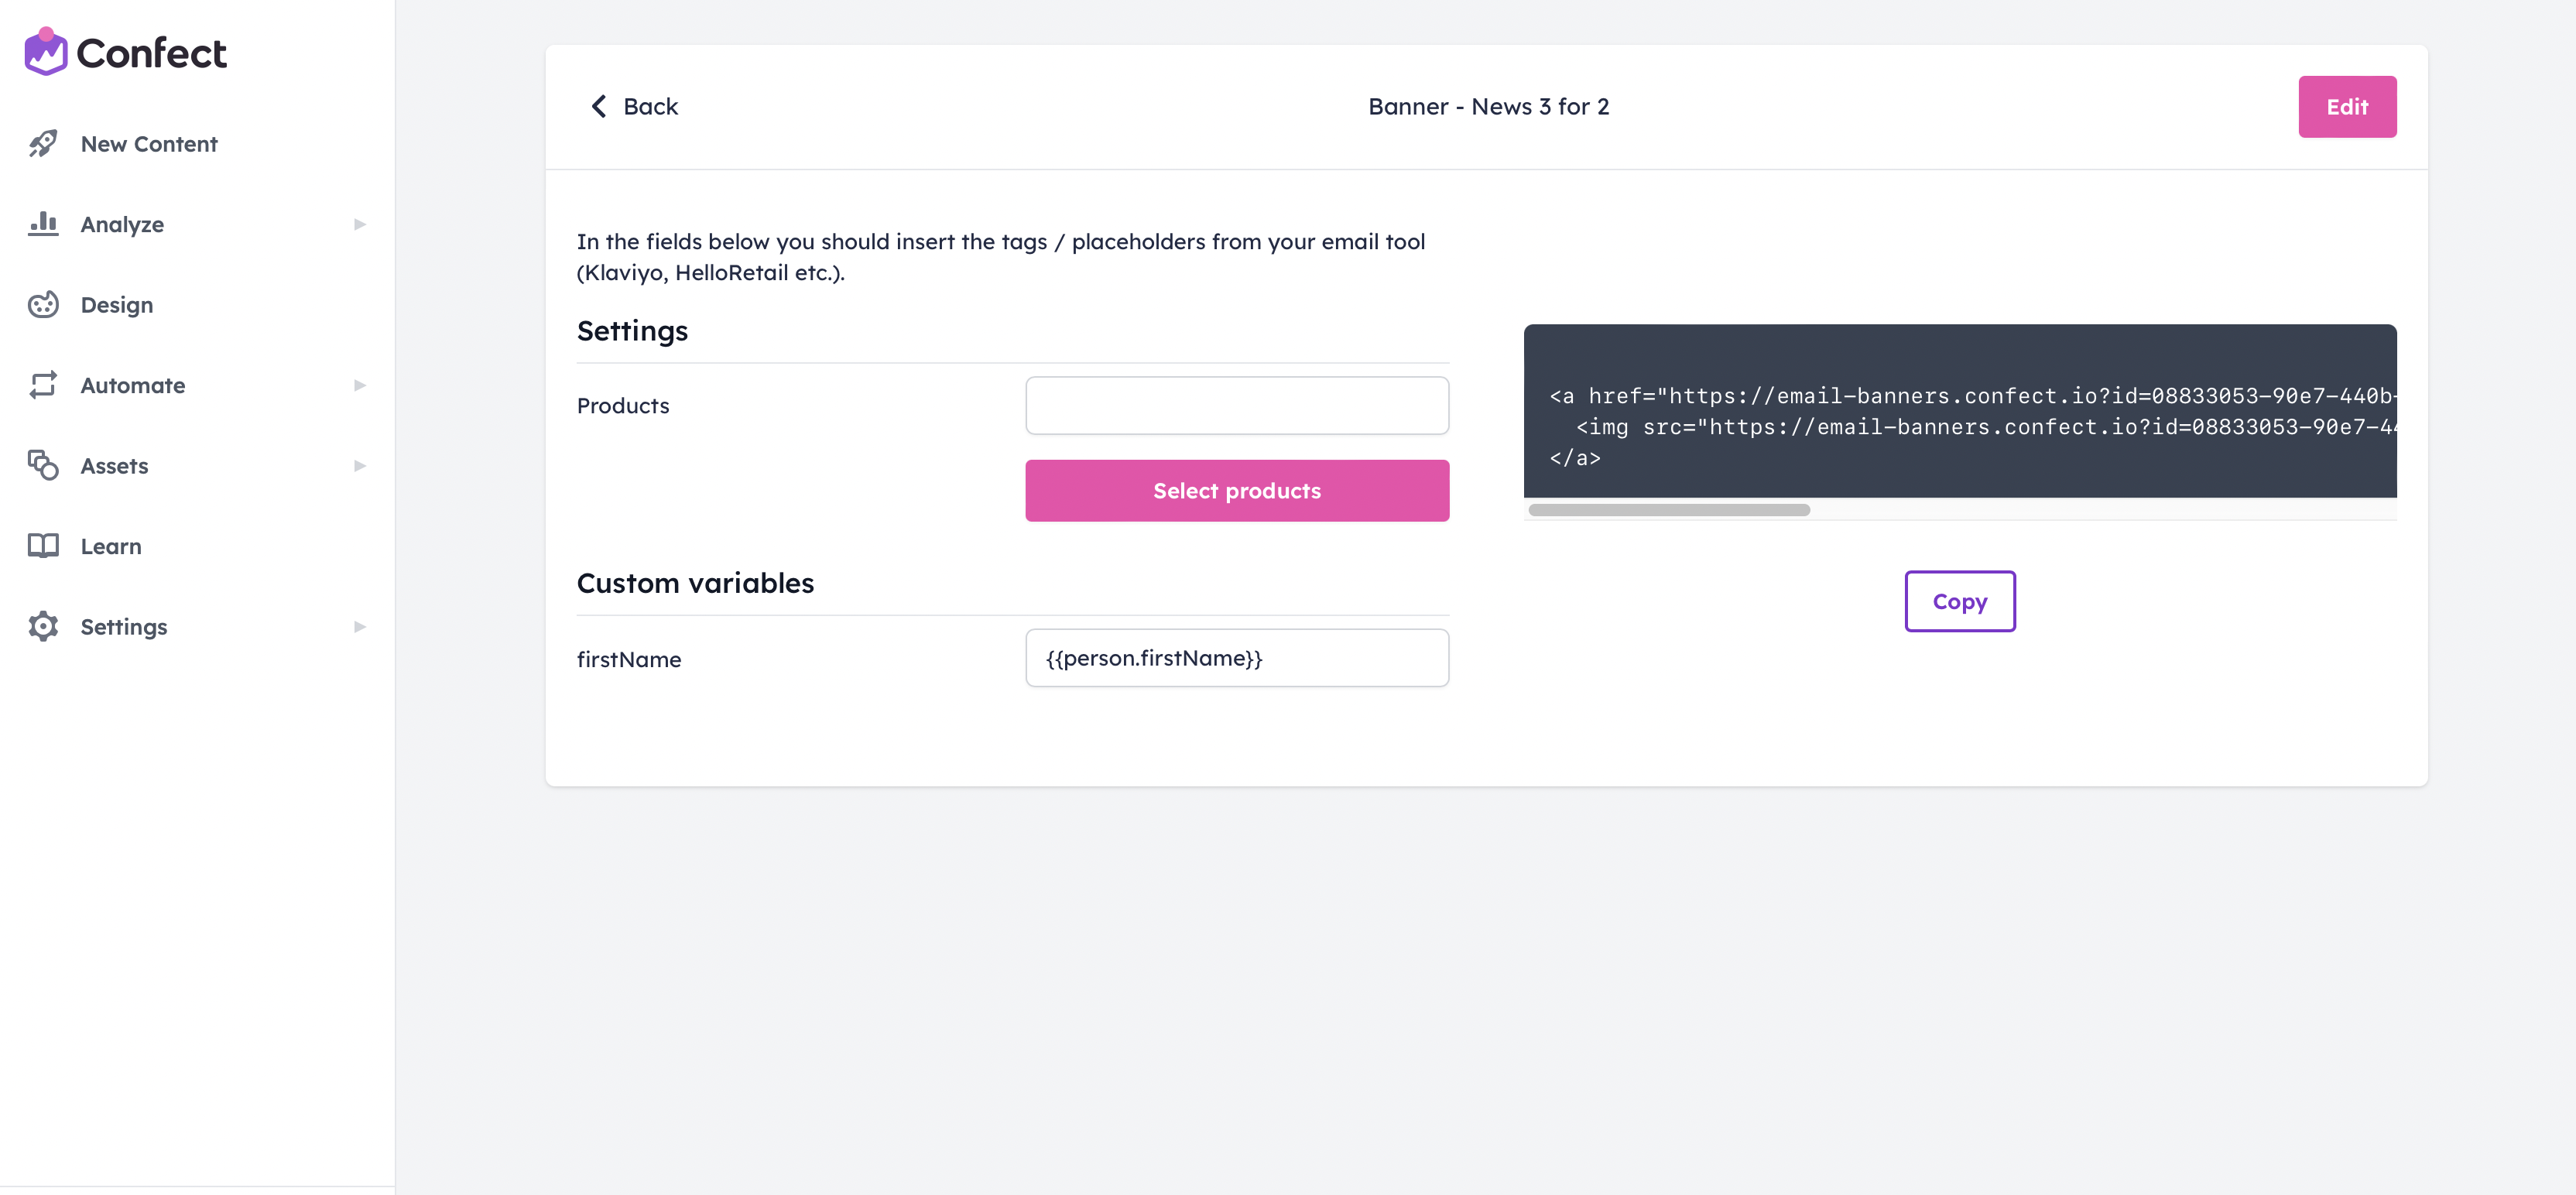
The name in the banner will now change dynamically for each recipient of the email, based on their contact properties.
Product settings - manual
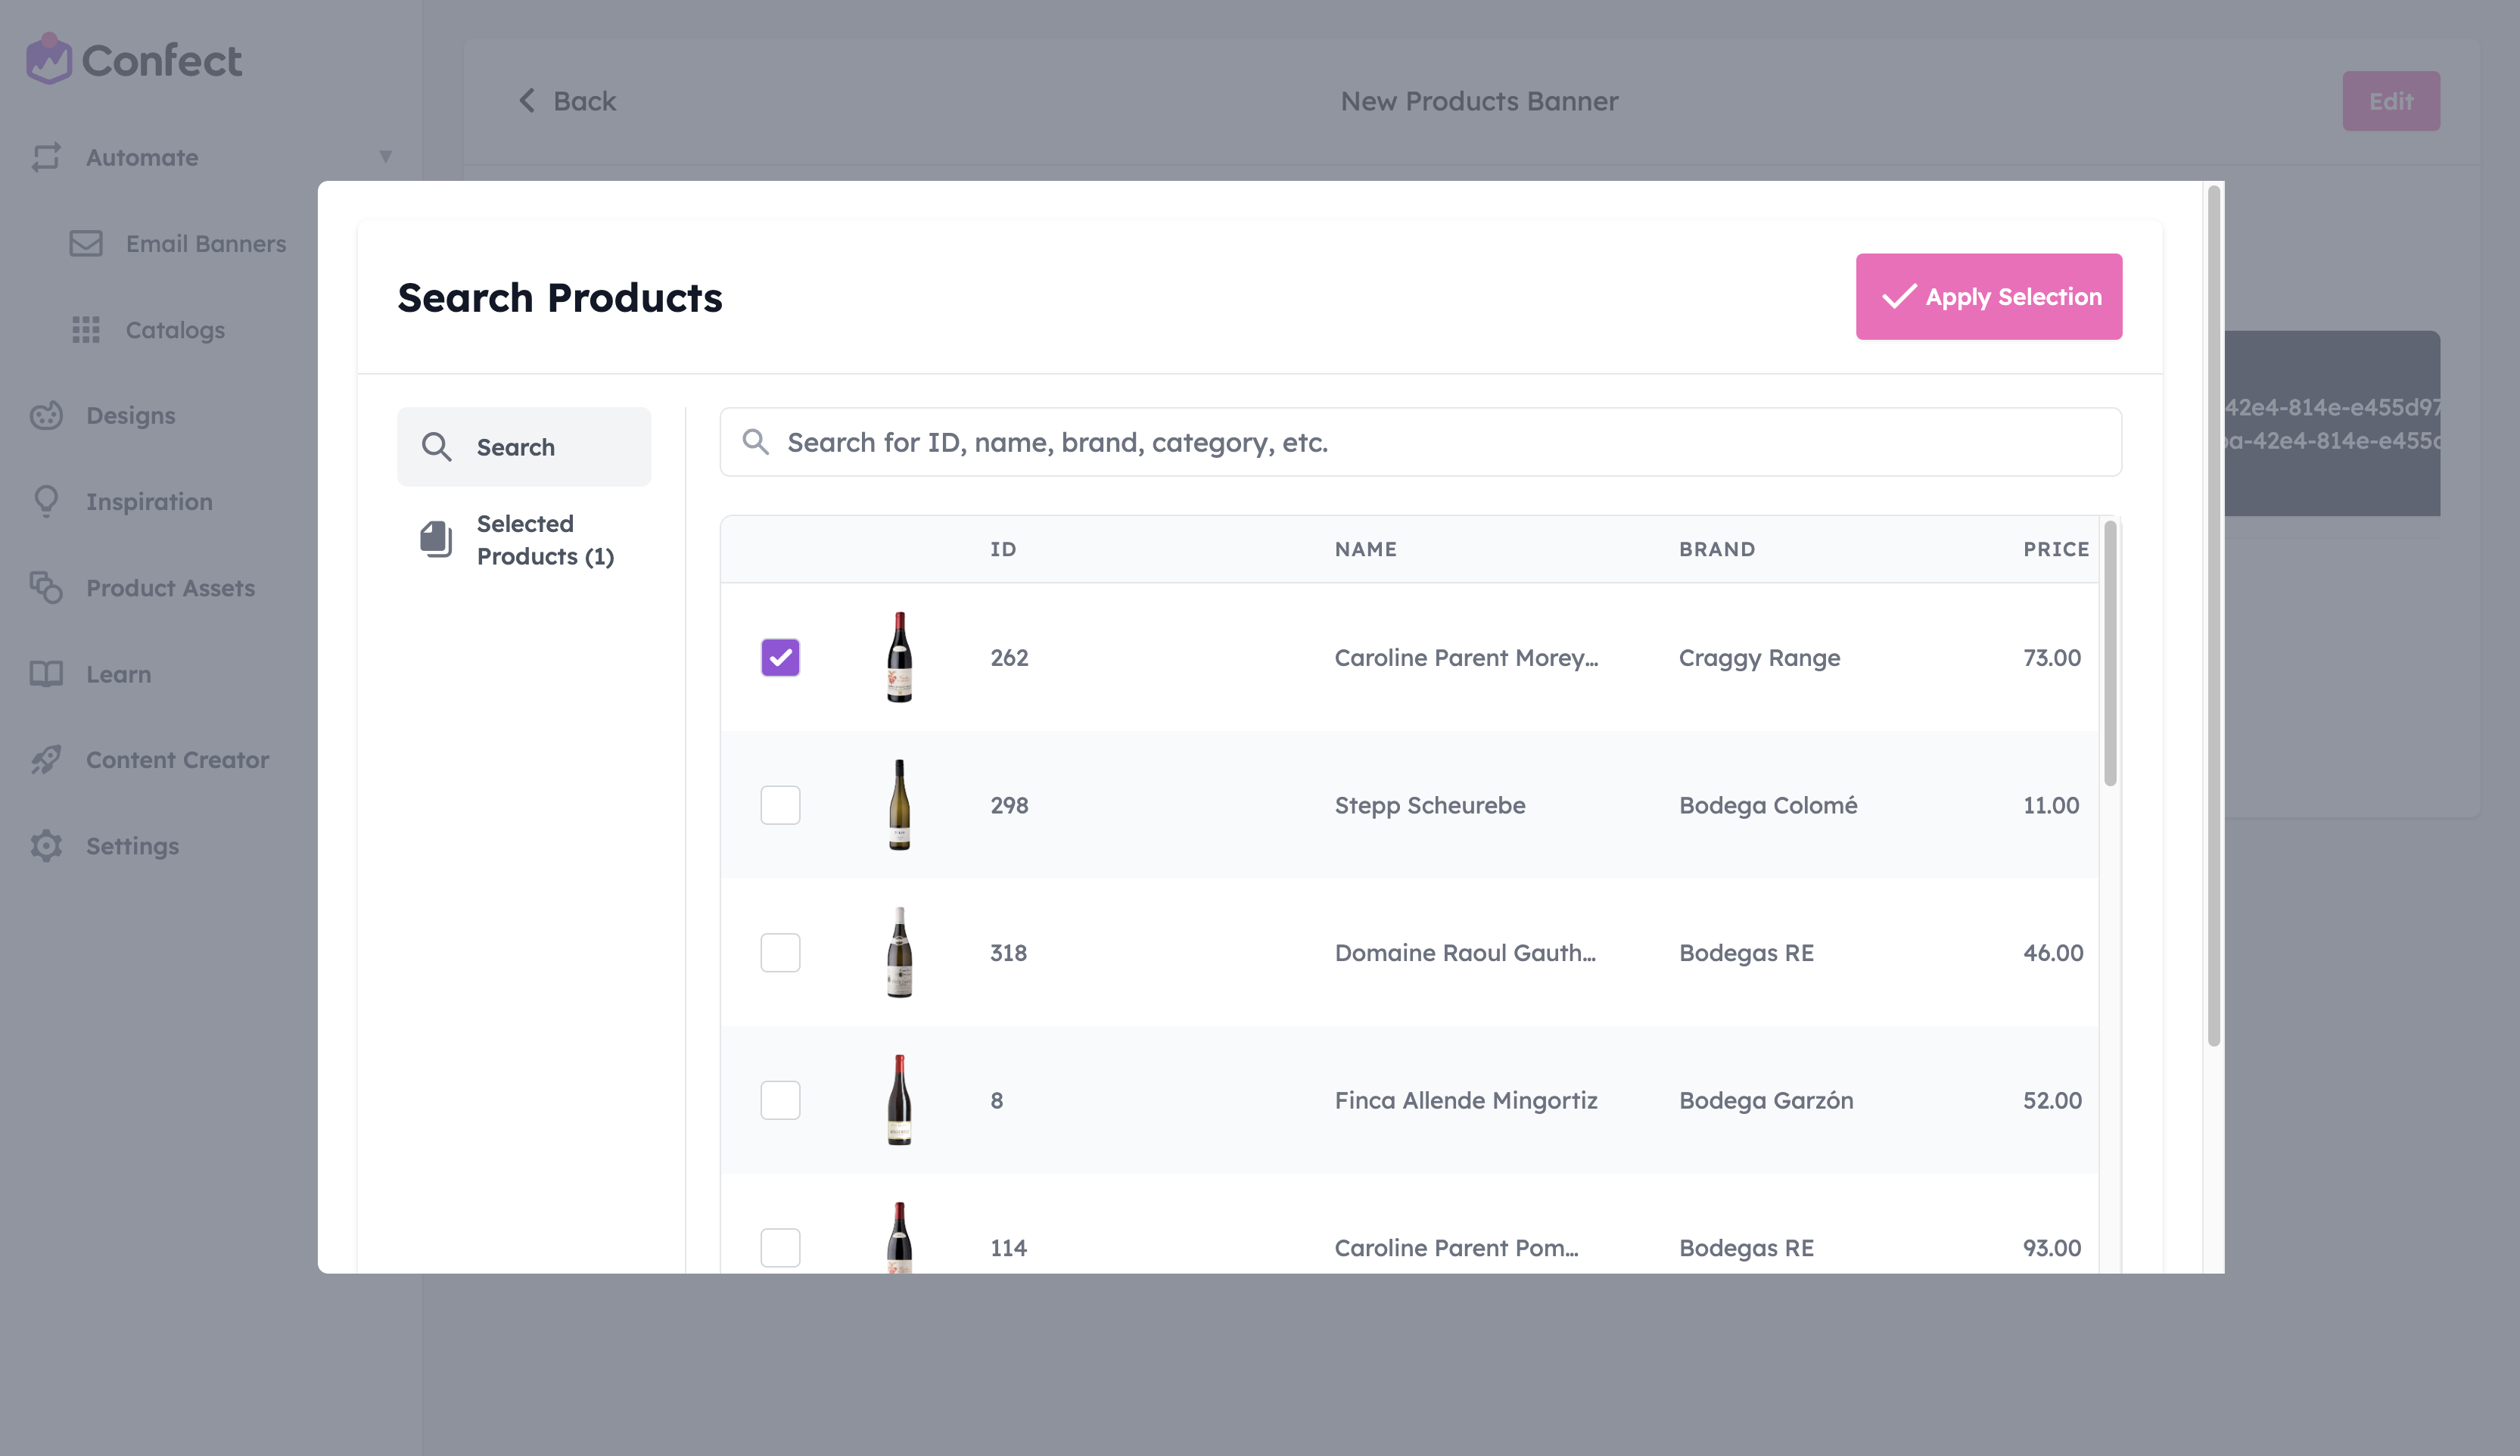
This is how you select the specific products you want to show up in your email banner.
The first option is to select a product manually through the “Select products” button. This will mean that the banner will always show that product.
If you select multiple products, the banner will only show one of them, but if the first product is no longer available (in stock) it will move on to the next product you’ve selected.
After you’ve chosen the product, click “Apply selection” in the top right corner.
Product settings - dynamic
The second option is to add a variable (“tag”, or “placeholder”) from your email software as the product selection. If your email system supports this (for example Klaviyo), you can automatically show the recipients a product relevant to them (i.e. abandoned cart).
If your email system is synced with your webshop, you may have a “tag”, or “placeholder”, which stores an id of a product abandoned in a cart, or a product the recipient is likely to be interested in.
This depends on your email software, so please refer to their documentations to find out whether this is available to you.
If this is available to you, simply add the variable (also known as “tag”, or “placeholder”) into the product selection box.
Integrating the email banner
Once you’re satisfied with the settings you’ve created, you can click “Copy” below the code snippet on the right side to copy the URL.
Be aware that leaving the page will reset the product setting and custom variables you’ve set up, so make sure to copy the URL while the settings are there. Once you’ve copied the URL, you can leave the page, as the settings you’ve set up will be saved in the URL itself.
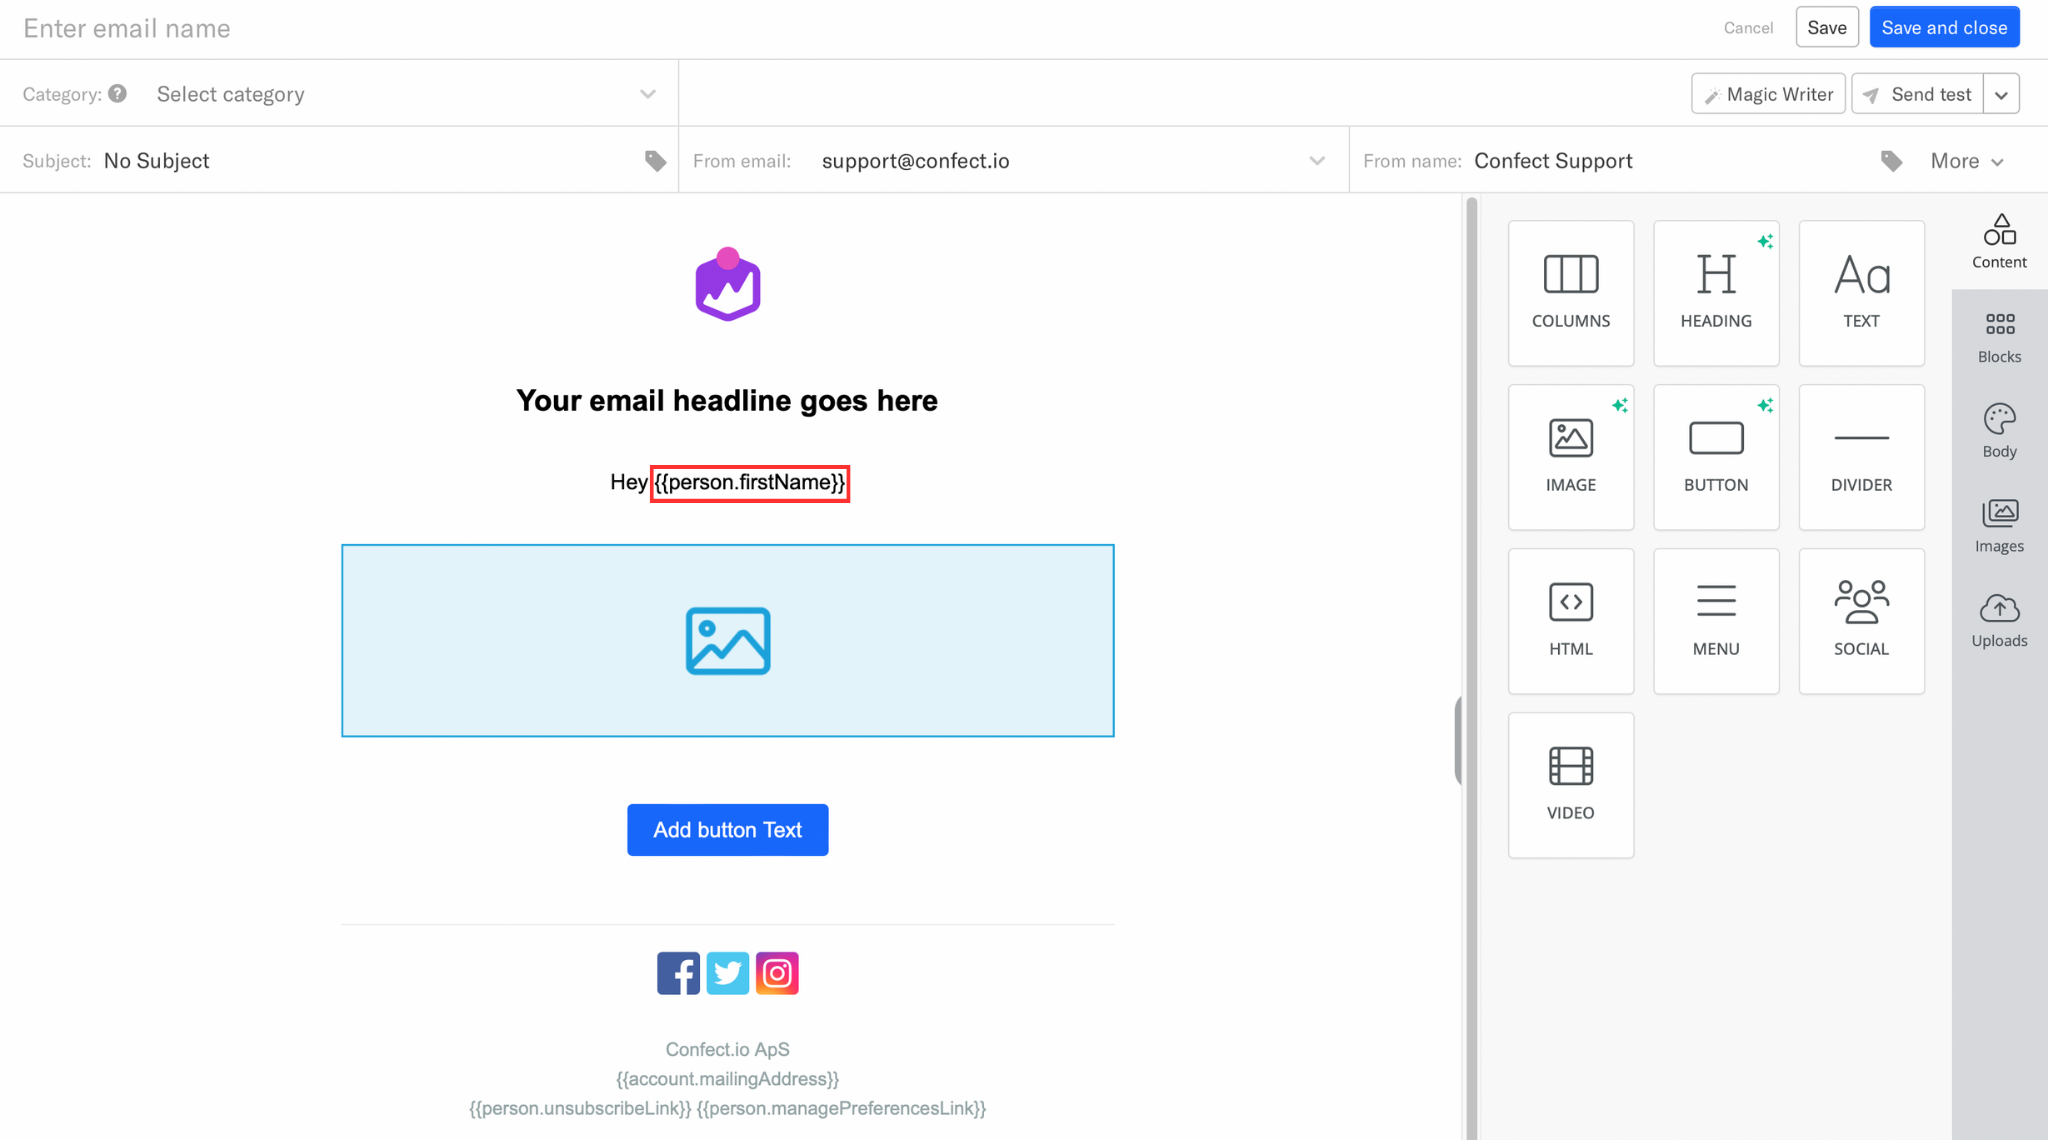
Now, head over to your email software, create a new email, and add an HTML block.
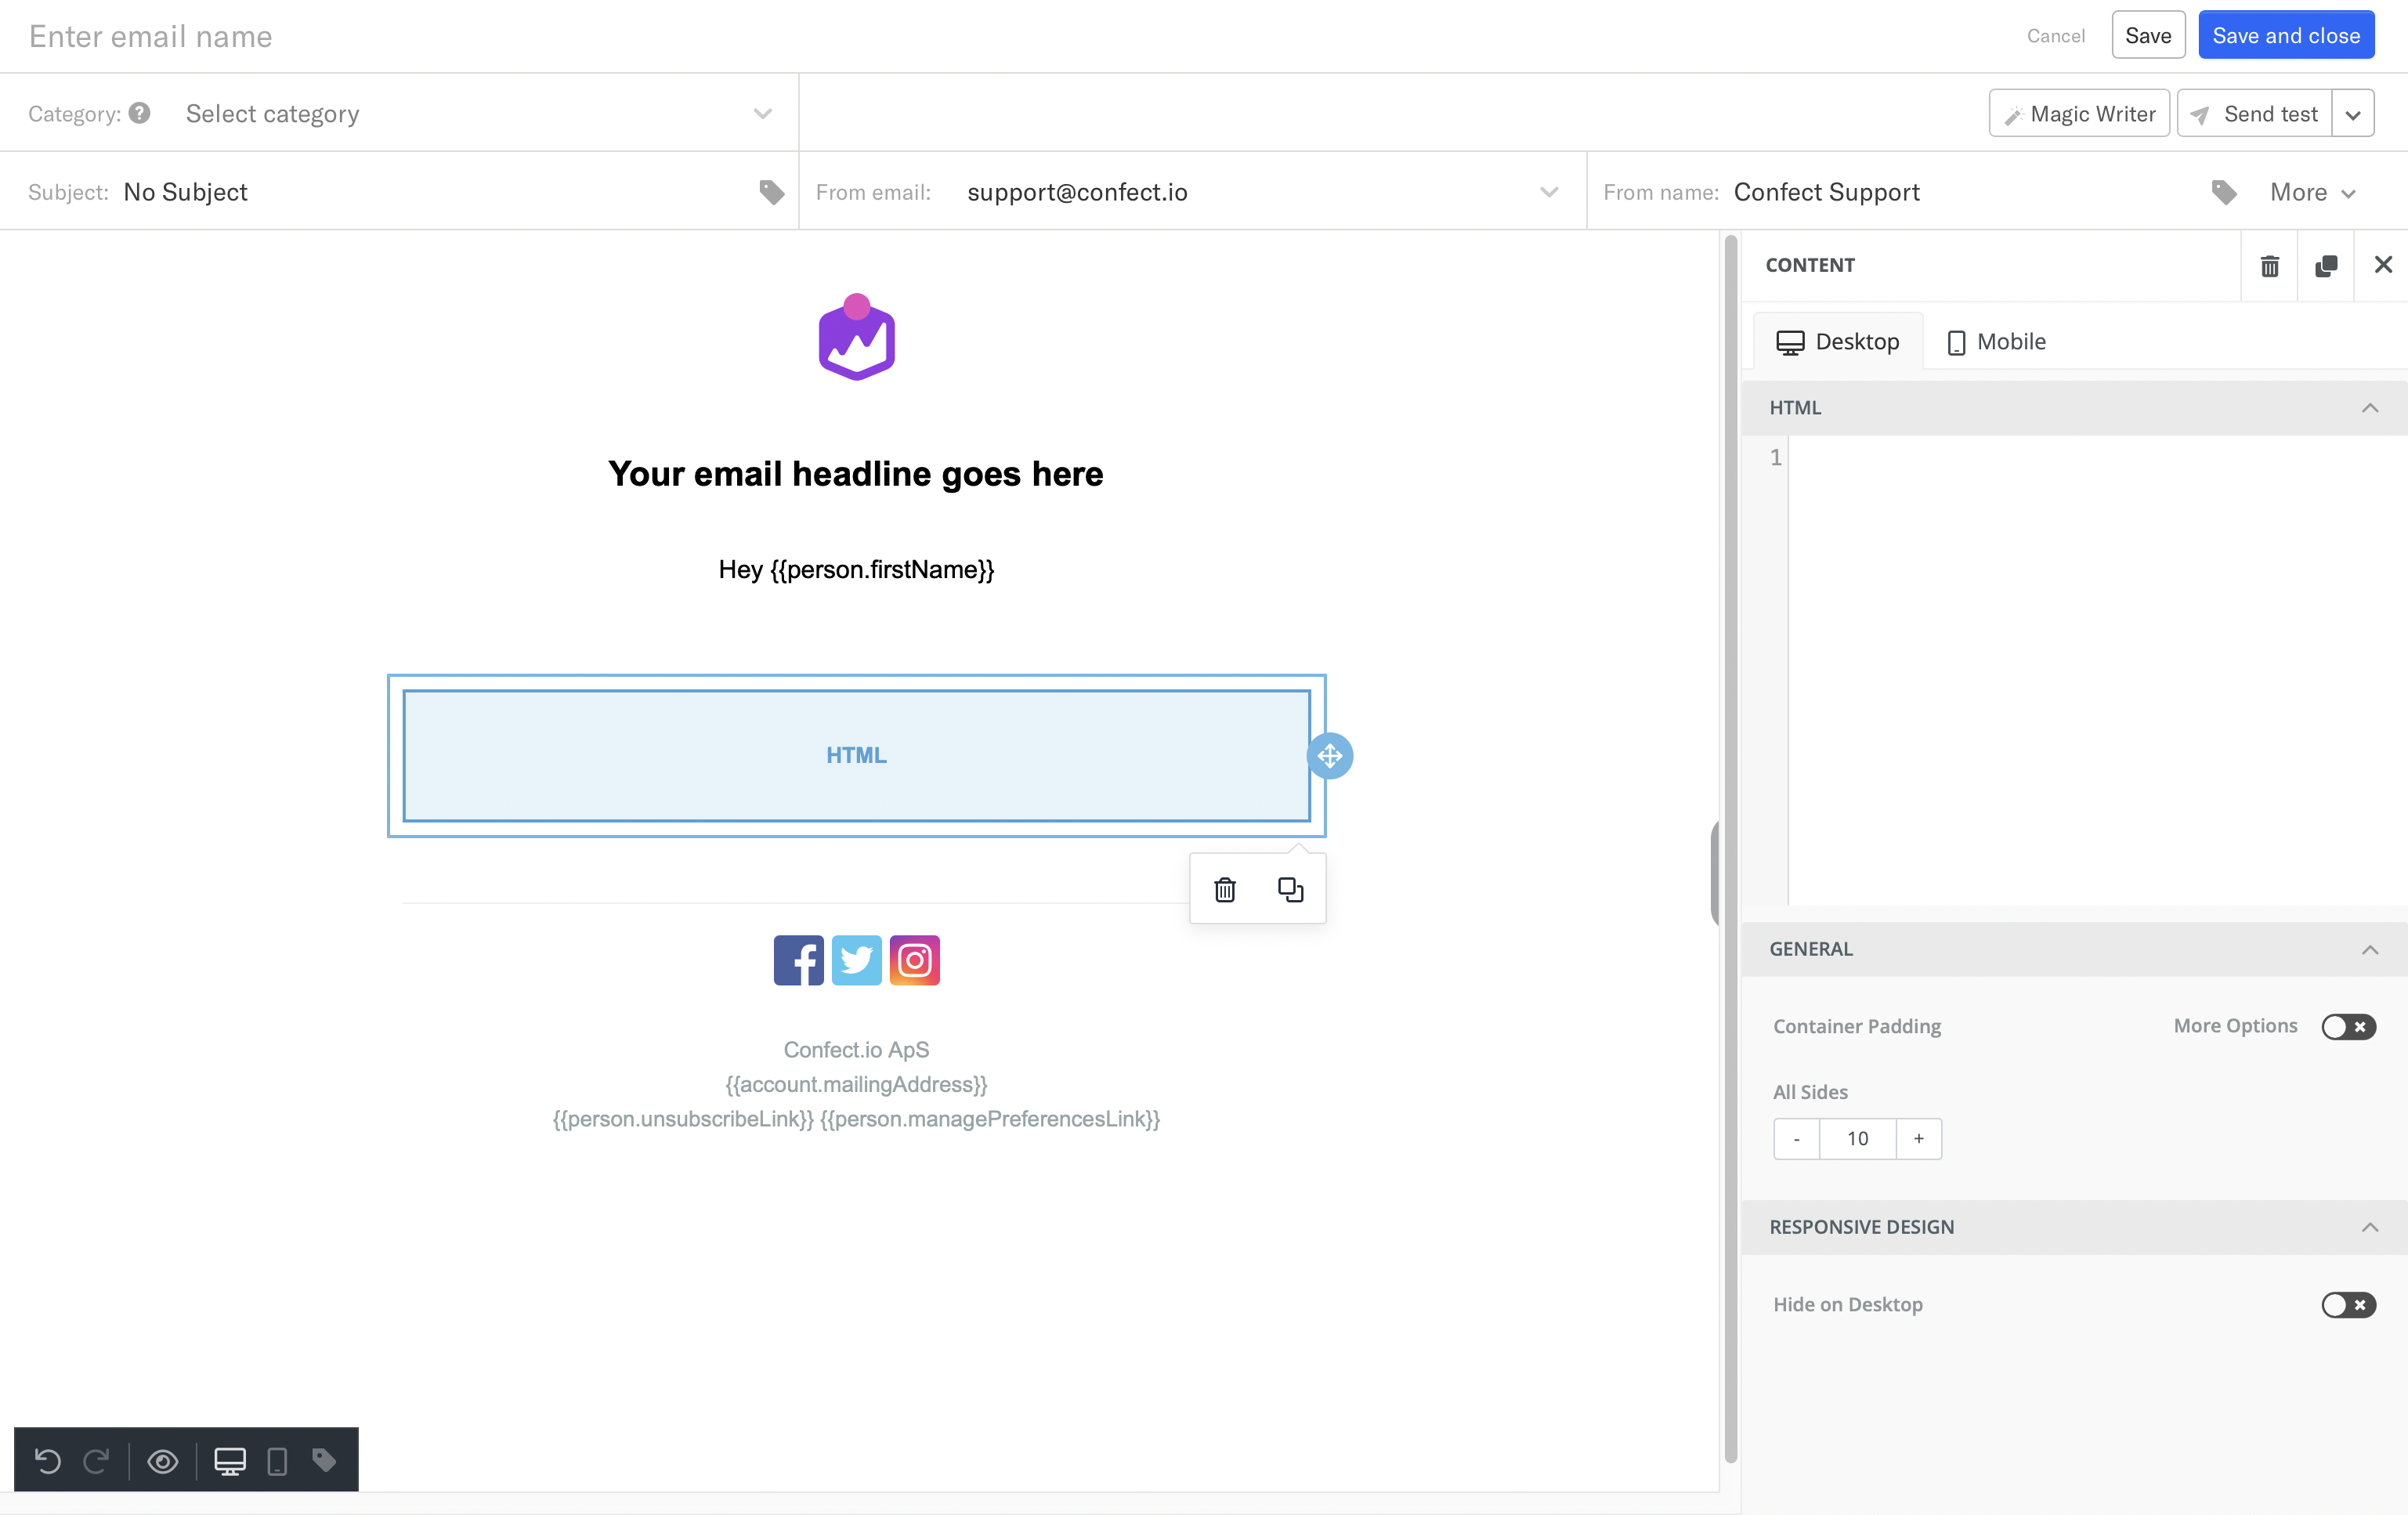
To embed the Confect email banner, simply paste the copied URL into the HTML block.
When a user clicks on this banner, he will be automatically redirected to the product page for that specific item.
Make sure to test the email banner by first sending it to one of your own email addresses.