A/B test catalog ads with Advantage+
A method for A/B test in Facebook with Advantage+ campaigns.Table of Contents
Best A/B testing practicesUse 3 (or more) distinct designsGather enough dataDon't use old campaigns or different catalogsHow to A/B test1. Save variants in Confect2. Create a new Advantage+ campaign3. Create one campaign per design4. Change the designs5. Start the A/B test6. Apply the learningsIn the majority of cases, we recommend using manual campaigns to set up an A/B test instead. The only way to conduct a reliable A/B test with Advantage+ campaigns is to create an individual campaign per each design you're testing - while you'd only need one manual campaign to do this.
1. A proper test with Advantage+ campaigns requires one campaign per creative tested. This can quickly add complexity and become overwhelming.
2. A common mistake is adding multiple ads using different designs into ONE Advantage+ campaign. This will lead to Meta distributing the budget unequally, not giving each design a chance to deliver.
If you'd rather use a manual campaign, click here to read the guide.
Best A/B testing practices
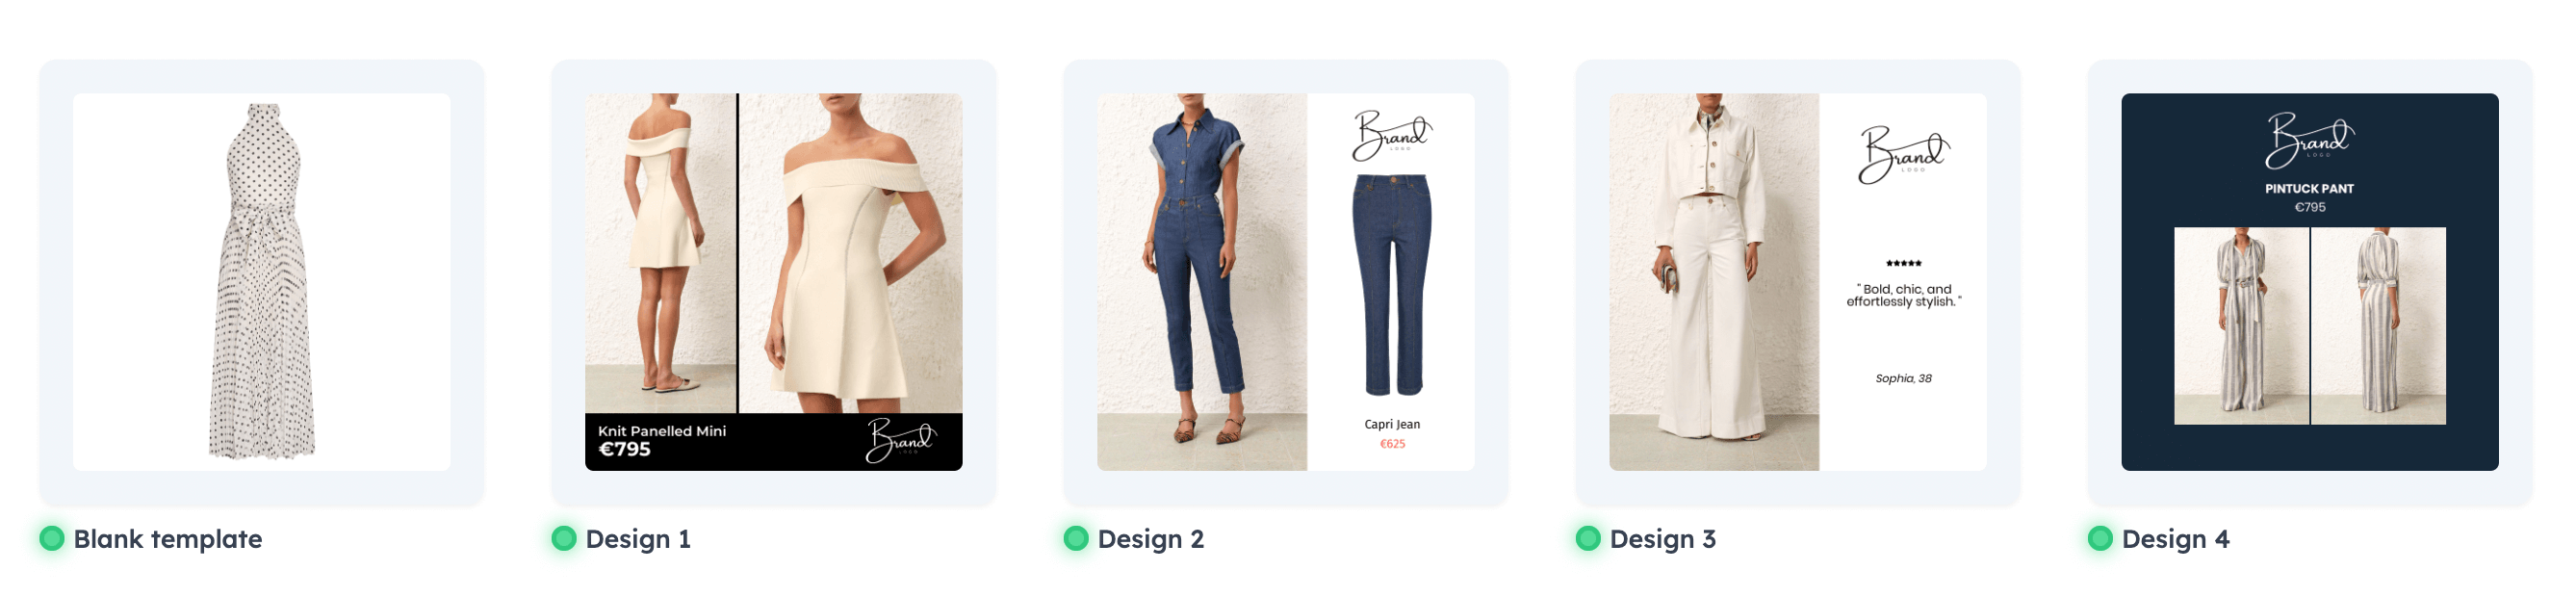
Use 3 (or more) distinct designs
Each design should have different dynamic elements to figure out what works best for your brand. Also, use different layouts and colors (if possible, within brand guidelines).
The goal is to create a broad variation to optimize reach and identify the best-performing design. You will not see a significant change if the designs are too similar.
If this is your first time testing Catalog Ads, and you want to test the difference between the original pictures and Confect designs, make sure to include a "Blank" template (a design that only includes the product).
Gather enough data
Allocate sufficient budget to reach at least 20-50 conversions per design for reliable results.
If your average CPA is 10$ and you're testing 4 designs - you should aim to spend between 800$ and 2.000$ in ad spend for this test (CPA*20-50 conversions*4 designs).
Have equal ad spend across all test designs for fair comparison.
Run A/B tests for 20-25 days to gather the minimum required insights.
Don't use old campaigns or different catalogs
Why not use existing campaigns?
As a campaign runs, it gathers optimization data. If you add new ads to this, the new ads will compete against already optimized ads - giving you highly unreliable results.
Why not use different catalogs?
In the same way as ads, catalogs also gather optimization data. If two separate catalogs are tested against each other, one of them will have more of this data - giving you highly unreliable results.
How to A/B test
1. Save variants in Confect
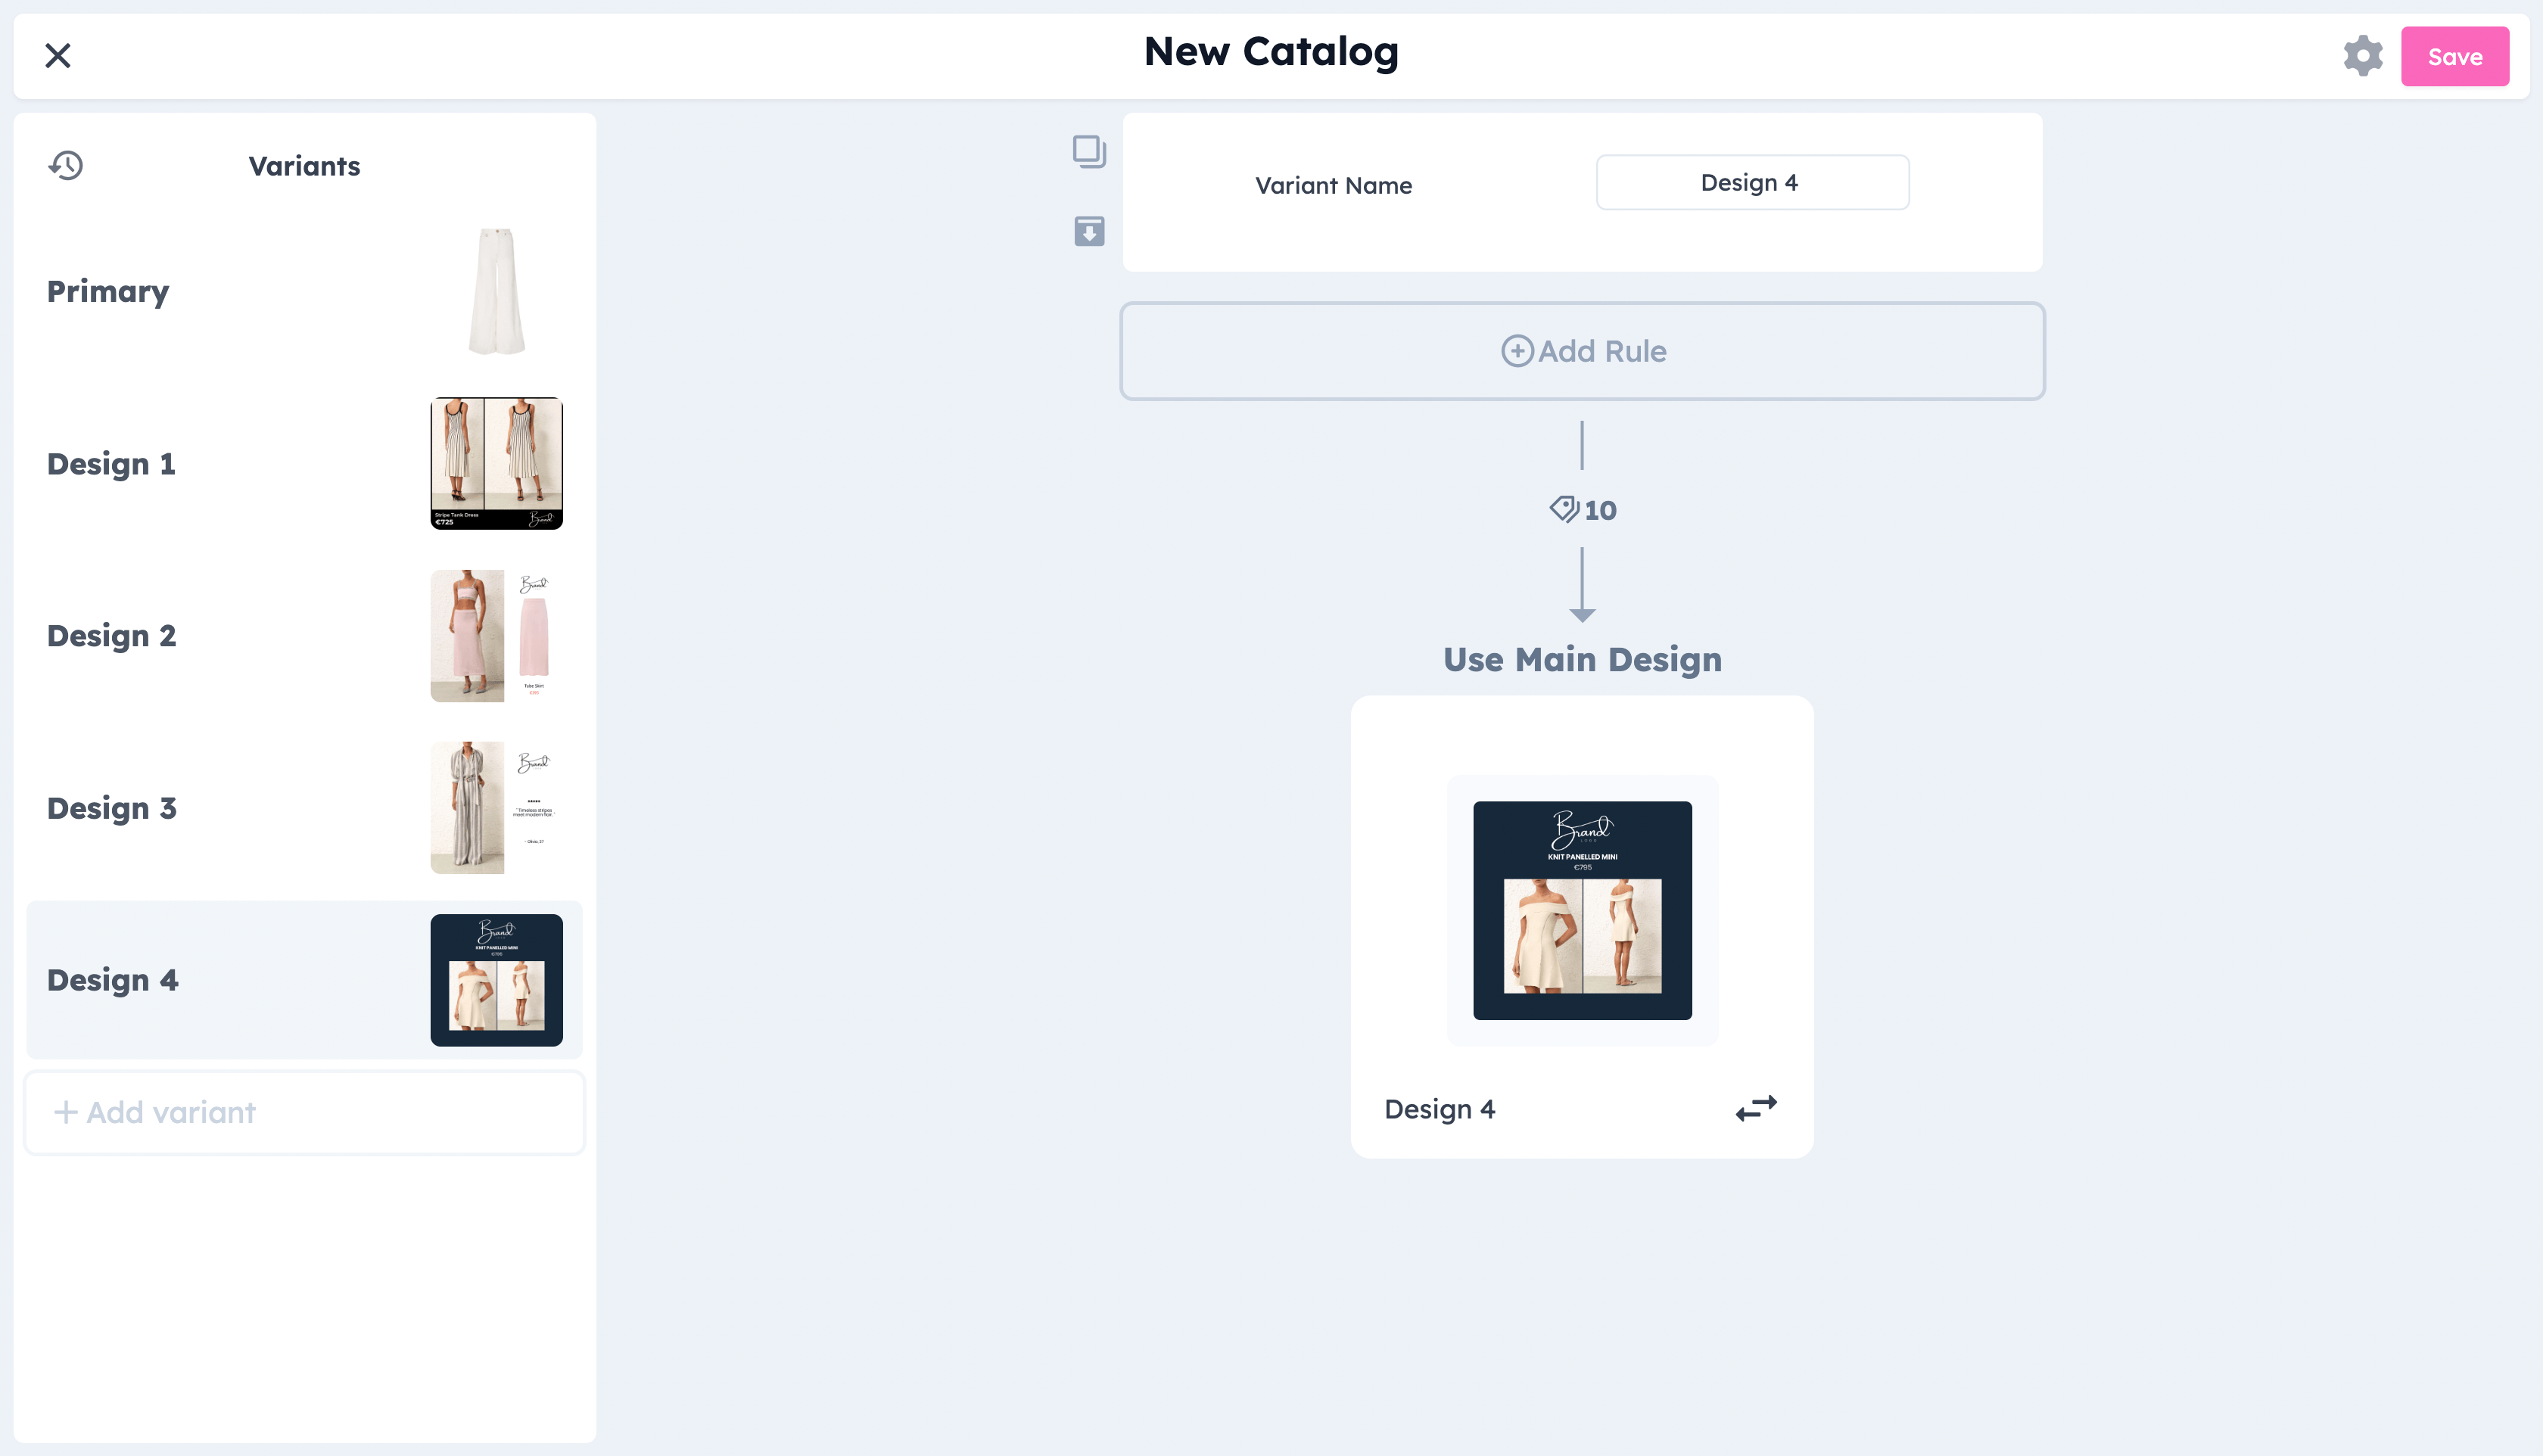
The first step is to create the individual designs you'll be using for A/B testing, and add them to the Confect catalog as design variants.
If you haven't yet done so, click here and follow STEP 1 of this guide.
If you don't want to affect your existing catalog ads, set the design of "Primary" to a blank design (see example below; including only the product layer).
2. Create a new Advantage+ campaign
The next step is to create the campaigns that will be used for this A/B test. Click "Create" in the Ad Manager, select "Sales" and then "Advantage+ shopping campaign".
After creating it, we recommend giving it a name (i.e. Advantage+ A/B Test #1).
We also recommend setting up the ad in this step:
- Give the campaign a budget
- Select "Advantage+ catalog ad" inside the ad
- Add a headline, primary text, and any other details
3. Create one campaign per design
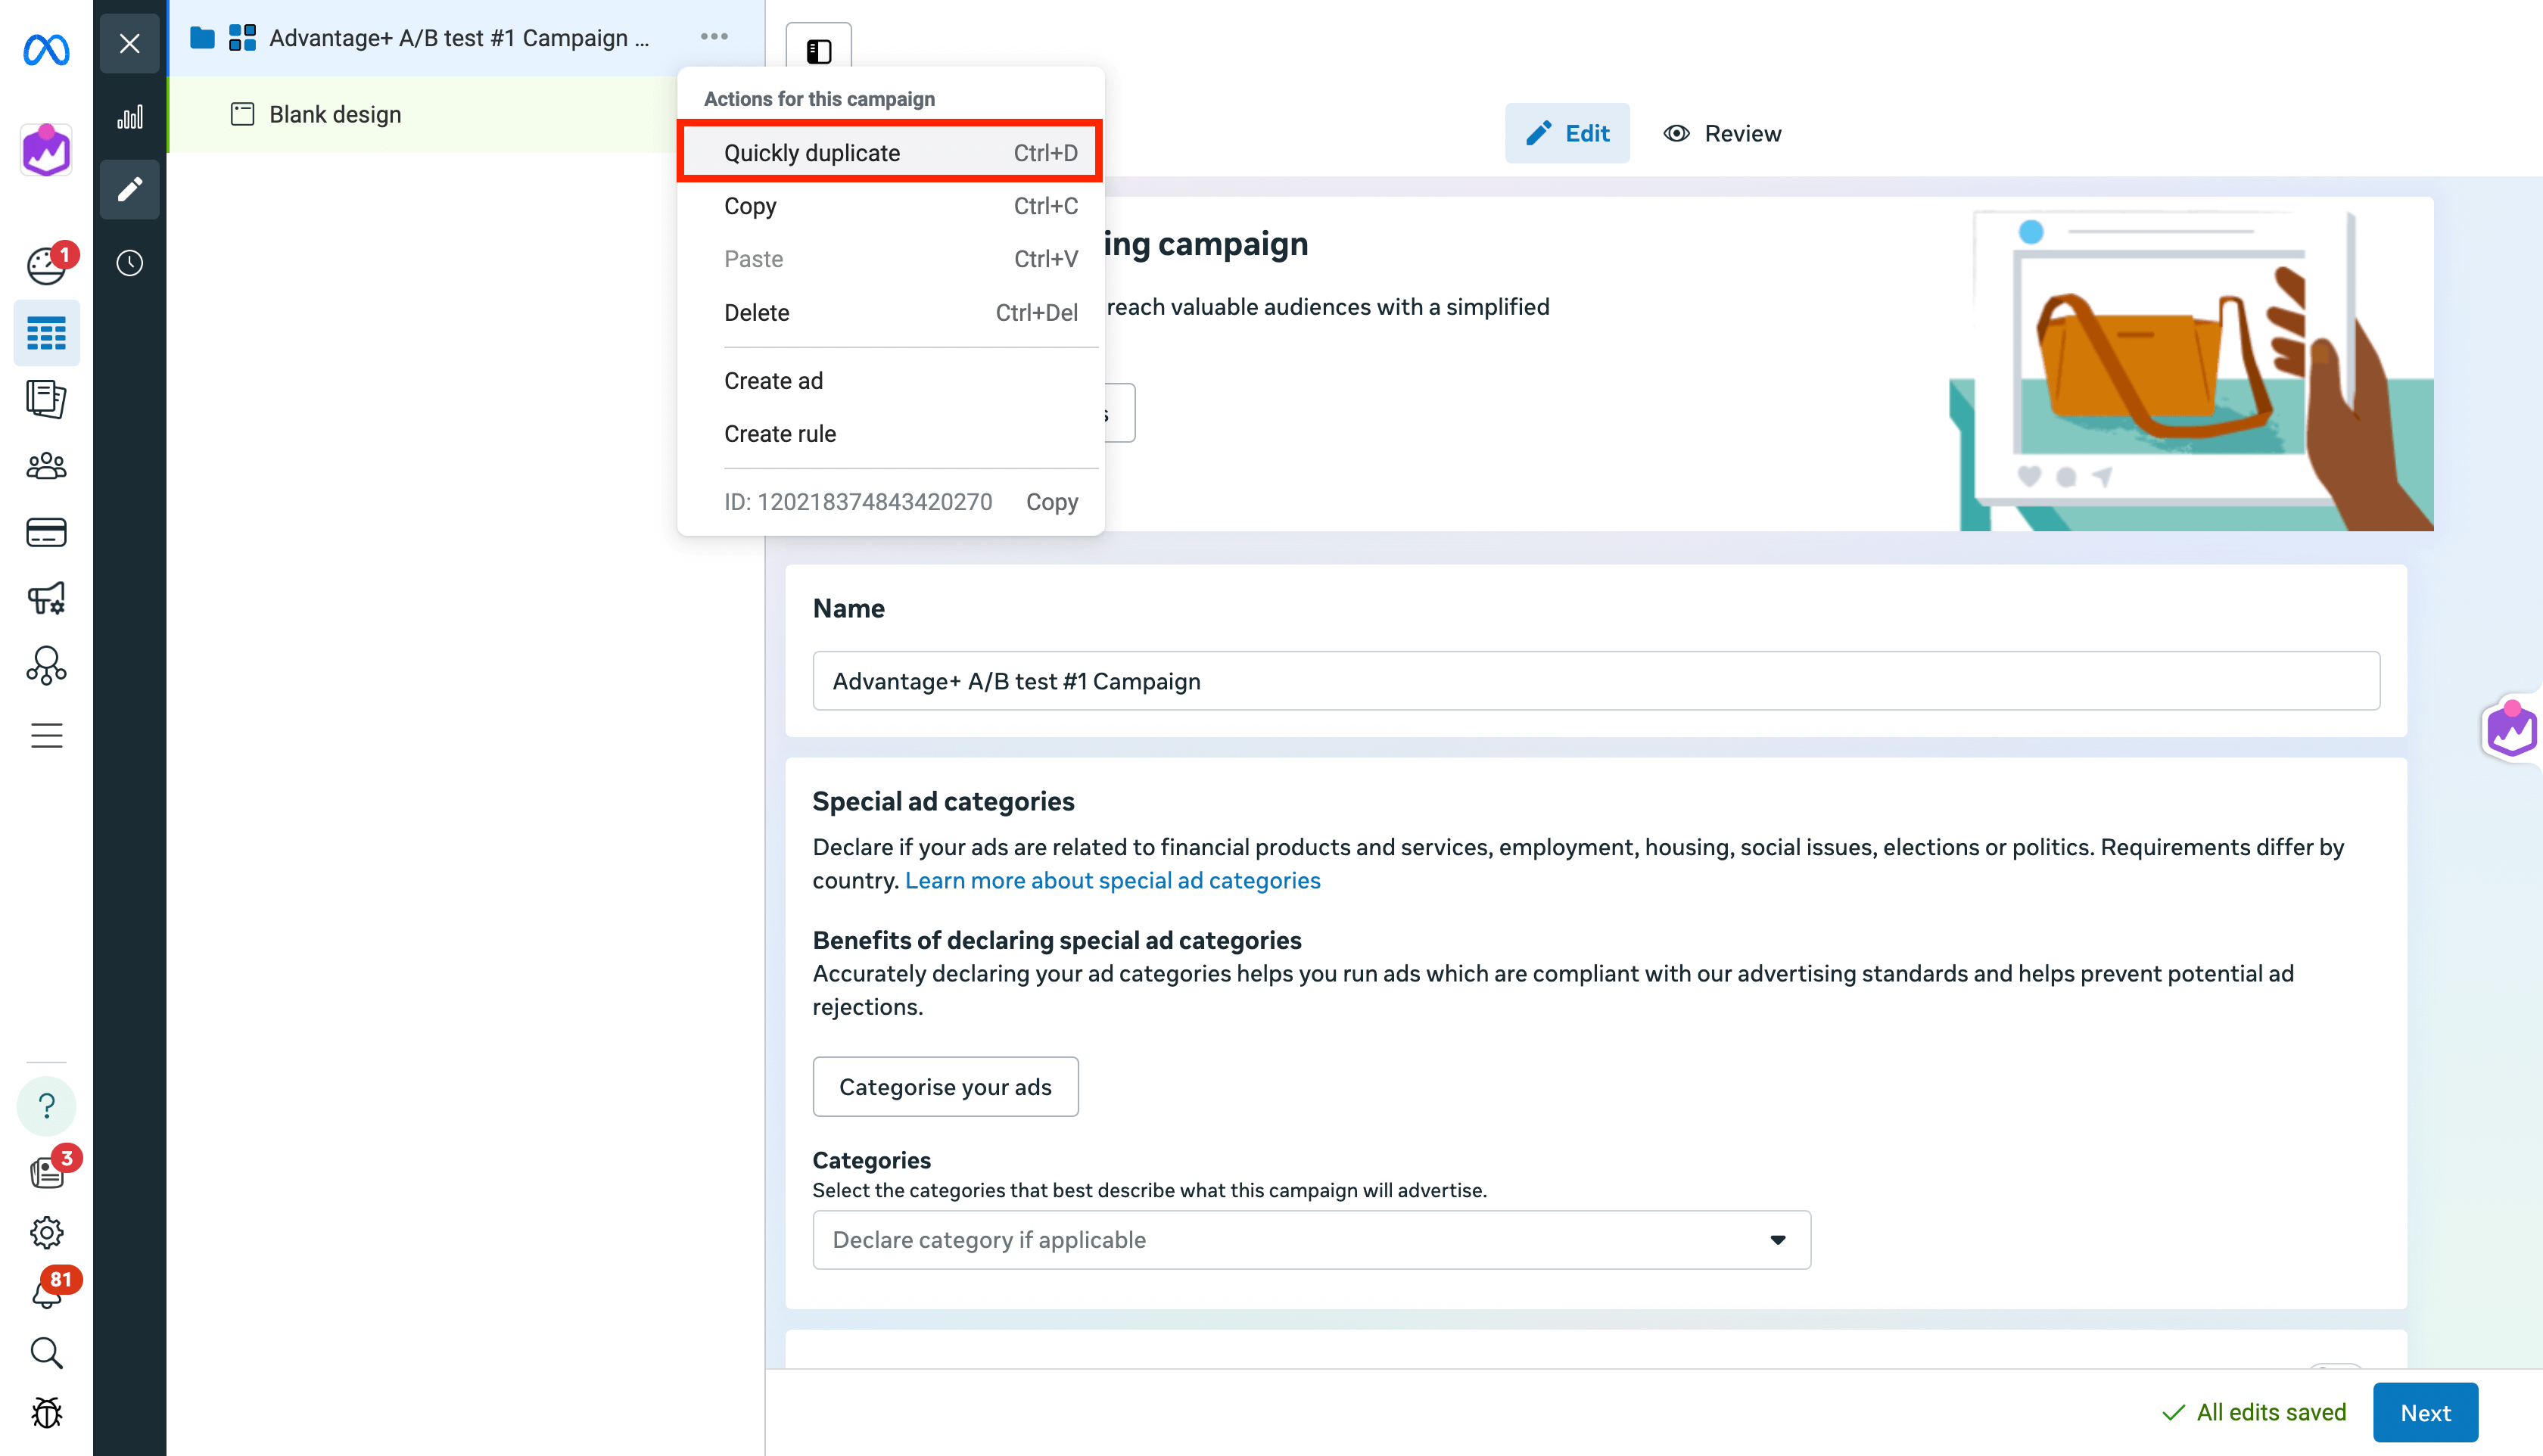
Since you've decided to use Advantage+ campaigns, you'll have to duplicate the entire campaign (not ad) once per each variation you're testing.
Click on the campaign and duplicate it (using "Quick duplicate"/ CTRL+D).
This will open a new campaign; duplicate it again, once per each design.
For our example, since we're testing one unedited image and three Confect designs, we'll need to duplicate this campaign 3 times so that we end up with 4 individual campaigns.
4. Change the designs
Use multiple design variants on Facebook
Once you've duplicated the campaigns, you'll need to change the design variants in each ad. Make sure to publish the ads before switching.
It is useful to rename the ads, or campaigns, after the design you're testing.
Go to each campaign and its ad to make sure the right design variants are used.
5. Start the A/B test
All that's left to do is select the campaigns you'll be using in this test.
Click the "A/B Test" button (you might have to click "Edit" to see it).
First, pick "Two existing ads", click "Next", and then choose "Existing campaigns".
Now, just add all of the campaigns you've made for this test.
For the key metric, we recommend using "Cost per result"; however, this can change based on your advertising objectives (i.e., clicks, leads, etc...).
We recommend running the test for a period of at least 2-4 weeks, and not concluding on tests with less than 30 results in each variant. We also suggest removing the "End test early if a winner is found" option.
Once the A/B test has been set up, just click "Publish Test" to save your changes and begin testing.
6. Apply the learnings
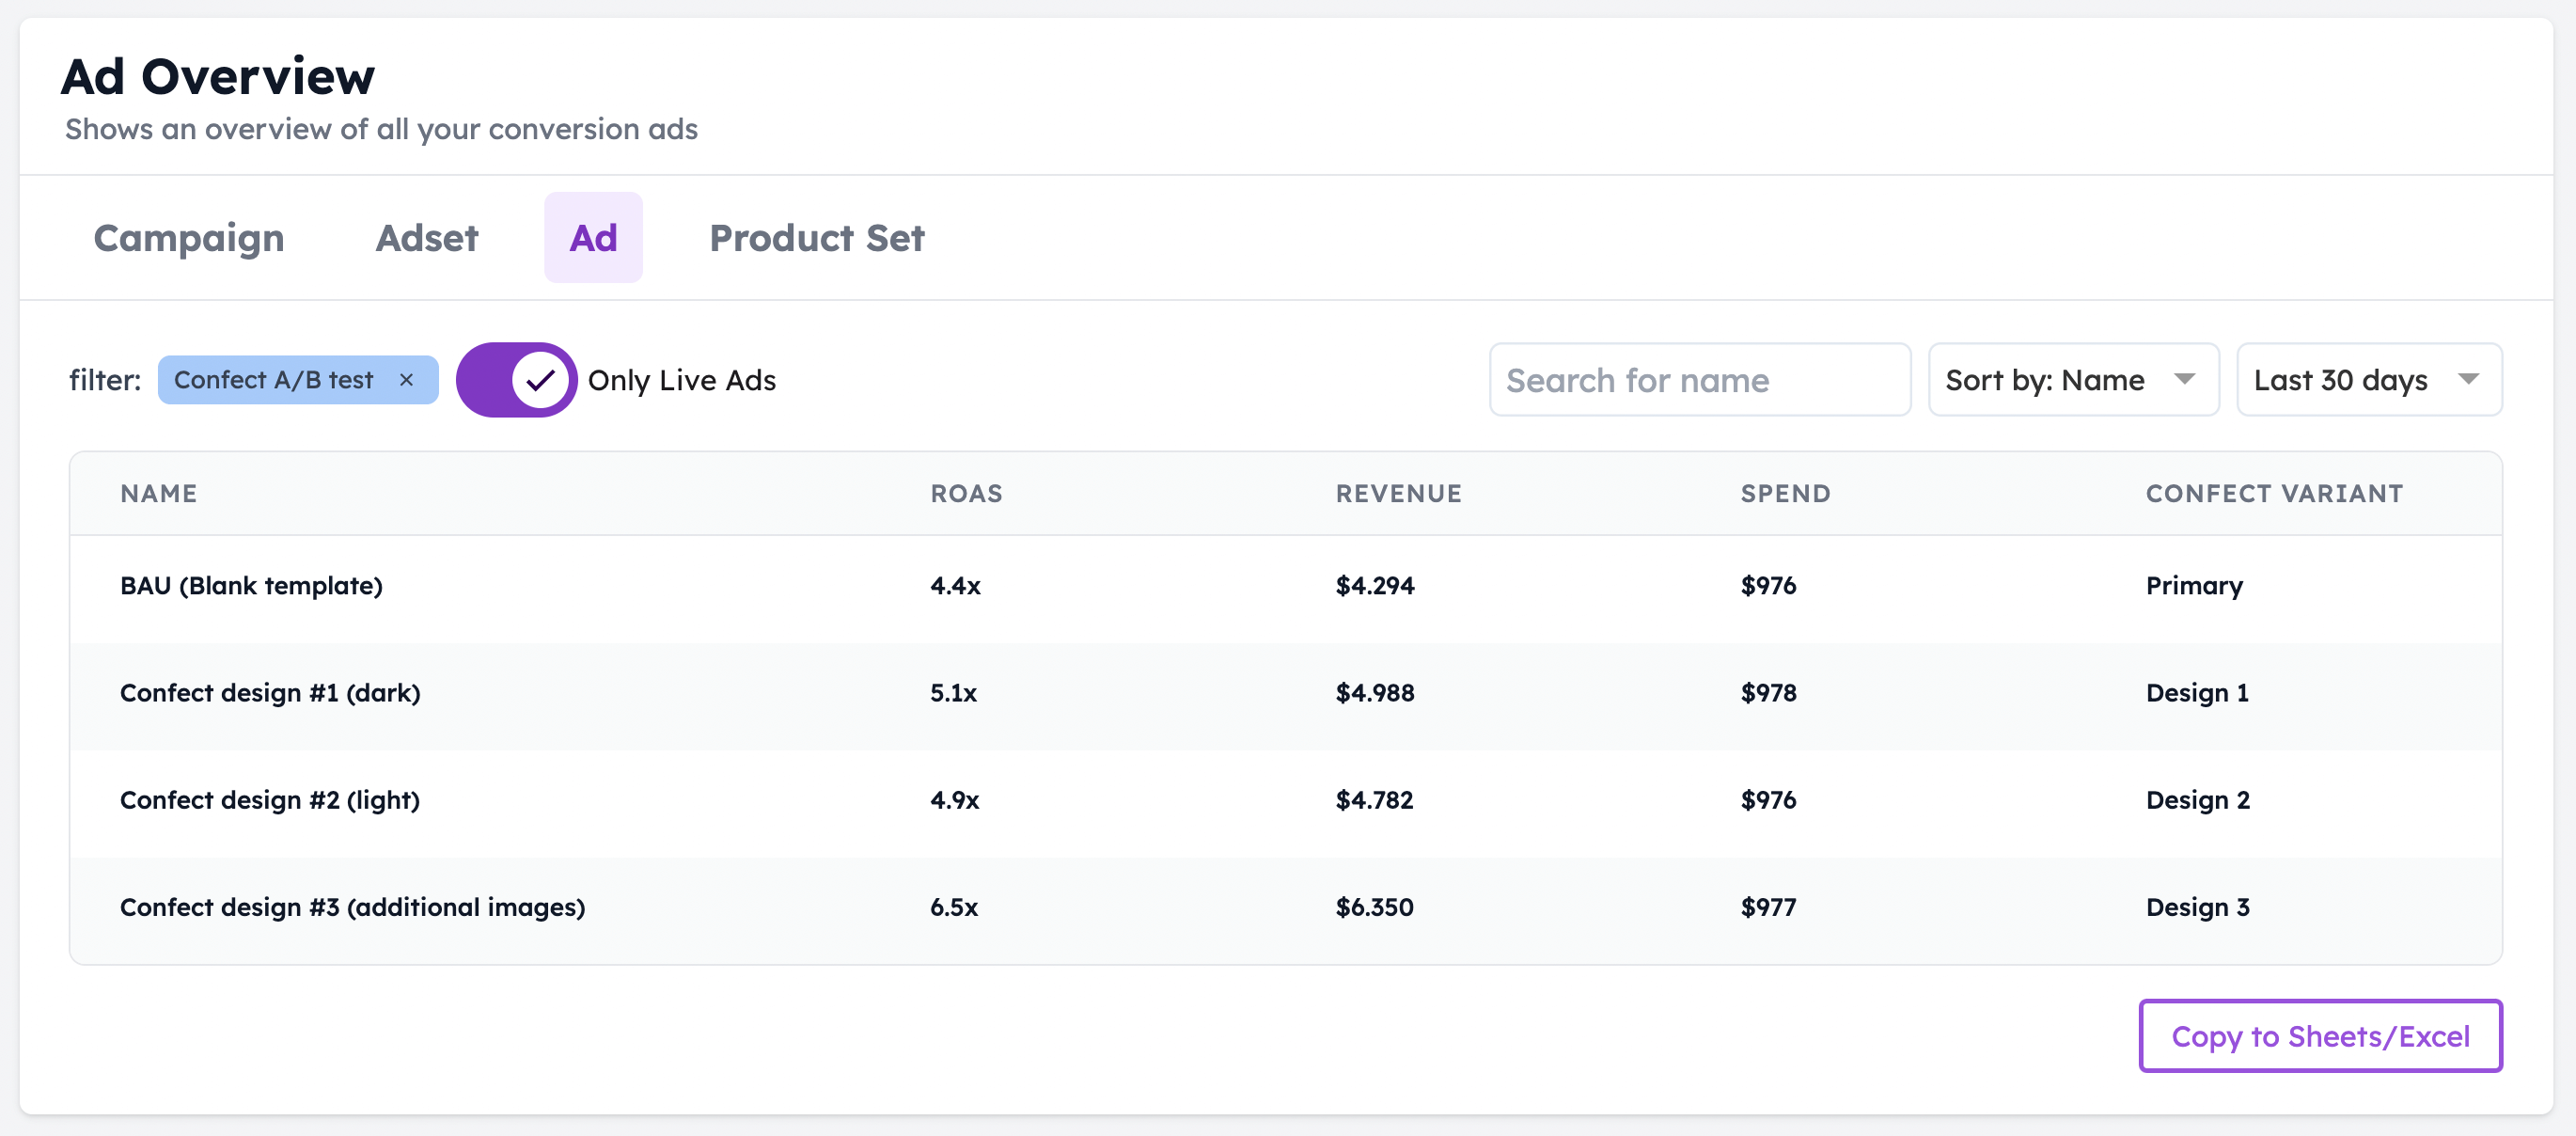
After the testing period ends, compare the key metric(s) between the ad sets to find your winner.
Since all the creatives come from the same catalog, the only variable creating the difference will be the design itself.
After finding your winning design, reflect on which design choices led to higher performance.
You might for example find that the main difference between your best and worst performing design is that the winning variant uses your logo, while the losing doesn't.
In that case, it's a good sign that your target audience responds well to seeing your logo in the ad, and you should be basing your future designs on this learning.