Change the design based on rules
Assign templates based on product filters, or schedule future campaigns.Table of Contents
1. Decide which designs to use2. Edit the catalog3. Add the design rules3.1. Product information rules3.2. Scheduled rules4. Save the catalog5. Preview the designsDesign rules allow you to filter and create conditions for which designs should be used for specific products or a certain period.
You can choose to do this based on product fields or a schedule.
With design rules, you can create conditions based on product information for when should a certain design be used.
Most used for:
- Items on sale or new releases.
- Using a different design for different categories (product sets).
- Highlighting certain key products (i.e. special bestseller design).
- Automatically scheduling campaign designs (i.e. for Black Friday).
1. Decide which designs to use
Depending on your use case, you might want to use variants instead of rules.
Rules: the different designs look similar and should appear in the same ad (the item should have design #1 OR design #2).
Variants: the different designs should not appear in the same ad, and you want to choose which one to use when (the item should have design #1 AND design #2)
Click here to see the guide for variants
Before setting up the design rules, the first step is to decide what new design you want certain products to switch to. This can be based on any available product field, or a schedule.
Common examples:
- Sale design,
- New release design,
- Bestseller design,
- Specific category design (product sets),
- Time-sensitive campaign design (i.e. Black Friday)
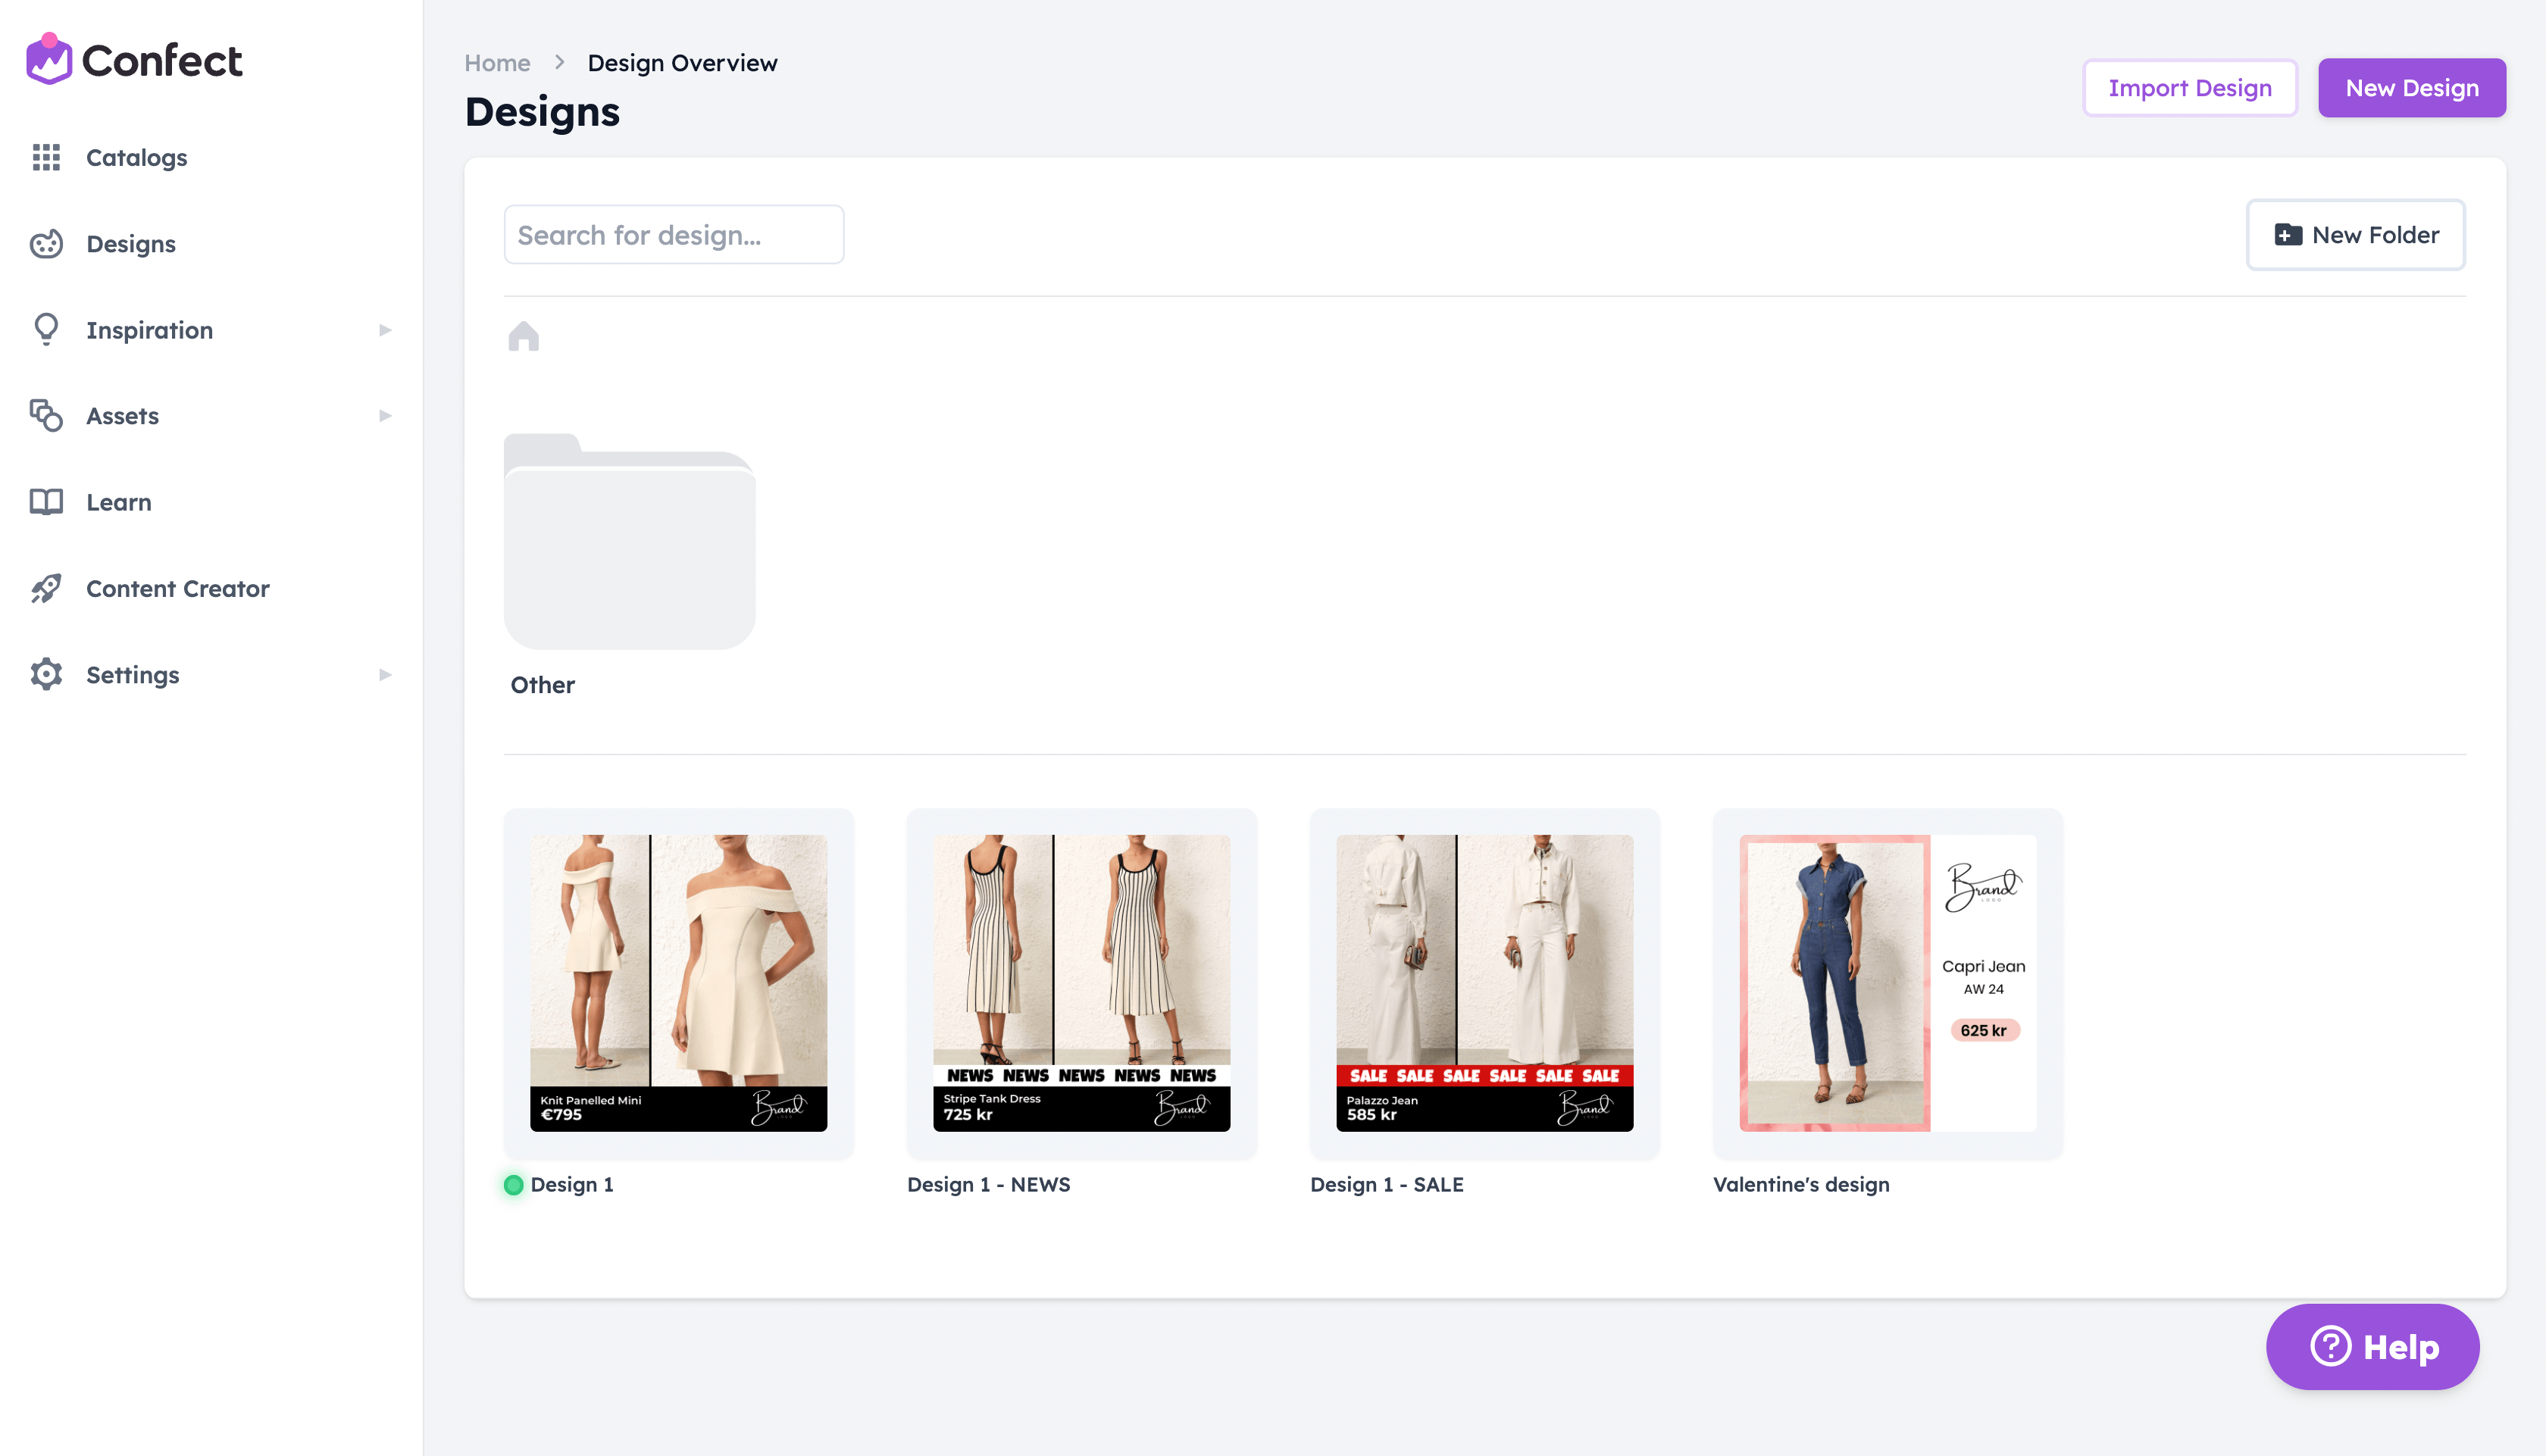
When you’ve decided on the design rules, create the designs.
2. Edit the catalog
Go into "Catalogs" and click on the catalog you're using - Design Rules are supported on all channels.
Then, click "Edit" in the top-right corner; and if you're using variants, make sure to select the one where you want to add these rules.
3. Add the design rules
3.1. Product information rules
- Click "Add rule"
- Select the design
- Click "Edit filter"
- Choose the product information you are creating the rule for
- Press "Apply"
We recommend using similar-looking designs for design rules (i.e., the same layout, but includes a sale text when products are discounted). This helps maintain visual consistency, as different rules may show in the same carousel ad.
3.2. Scheduled rules
A scheduled design rule is very similar to a product filter rule, but will change the design based on a date and time; great for time-sensitive campaigns.
4. Save the catalog
Once you've added the desired or multiple rules, click "Save" in the top right.
Design rules follow a hierarchy, so the ones on top take priority over the ones below them - if a product matches the rule, it gets the correct design, and the rest of the products continue down to the next rules (you can change their order by clicking the up or down arrows).
In this example we've set up:
- A sale design for discounted products
- A news design for products added within the last 14 days
- And a default fallback design

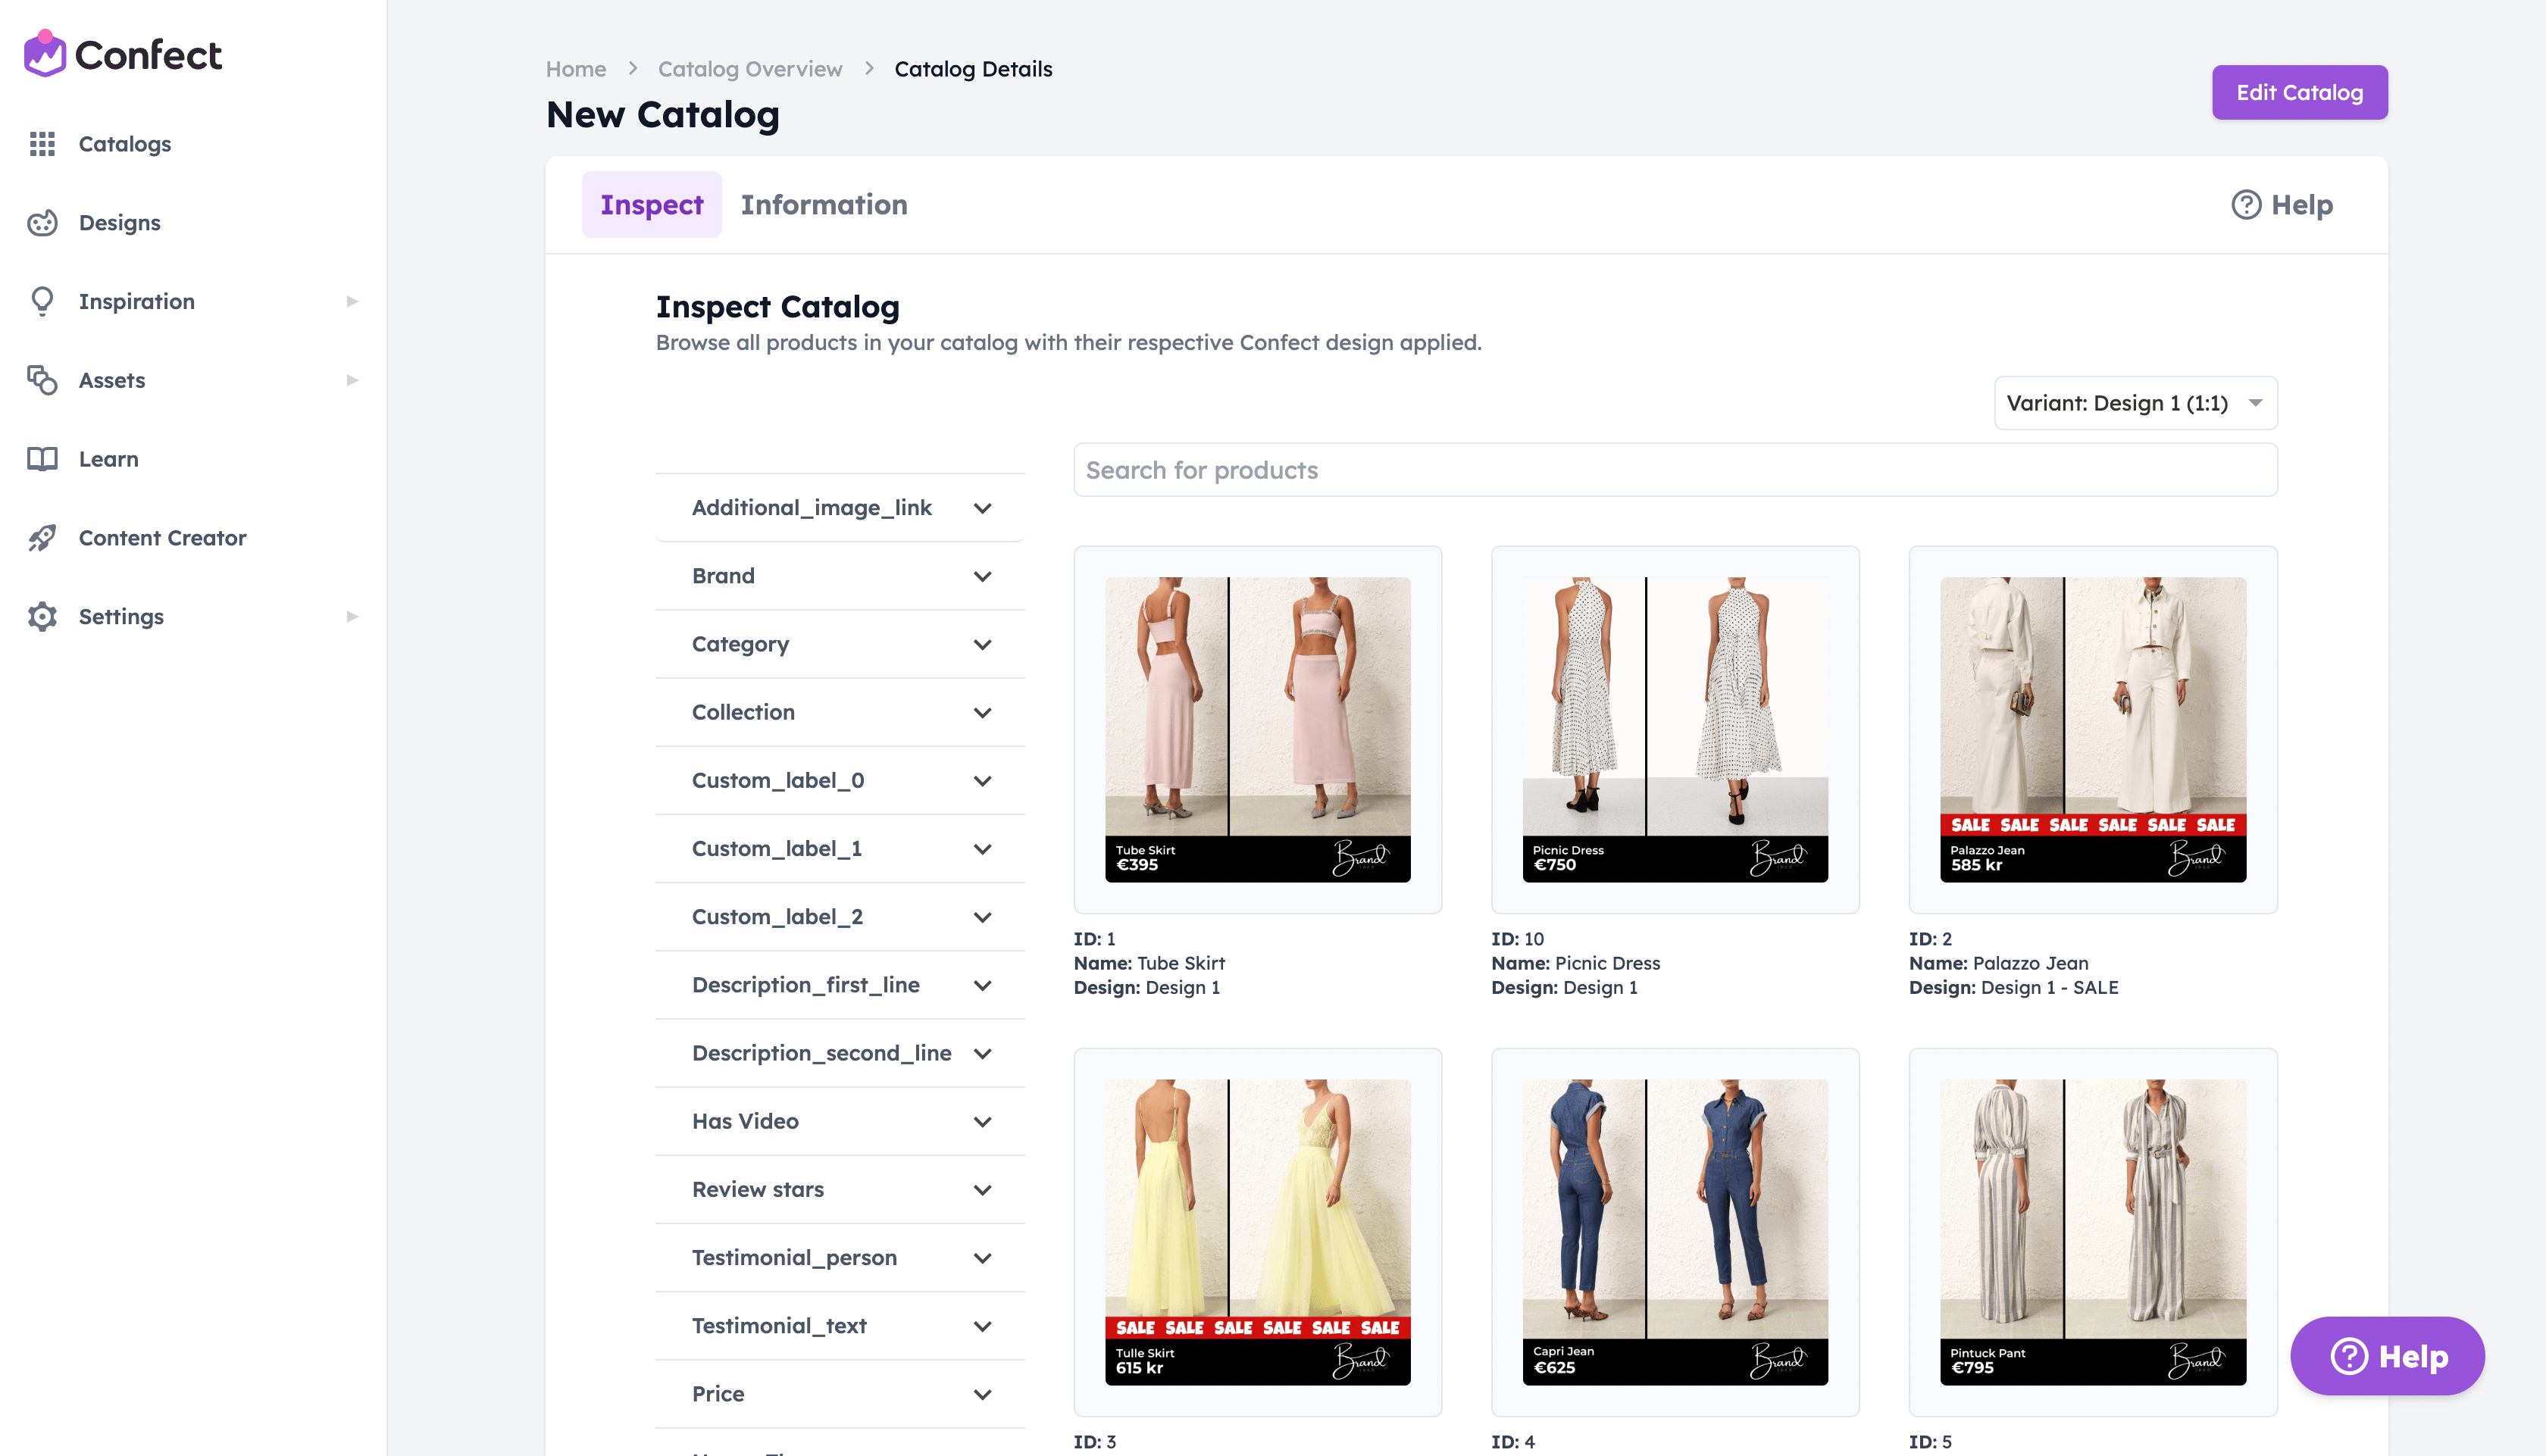
5. Preview the designs
The designs will update automatically once every hour, but if you’d like to see your new changes now, go to the "Information" tab in the catalog and click on the "↻" icon.
Wait for the new images to render and preview the creatives in "Inspect".